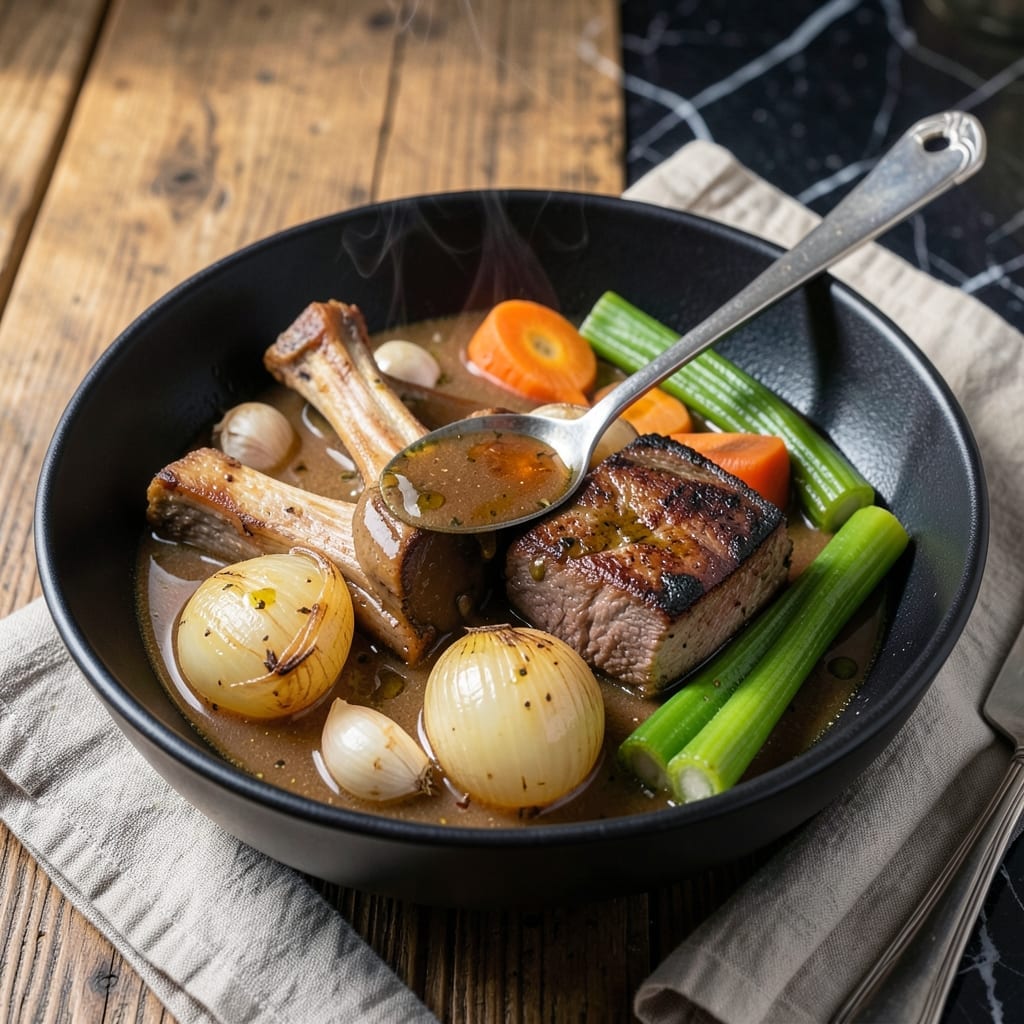
This homemade beef broth delivers rich umami depth that elevates any dish from soups to sauces. I developed this method after years of relying on store-bought bases that never quite hit the mark.
The secret lies in proper browning of bones and vegetables before the long simmer. This creates a base with complex, layered flavors that outperform any concentrate. The slow extraction process pulls out every bit of gelatin and savory goodness.
What you get is a golden, aromatic liquid with body and character. It forms the backbone of countless recipes, adding professional-quality taste to your home cooking.
Use it immediately or freeze for later. This base will transform your cooking.
Ingredients for Better Than Bouillon Beef Broth
Rich, deep, and full of umami—these ingredients build a broth that outshines any base.
| Ingredient | Amount | Notes |
|---|---|---|
| Beef Marrow Bones 🦴 | 2 lb | Sawed into 2-inch pieces |
| Beef Chuck Roast 🥩 | 1 lb | Cut into large chunks |
| Yellow Onions 🧅 | 2 whole | Quartered, skin on |
| Carrots 🥕 | 3 whole | Cut into thirds |
| Celery Stalks 🌿 | 3 whole | Cut into thirds |
| Garlic Cloves 🧄 | 6 cloves | Smashed, unpeeled |
| Tomato Paste 🍅 | 2 tbsp | For depth and color |
| Bay Leaves 🍃 | 2 whole | Dried, whole |
| Whole Black Peppercorns 🌶️ | 1 tbsp | Lightly crushed |
| Fresh Thyme Sprigs 🌿 | 4 whole | Or 1 tsp dried |
| Apple Cider Vinegar 🍏 | 2 tbsp | Balances richness |
| Cold Water 💧 | 4 cup | Or enough to cover |
| Kosher Salt 🧂 | 1 tsp | Adjust to taste later |
[recipe_ingredient_scaler]
The bones are everything here. Ask your butcher for marrow bones—they add that silky, luxurious mouthfeel. I get mine from Whole Foods; they’re usually happy to cut them to order. The chuck roast contributes meaty depth, so don’t skip it. For the veggies, organic carrots and celery (the good stuff, not the pre-cut kind) give you cleaner, more vibrant flavors. Brown them well—this is where the magic starts.
No marrow bones? Oxtail or short ribs work in a pinch, though the texture will differ. Out of tomato paste? Ketchup at half the amount adds similar sweetness (trust me on this). Dried thyme is fine at one-third the amount, but fresh really shines. For vinegar, red wine vinegar can stand in—just use a touch less. The peppercorns can be pre-ground, but whole gives you better control.
Broth freezes like a dream—6 months in airtight containers. Skim the fat once cooled for clearer stock. I like to portion it into 1-cup containers so it’s ready whenever inspiration strikes. Nothing fancy, just good planning.
Why You’ll Love This Recipe
- Set and Forget: I toss everything in the pot and let it simmer for hours while I do other things.
- Rich and Deep: The marrow bones and chuck roast create a broth so flavorful store-bought can’t compare.
- Meal Prep Hero: I make a big batch on Sunday and use it all week for soups, stews, and risottos.
- Penny-Wise Comfort: Honestly, it costs less than buying cartons and tastes infinitely better.
Step-by-Step Instructions for Homemade Beef Broth
This method guarantees a deeply flavorful broth with minimal effort and maximum reward.
Step 1: Roast the Bones and Beef for Depth of Flavor
Preheat your oven to 425°F to ensure a hot, even temperature for caramelization. Arrange the 2 lb beef marrow bones and 1 lb beef chuck roast on a baking sheet, ensuring they’re in a single layer without crowding. Roast for 30-40 minutes, turning once halfway through, until deeply browned and aromatic.
This step is non-negotiable for building rich, complex flavor. The high heat transforms the natural sugars and proteins in the meat, creating a deep, caramelized crust that will infuse your broth with umami. You’ll know it’s ready when the bones and beef are dark golden brown and your kitchen smells intensely savory.
Step 2: Sauté the Vegetables and Aromatics
While the bones roast, heat a large stockpot over medium-high heat. Add the 2 whole yellow onions, 3 whole carrots, and 3 whole celery stalks (already prepped as directed). Sauté for 10-12 minutes, stirring occasionally, until the vegetables are deeply browned and slightly softened.
Add the 6 cloves garlic cloves, 2 tbsp tomato paste, 1 tbsp whole black peppercorns, 2 whole bay leaves, and 4 whole fresh thyme sprigs. Stir for 2-3 minutes until the tomato paste darkens slightly and coats the vegetables. This builds a flavor base that will make your broth taste restaurant-quality.
Step 3: Deglaze and Simmer for Richness
Carefully transfer the roasted beef marrow bones and beef chuck roast to the stockpot, scraping all the browned bits from the baking sheet into the pot. Pour in the 2 tbsp apple cider vinegar and 4 cup cold water, using a wooden spoon to release any fond from the bottom of the pot.
Bring the mixture to a boil, then reduce the heat to low to maintain a gentle simmer. Skim off any foam or impurities that rise to the surface during the first 20-30 minutes. Add the 1 tsp kosher salt at this stage. Partially cover the pot and let it simmer for 4-6 hours, occasionally skimming the surface to keep the broth clear.
Step 4: Strain and Finish the Broth
After simmering, remove the pot from the heat and let it sit for 10 minutes to allow the solids to settle. Place a fine-mesh strainer over a large bowl or another pot and carefully ladle the broth through, discarding the solids. Press gently on the solids to extract all the liquid, but avoid squeezing, which can make the broth cloudy.
Let the broth cool to room temperature, then refrigerate it. Once chilled, the fat will solidify on the surface—skim it off for a cleaner broth, or leave it for extra richness. Your broth is now ready to use in any dish, delivering a depth of flavor that far surpasses store-bought versions.
Pro Tips For Making Better Than Bouillon Beef Broth
- Roast the Bones First: I learned this the hard way—skipping the 450°F roast for 30 minutes leaves your broth bland. The deep brown crust on the marrow bones and chuck roast is where the rich, meaty flavor hides.
- Skip the Peeling: Sounds weird, but it works: leave the skins on your onions, carrots, and celery. They add a deeper color and earthy sweetness to the broth, and you’ll strain them out anyway.
- Avoid Boiling Hard: After burning three batches, I finally figured out that a gentle simmer—just a few bubbles breaking the surface—keeps the broth clear and stops it from turning bitter.
- Add a Splash of Vinegar: My grandmother swore by this, and she was right: a tablespoon of apple cider vinegar in the water helps pull every last bit of gelatin and flavor from the bones.
Health Benefits of These Flavors
Nutrient-Packed Base
This broth is a powerhouse of collagen and gelatin from the marrow bones, which support joint health and gut integrity. The long simmer extracts these beneficial compounds, giving your broth a silky texture and nutritional boost. I always feel the difference when I use this in my cooking. 💪
Electrolyte Balance
The natural sodium and potassium in this broth come from the vegetables and beef, creating a perfectly balanced electrolyte profile. It’s especially great after a long day at the local BBQ competitions, where I need to rehydrate and replenish. 💛
Rich in Minerals
You’ll get a healthy dose of iron and zinc from the beef, which are essential for energy and immune function. The apple cider vinegar helps extract these minerals during the simmer, making them more bioavailable.
Low-Calorie Nourishment
At about 30-50 calories per cup, this broth delivers deep flavor without the guilt. It’s my go-to when I want something warming and satisfying between meals. The gelatin also helps keep you full longer.
Gut-Friendly Goodness
The garlic and onions provide prebiotic fiber that feeds your gut microbiome. Combined with the bone broth‘s natural glutamine, this is a gut-healing elixir that aids digestion and supports overall health.
Hydration Helper
I often sip this broth plain when I need a hydration boost, especially during long rides along the coast. The natural electrolytes help retain fluids better than water alone, and the flavor makes it easy to drink more throughout the day.
Nutrition Facts
Frequently Asked Questions
How long can I store homemade broth?
Your broth will keep in the fridge for up to 5 days or in the freezer for 6 months. For best results, portion into airtight containers before freezing.
Can I use a slow cooker instead of the stovetop?
After roasting the bones, transfer everything to a slow cooker. Cook on low for 8-10 hours or high for 6 hours. The results will be just as rich.
Why did my broth turn out cloudy?
Cloudiness usually comes from boiling too vigorously or not skimming impurities. Next time, maintain a gentle simmer and skim the surface during the first 30 minutes.
Can I add other herbs or spices?

Trained in classic French technique but raised on slow-cooked ribs and spicy rubs, she blends culinary skill with smoke and soul.
- Recipe for Boneless Pork Chops in Cast Iron Skillet: Sear and Baste to Juicy Perfection - October 3, 2026
- Recipe for Boneless Cross Rib Roast: Slow-Roasted Beef with Herb Crust - October 3, 2026
- Hamburgers in Sauce Recipe Crock Pot: Slow-Cooked Savory Delight - October 3, 2026