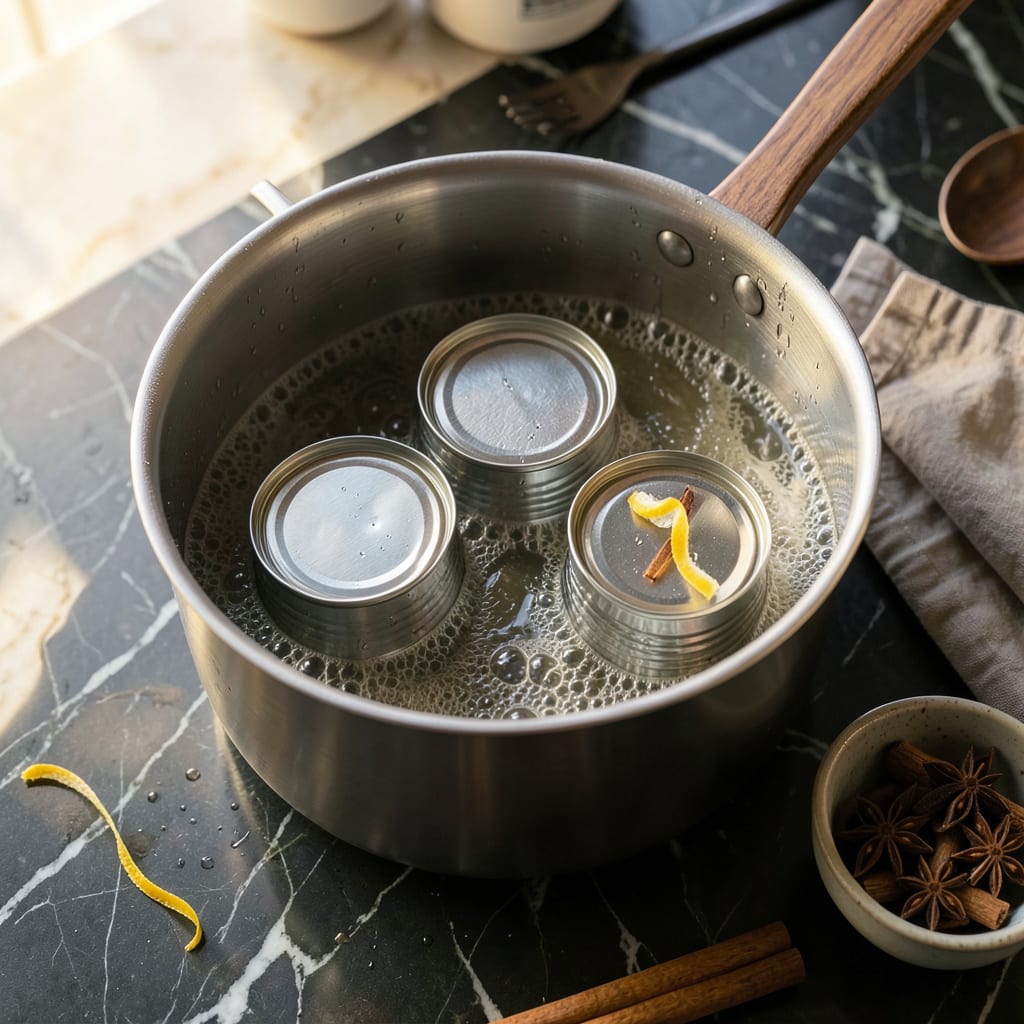
I’ll be real with you—this might be the easiest way to make caramel sauce you’ve ever tried. No fancy equipment, no complicated techniques, just a can of condensed milk and some patience. The transformation that happens inside that can is pure magic: thick, velvety caramel with deep toffee notes develops while you barely lift a finger.
Here’s the thing—this isn’t just any caramel. It’s richer, creamier, and more complex than the stuff from jars. I’ve been making this for years, and it never fails to impress. The slow heat coaxes the sugars into that perfect caramelized state, creating a spread that’s equally at home drizzled over ice cream or sandwiched between cookies.
You’ll end up with about 1½ cups of golden caramel that’s thick enough to spread but still pourable. It keeps for weeks in the fridge, so you can make a batch and have it ready whenever a dessert needs elevating. The hardest part? Waiting those 2 hours while it works its magic.
Fair warning: once you try homemade, the store-bought version won’t cut it anymore. This is the kind of simple trick that makes people think you spent hours in the kitchen. Let’s get that can boiling!
📚 In This Guide
- What You’ll Need
- Instructions
- Tips and Common Mistakes
What Youll Need
- ● 1 can (14 oz) sweetened condensed milk – Unopened, with the label removed 🥫
- ● Large pot or deep saucepan – At least 3-quart capacity (big enough to fully submerge the can)
- ● Water – Enough to cover the can by 2–3 inches (prevents overheating)
- ● Tongs or heat-resistant gloves – For safely handling the hot can ⚠️
- ● Timer or smartphone – To track the 2-hour boiling time ⏰
- ● Can opener – To open the cooled can (never pierce it while hot!)
- ● Kitchen thermometer – To monitor water temp (ideal: 180–200°F)
- ● Wooden spoon or spatula – For stirring if making a larger batch in a pot
- ● Glass jar or airtight container – For storing leftover dulce de leche 🏺
- ● Vanilla extract or sea salt – To customize flavor (add after boiling)
Instructions
This simple process transforms sweetened condensed milk into velvety caramel with just heat and time.
Prepare the Cans for Boiling
Start by removing the labels from your unopened cans of sweetened condensed milk. I like to use a warm, soapy cloth to help dissolve the adhesive—this makes the labels come off cleanly without leaving sticky residue. Make sure you’re using standard 14-ounce cans for this process.
Once the labels are removed, give each can a thorough rinse under warm water to remove any remaining glue. Dry them completely with a clean kitchen towel. This step prevents any paper or adhesive from contaminating your caramel during the boiling process.
Place the clean, dry cans on their sides in a large pot. I always use a pot that’s at least 4 inches taller than the cans when lying down—this gives you plenty of room for water circulation and prevents dangerous boiling over.
Submerge and Simmer the Cans
Fill the pot with enough water to completely cover the cans by at least 2 inches. I’ve found that using warm tap water helps prevent the cans from cracking due to sudden temperature changes. The water level is crucial—if it’s too low, the cans won’t cook evenly, and if it’s too high, you risk water boiling over.
Place the pot on your stovetop over medium-high heat and bring the water to a gentle boil. Once you see steady bubbles breaking the surface, reduce the heat to medium-low to maintain a gentle simmer. You’ll want to see small, consistent bubbles—not a rolling boil.
Let the cans simmer undisturbed for 2 hours. I check the water level every 30 minutes and add more hot water as needed to keep the cans fully submerged. The simmer should be gentle enough that you don’t need to stir, but active enough to create that magical caramelization inside.
Cool and Open the Cans
After 2 hours, carefully remove the pot from the heat. Using tongs, transfer the hot cans to a heatproof surface. I like to place them on a wire rack to allow air circulation underneath. Let the cans cool completely at room temperature—this usually takes about 1 hour.
It’s crucial not to rush this cooling process. Opening hot cans can cause the caramel to spray out forcefully due to pressure buildup. You’ll know they’re ready when the cans feel just slightly warm to the touch. The caramel inside will continue to thicken slightly as it cools.
Once completely cooled, open the cans carefully. I use a can opener with smooth edges to prevent any metal shavings from getting into my caramel. The contents should be a beautiful golden brown color with a thick, pourable consistency—like warm honey but richer.
Store and Use Your Homemade Caramel
Transfer the caramel to clean glass jars with tight-fitting lids. I prefer using 8-ounce mason jars for this amount—they’re the perfect size and create a nice seal. Let the caramel cool to room temperature before sealing the jars.
Your homemade caramel will keep in the refrigerator for up to 3 weeks. The flavor actually deepens and becomes more complex after a day or two. When you’re ready to use it, you can gently warm it in the microwave in 15-second intervals, stirring between each, until it reaches your desired consistency.
This rich caramel is incredibly versatile. I love drizzling it over ice cream, swirling it into brownies, or using it as a dip for fresh fruit. It also makes an amazing filling for cakes or a decadent topping for pancakes and waffles. The possibilities are endless with this simple but magical transformation.
Tips and Common Mistakes
Transforming sweetened condensed milk into caramel is surprisingly simple, but these key details ensure perfect results every time.
Safety First: The 2-hour simmering process requires constant attention to water levels. I check every 30 minutes as instructed, but here’s what I’ve learned: always keep a kettle of hot water nearby so you can quickly top up the pot without shocking the cans with cold water. This prevents dangerous pressure changes that could cause cans to burst or caramel to burn.
Pot Selection Matters: Using a pot that’s at least 4 inches taller than your cans isn’t just about preventing overflow—it creates proper water circulation. I learned the hard way that a pot that’s too narrow causes uneven heating, which can lead to some caramel being lighter or thinner than the rest. A wide, deep pot gives you the best results.
Cooling Patience: That 1-hour cooling time isn’t just about safety—it’s crucial for texture. I once rushed and opened a can after just 30 minutes, and the caramel was noticeably thinner. The full hour allows the caramel to reach its perfect thick, pourable consistency. Place cans on a wire rack as suggested to prevent condensation from collecting underneath.
Water Temperature Trick: When adding water during the 2-hour simmer, always use hot water from your kettle rather than cold tap water. The sudden temperature change from cold water can cause the cans to contract rapidly, potentially creating weak spots that might leak or burst during the remaining cooking time.
Pro Tips for Boiling Condensed Milk
- Transforming sweetened condensed milk into caramel is surprisingly simple, but these key details ensure perfect resul…
- Safety First: The 2-hour simmering process requires constant attention to water levels. I check every 30 minutes as i…
- Pot Selection Matters: Using a pot that’s at least 4 inches taller than your cans isn’t just about preventing overflo…
Frequently Asked Questions
Got questions about boiling condensed milk? You’re not alone! Here are the most common queries—and quick answers—to help you nail that perfect caramel every time.
How long does it take to boil a can of condensed milk for caramel?
Plan for 2–3 hours of gentle boiling in a water bath (simmering, not rolling). Larger cans (14 oz) may need the full 3 hours, while smaller ones (7 oz) could be done in 2. Never rush it—high heat risks burning or explosion!
Can I boil condensed milk in the microwave instead?
Nope! Microwaving sealed cans is dangerous (pressure buildup = boom ). For a faster method, pour condensed milk into a microwave-safe bowl, cover loosely, and heat in 30-second bursts, stirring often. Texture won’t be as smooth, though.
Why did my boiled condensed milk turn grainy or lumpy?
Graininess usually means the sugar crystallized. Fix it by whisking vigorously over low heat or blending briefly. To prevent it: Don’t open the can mid-boil, and ensure the water bath stays consistently simmering (not boiling hard).
Is boiled condensed milk the same as dulce de leche?
Almost! Both are caramelized milk, but traditional dulce de leche is made by slow-cooking milk with sugar (not condensed). Boiled condensed milk is a shortcut—richer, thicker, and slightly saltier. Pro tip: Add a pinch of salt or vanilla to mimic classic dulce de leche!
Can I reuse the water from boiling the can?
No—it’s not unsafe, but the water absorbs metallic tastes and residual sugar. Toss it and use fresh water for each batch. For eco-friendliness, repurpose it to water plants (sugar acts as a mild fertilizer! ) or clean sticky pans.
Boiling condensed milk transforms a simple can into a luscious, golden caramel sauce with minimal effort—just patience and a watchful eye! 🍯 Whether you drizzle it over ice cream, swirl it into coffee, or use it as a cake filling, the rich, buttery flavor is worth the wait.
Now that you’ve mastered the basics, why not experiment? Try adding a pinch of sea salt for depth or a splash of vanilla for extra warmth. Ready to get creative? Grab a spoon and start brainstorming your next dessert adventure!

Trained in classic French technique but raised on slow-cooked ribs and spicy rubs, she blends culinary skill with smoke and soul.
- Recipe for Boneless Pork Chops in Cast Iron Skillet: Sear and Baste to Juicy Perfection - October 3, 2026
- Recipe for Boneless Cross Rib Roast: Slow-Roasted Beef with Herb Crust - October 3, 2026
- Hamburgers in Sauce Recipe Crock Pot: Slow-Cooked Savory Delight - October 3, 2026