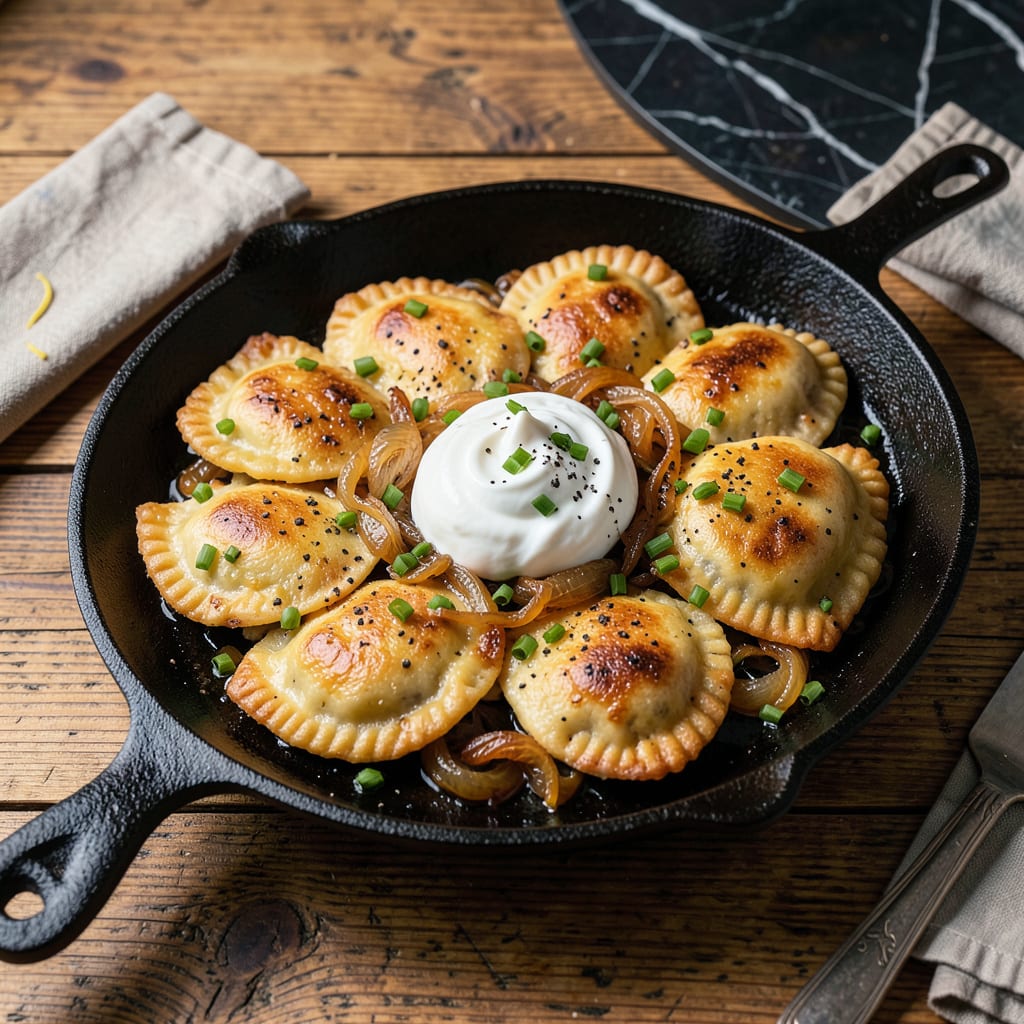
Frozen pierogis transform into golden, crispy perfection in just 10 minutes with this professional skillet method. No need to thaw—this technique works directly from the freezer to deliver restaurant-quality results at home. The key lies in achieving that ideal contrast: tender filling encased in a shatteringly crisp exterior, every time.
This method leverages simple pantry staples and precise timing to avoid the common pitfalls of soggy or unevenly cooked pierogis. A hot skillet creates immediate caramelization, while a brief covered cook ensures the filling heats through completely. The result is far superior to boiling alone, with textural complexity that rivals traditional Polish preparations.
What sets this approach apart is its versatility. Whether you prefer classic potato-cheese filling or more adventurous varieties, the technique remains foolproof. The skillet method also allows for easy customization—add caramelized onions during cooking or finish with fresh herbs for elevated flavor.
Perfect as a quick weeknight meal or party appetizer, these pierogis pair beautifully with sour cream, applesauce, or a simple green salad. The entire process requires just one pan and minimal cleanup, making it as practical as it is delicious.
📚 In This Guide
- What You’ll Need
- Instructions
- Tips and Common Mistakes
What Youll Need
- ● Frozen pierogis – 1 (16 oz) package (any flavor: potato, cheese, sauerkraut, etc. 🥔🧀)
- ● Cooking oil or butter – 2 tbsp (vegetable, canola, or olive oil; or unsalted butter for richer flavor 🧈)
- ○ Salt – to taste (optional, but enhances flavor 🧂)
- ○ Black pepper – to taste (optional, for a little kick 🌶️)
- ● Non-stick skillet – 10-12 inches (cast iron or stainless steel works too! 🍳)
- ● Tongs or spatula – for flipping (heat-resistant silicone recommended 🔥)
- ● Paper towels – 2-3 sheets (to drain excess oil if needed 🧻)
- ○ Medium bowl – for holding cooked pierogis (optional but handy 🥘)
- ● Sour cream – ½ cup (classic pairing! 🥄)
- ● Chopped green onions – 2 tbsp (for freshness 🌿)
- ● Crispy bacon bits – ¼ cup (for a smoky crunch 🥓)
- ● Shredded cheddar – ¼ cup (extra cheesy goodness 🧀)
- ● Hot sauce – to taste (spice lovers, this is for you! 🔥)
Instructions
This method delivers perfectly crispy pierogis with a golden-brown exterior and tender filling every time.
Prepare the Skillet and Oil
Select a heavy-bottomed skillet—cast iron works best for even heat distribution. Add 2 tablespoons of neutral oil (vegetable or canola) and heat over medium-high heat until the oil shimmers and a drop of water sizzles vigorously when flicked in.
The oil temperature is critical here. If it’s not hot enough, the pierogis will absorb oil and become greasy rather than crispy. I recommend using a thermometer to verify the oil reaches 350°F before adding the pierogis.
Arrange the Pierogis in a Single Layer
Carefully place the frozen pierogis in the hot oil in a single layer, leaving about ½ inch between each. Don’t overcrowd the pan—this causes steam buildup and prevents proper browning. Work in batches if necessary to maintain the oil temperature.
Immediately after adding the pierogis, resist the urge to move them. Let them sear undisturbed for 2-3 minutes until the bottoms develop a deep golden crust. You’ll hear a steady sizzle when the temperature is correct—if it’s too quiet, increase the heat slightly.
Flip and Crisp the Second Side
Using tongs, gently flip each pierogi to expose the uncooked side. The first side should be deep golden brown with crispy edges. Cook for an additional 2-3 minutes until the second side matches the first in color and texture.
For extra crispiness, I press down lightly on each pierogi with a spatula during the last 30 seconds of cooking. This ensures maximum contact with the hot oil and creates an ultra-crispy crust. Watch for the edges to become lace-like and fragrant.
Drain and Rest Briefly
Transfer the cooked pierogis to a paper towel-lined plate to drain excess oil. The paper towels should absorb any residual oil while maintaining the crispy texture. Let them rest for 1-2 minutes before serving—this allows the filling to set slightly.
During this resting period, you’ll notice the pierogis firm up slightly. This is ideal, as it prevents the filling from bursting out when bitten. The exterior should remain audibly crisp when cut with a fork.
Serve with Complementary Toppings
Serve the pierogis immediately while still hot and crispy. Traditional accompaniments include sour cream, caramelized onions, or apple sauce for contrasting flavors. The contrast between the crispy exterior and soft filling is most pronounced when eaten fresh from the skillet.
For best results, maintain the skillet at the proper temperature between batches. If the oil starts smoking, reduce the heat slightly and let it recover to 350°F before adding the next batch. This ensures consistent crispiness throughout all servings.
Tips and Common Mistakes
Mastering the crispy skillet method requires attention to detail—here’s what separates perfect pierogis from merely good ones.
Temperature Precision: The 350°F oil temperature in Step 1 isn’t arbitrary—it’s the sweet spot where pierogis develop a golden crust without absorbing excess oil. Use an instant-read thermometer for accuracy; visual cues like shimmering oil can be misleading with different skillet materials. Cast iron retains heat beautifully but can overshoot temperatures quickly.
Spatial Strategy: In Step 2, that ½ inch spacing between pierogis serves a critical purpose: it allows hot oil to circulate freely, creating even browning. When working in batches, resist the temptation to add “just one more”—overcrowding drops the oil temperature by 20-30°F, resulting in steamed rather than crisped pierogis. Maintain the 350°F between batches by giving the oil 30 seconds to recover.
Timing Nuance: The 2-3 minute sear in Steps 2 and 3 should produce a deep golden brown color, not just light browning. Listen for the sizzle to shift from aggressive crackling to a steady hiss—that’s your auditory cue the crust is forming properly. For the final 30 seconds of cooking, the light spatula press technique creates micro-ridges that maximize crispiness without compressing the filling.
Resting Protocol: Those 1-2 minutes of resting in Step 4 aren’t just about cooling—they allow the starches in the dough to retrogradate slightly, which reinforces the crispy texture. Serve immediately after resting; pierogis lose about 30% of their crispness after 5 minutes as moisture redistributes from filling to crust.
Pro Tips for Cook Frozen Pierogis
- Mastering the crispy skillet method requires attention to detail—here’s what separates perfect pierogis from merely g…
- Temperature Precision: The 350°F oil temperature in Step 1 isn’t arbitrary—it’s the sweet spot where pierogis develop…
- Spatial Strategy: In Step 2, that ½ inch spacing between pierogis serves a critical purpose: it allows hot oil to cir…
Frequently Asked Questions
Got questions about cooking frozen pierogis? You’re not alone! Here are the most common queries—with quick, practical answers to help you nail that perfect bite every time.
Do I need to thaw frozen pierogis before cooking?
Nope! Cooking them straight from frozen is best—it prevents mushiness and helps retain texture. Thawing can make them sticky or fall apart. Just add 1-2 extra minutes to your cook time if they’re rock-solid.
How do I know when pierogis are done?
Look for a golden-brown crust (2-3 minutes per side in a skillet) and a tender bite. If boiling, they’ll float to the top when ready (about 5 minutes). Cut one open to check—the filling should be piping hot (165°F).
Can I air-fry frozen pierogis instead?
Toss frozen pierogis with 1 tsp oil, air-fry at 375°F for 8-10 minutes, shaking halfway. They’ll be crispy outside, creamy inside—no flipping needed! Pro tip: Spritz with water first for extra crunch.
Why did my pierogis stick to the pan?
Two likely culprits: not enough oil or low heat. Use a nonstick skillet with 1-2 tbsp oil on medium-high heat. Let them sizzle undisturbed for 2 minutes before flipping to form a crust.
What’s the fastest way to cook frozen pierogis?
Microwave + skillet combo wins for speed! Microwave frozen pierogis for 1-2 minutes (just to soften), then sear in a hot skillet for 1-2 minutes per side. Crisis averted in under 10 minutes!
Cooking frozen pierogis doesn’t have to be complicated—with the crispy skillet method, you’re just 10 minutes away from a golden, delicious meal! 🍽️ Whether you prefer them pan-fried, boiled, or air-fried, the key is patience and the right heat to lock in that perfect texture.
Now that you’ve mastered the basics, why not experiment with toppings? Try sour cream, caramelized onions, or even crispy bacon for extra flavor. Hungry for more? Check out our favorite pierogi pairings to turn this dish into a full feast!

Trained in classic French technique but raised on slow-cooked ribs and spicy rubs, she blends culinary skill with smoke and soul.
- Recipe for Boneless Pork Chops in Cast Iron Skillet: Sear and Baste to Juicy Perfection - October 3, 2026
- Recipe for Boneless Cross Rib Roast: Slow-Roasted Beef with Herb Crust - October 3, 2026
- Hamburgers in Sauce Recipe Crock Pot: Slow-Cooked Savory Delight - October 3, 2026