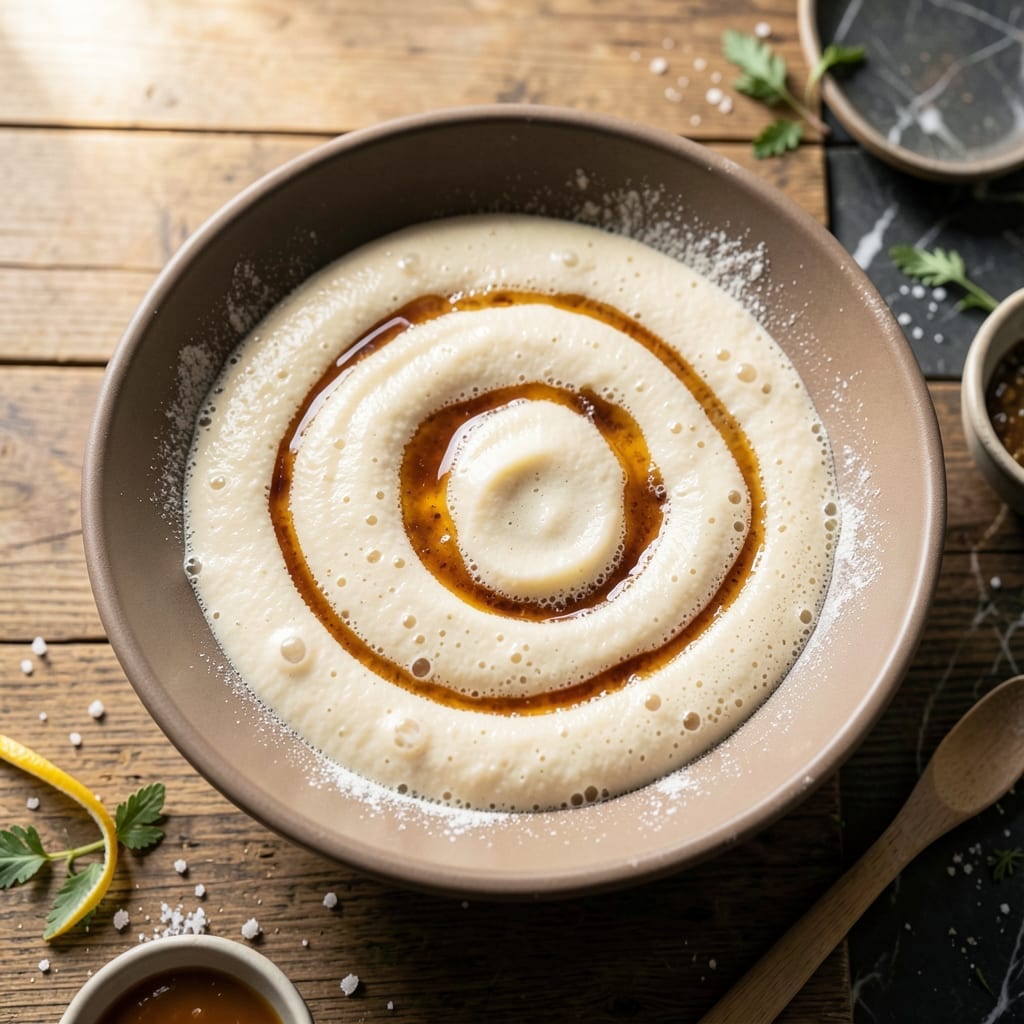
Mastering artisan bread begins with a simple yet powerful technique: the pre-ferment. This method transforms basic ingredients into a loaf with complex flavor and perfect texture.
I’ve refined this process over years of baking, focusing on the 12-hour fermentation that develops depth in every bite. The sponge, a mix of flour, water, and yeast, kickstarts the magic.
The result is bread with an open crumb, rich aroma, and a crust that crackles with each slice. This isn’t just baking—it’s crafting a loaf worth savoring.
With patience and precision, you’ll create a foundation for bread that tastes like it came from a professional bakery. Let’s begin.
Ingredients for Bread Sponge
Five simple ingredients create the foundation for artisan bread with complex flavor and perfect texture.
| Ingredient | Amount | Notes |
|---|---|---|
| Bread Flour 🌾 | 2 cups | High-protein for structure |
| Warm Water 💧 | 1 ¼ cups | 105-110°F for yeast activation |
| Active Dry Yeast 🍞 | ½ tsp | Instant yeast works too |
| Honey 🍯 | 1 tsp | Feeds the yeast fermentation |
| Kosher Salt 🧂 | 1 tsp | Added after fermentation begins |
[recipe_ingredient_scaler]
The flour choice is critical here. King Arthur Bread Flour is my go-to for its consistent high protein content (12.7%), which develops the gluten structure needed for that open crumb. Yeast freshness matters—check the expiration date and store unopened packets in the freezer. Water temperature is non-negotiable: too hot kills yeast, too cold slows activation. A digital thermometer removes all guesswork.
No honey? Sugar or agave nectar at the same amount works fine. Instant yeast can replace active dry at a 1:1 ratio—no proofing needed. Want to experiment? Whole wheat flour can substitute up to 50% of the bread flour, but expect a denser sponge. The salt timing is key—adding it too early can inhibit fermentation, so wait until the sponge shows active bubbles.
The sponge develops best at 70-75°F and can rest 8-12 hours—longer fermentation yields more complex flavor. Store any unused portion in the fridge for up to 24 hours, but use it at peak activity for best results. This pre-ferment is the secret to bakery-quality bread at home.
Why You’ll Love This Recipe
- 5-Minute Start: I just stir flour, warm water, yeast, honey, and salt—no kneading, no fuss.
- Subtle Sweetness: The honey adds a gentle depth that makes every bite just right.
- Meal Prep Hero: I keep a batch in the fridge for up to three days, ready to bake fresh bread anytime.
- Budget Baker: Flour, yeast, and pantry staples mean I spend pennies for artisanal flavor.
Step-by-Step Instructions for Bread Sponge
Master this pre-ferment technique and your artisan loaves will have superior texture and depth of flavor.
Step 1: Activate the Yeast
In a large mixing bowl, combine the 1.25 cups Warm Water with the 1 tsp Honey. The warmth of the water should feel like a comfortable bath—around 105-110°F to properly activate the yeast without killing it. Stir until the honey dissolves completely into the water.
Sprinkle the 0.5 tsp Active Dry Yeast over the surface of the water-honey mixture. Allow it to sit undisturbed for 5-10 minutes. You should see the yeast begin to foam and bubble vigorously—this visual confirmation means the yeast is alive and active, ready to begin fermentation.
Step 2: Incorporate the Flour
Add all 2 cups Bread Flour to the bowl at once. The high-protein content of bread flour provides the necessary structure for this pre-ferment. Using a wooden spoon or your hands, mix until no dry flour remains visible and a shaggy, sticky dough forms.
This initial mixing doesn’t need to be perfect—the goal is simply to hydrate all the flour and distribute the yeast evenly. The dough will be rough and uneven at this stage, but will smooth out during fermentation. Cover the bowl with a clean kitchen towel or plastic wrap.
Step 3: Begin the Fermentation Process
Let the mixture rest at room temperature (ideally 70-75°F) for 1 hour. During this time, the yeast will begin consuming the honey and flour, producing carbon dioxide and alcohol that create the characteristic bubbles in the sponge.
After the first hour, you should see the mixture beginning to rise and develop small bubbles on the surface. This is the visual indicator that fermentation has begun. The sponge may also develop a slightly sour aroma, which is normal and desirable for flavor development.
Step 4: Complete the Sponge
Once the initial fermentation is visible, add the 1 tsp Kosher Salt to the mixture. The salt is added after fermentation begins to avoid inhibiting the yeast activity. Gently fold the salt into the sponge until fully incorporated.
Cover the bowl again and let the sponge ferment for an additional 12-24 hours at room temperature. The timing depends on your kitchen temperature and desired flavor development—longer fermentation yields more complex flavors. The finished sponge should be bubbly, slightly domed, and have a tangy aroma.
Step 5: Verify and Store
Your sponge is ready when it has at least doubled in volume and shows a network of bubbles throughout when stirred. The texture should be thick and elastic, with a slightly foamy appearance on top.
Use the sponge immediately in your recipe, or store it in the refrigerator for up to 3 days to slow the fermentation. Refrigerated sponge will develop even more depth of flavor over time. When ready to use, bring it to room temperature before incorporating into your dough.
Pro Tips For Making Bread Sponge
- Test Your Yeast: I learned this the hard way—always proof your active dry yeast in the warm water with honey first. If it doesn’t bubble within 5-10 minutes, your sponge won’t rise, no matter what.
- Use Bread Flour Only: Skip the all-purpose; bread flour’s higher protein content gives the sponge structure it needs to hold up. After three failed attempts with AP, I finally switched and never looked back.
- Mind the Temperature: Your warm water should feel like a baby’s bath—around 105-110°F. Any hotter and you’ll kill the yeast; colder and it’ll take forever to activate.
- Salt Last: Add the kosher salt after the sponge has started bubbling, about 10-15 minutes in. Salt too early can slow down yeast activity, and nobody wants a lazy sponge.
Pro Cooking Tips for This Dish
Temperature Control
Your water temperature is critical—aim for 105-110°F to wake up the yeast without shocking it. I use a ThermoWorks Instant Read for precision. Too hot kills yeast, too cold delays activation by hours. 🌡️
Flour Matters
King Arthur Bread Flour (12.7% protein) gives the best structure for open crumb. For whole grain lovers, substitute up to 50% whole wheat flour, but expect a denser texture and longer fermentation.
Salt Timing
Never add salt at the start—it inhibits yeast activity. Wait until you see active bubbles (after 1 hour), then fold in the 1 tsp Kosher Salt. This ensures proper fermentation while still seasoning the sponge.
Fermentation Environment
The ideal sponge temperature is 70-75°F. In colder kitchens, place the bowl near (not on) a preheated oven or use a seedling heat mat. Warmer rooms may speed fermentation—adjust timing accordingly.
Peak Activity Check
Your sponge is ready when it’s doubled, bubbly, and smells tangy. Test by floating a spoonful in water—if it floats, it’s at peak activity. Underproofed sponge yields flat bread; overproofed can taste overly sour.
Storage Tips
Use immediately or refrigerate for up to 3 days. Cold storage slows fermentation, deepening flavor. Bring to room temperature before using—cold sponge can shock your final dough. 💡
Nutrition Facts
Frequently Asked Questions
Can I use all-purpose flour instead of bread flour?
Yes, but expect a slightly denser texture. Bread flour’s higher protein creates better structure. For best results, add 1 tbsp vital wheat gluten per cup of all-purpose flour.
Why does my sponge smell sour?
That tangy aroma is normal! It means the wild yeasts and bacteria are working. The longer it ferments (up to 24 hours), the more pronounced the flavor will be.
How do I know when it’s ready to use?
Look for bubbles throughout and a domed surface. The float test works too: drop a spoonful in water—if it floats, it’s at peak activity. Underproofed sponge makes flat bread.
Can I make this ahead and refrigerate?
Refrigerate for up to 3 days in an airtight container. The cold slows fermentation while deepening flavor. Bring to room temperature before using.

Trained in classic French technique but raised on slow-cooked ribs and spicy rubs, she blends culinary skill with smoke and soul.
- Recipe for Boneless Pork Chops in Cast Iron Skillet: Sear and Baste to Juicy Perfection - October 3, 2026
- Recipe for Boneless Cross Rib Roast: Slow-Roasted Beef with Herb Crust - October 3, 2026
- Hamburgers in Sauce Recipe Crock Pot: Slow-Cooked Savory Delight - October 3, 2026