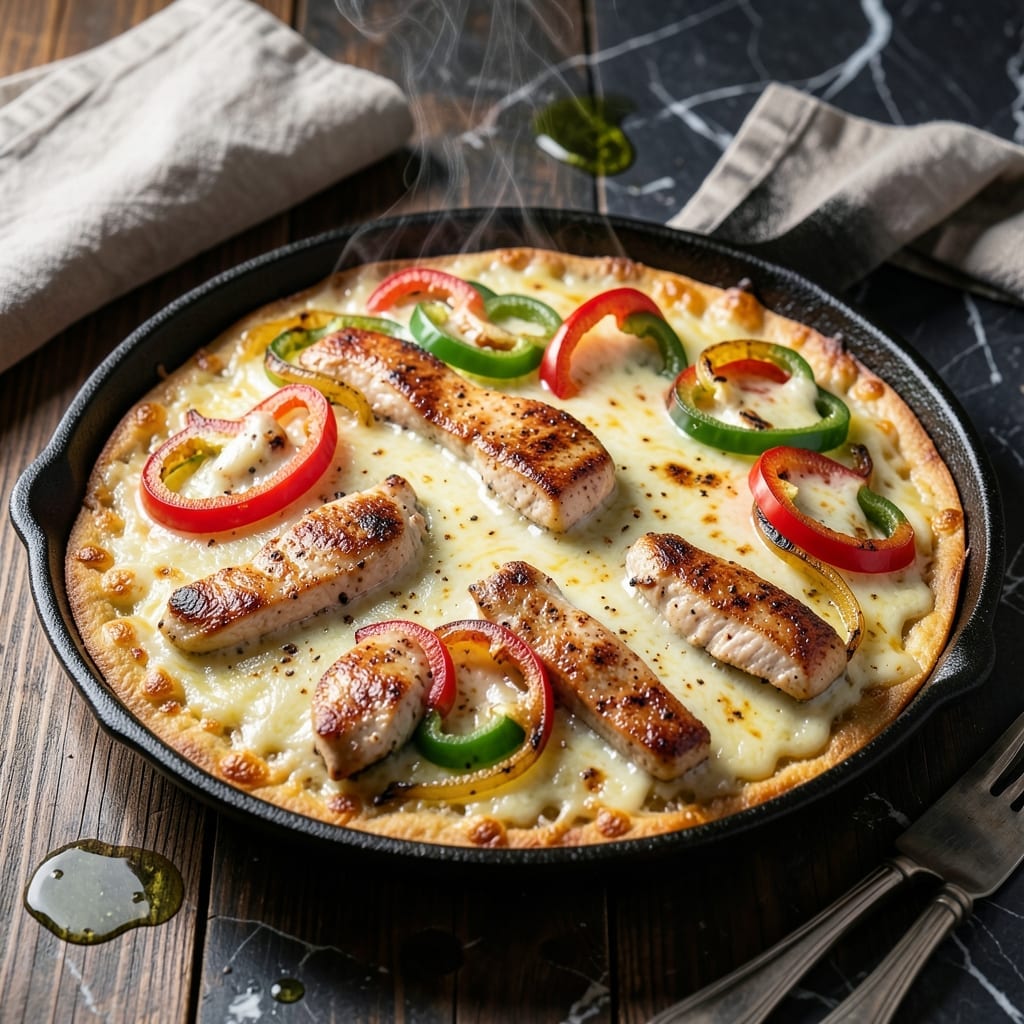
This skillet creation brings the bold flavors of Carlos O’Kelly’s straight to your kitchen. A sizzling combination of melted cheese and fajita-seasoned proteins creates an irresistible texture that’s crispy on the edges yet gooey at the center.
The beauty lies in its simplicity: layering tortillas with seasoned meats, peppers, and a generous blanket of cheese. High heat transforms these simple ingredients into a bubbling, golden masterpiece ready in 20 minutes.
What emerges is a dish that captures the essence of Tex-Mex indulgence—rich, cheesy, and packed with smoky fajita flavors. The contrast between the crisp exterior and molten center makes every bite unforgettable.
Serve directly from the skillet for maximum impact. This creation delivers restaurant-quality results with minimal effort.
Ingredients for Carlos O’kelly’s Fajita Cheese Crisp
Large tortillas, seasoned chicken, peppers, and melty cheese create this Tex-Mex skillet masterpiece.
| Ingredient | Amount | Notes |
|---|---|---|
| Flour Tortillas 🌯 | 8 pieces | Large, burrito-sized preferred |
| Chicken Breast 🍗 | 1 ½ lb | Boneless, skinless, sliced thin |
| Bell Peppers 🌶️ | 2 whole | Red and green, sliced into strips |
| Yellow Onion 🧅 | 1 whole | Thinly sliced into half-moons |
| Fajita Seasoning 🌿 | 2 tbsp | Or homemade blend of cumin, chili powder, garlic powder |
| Shredded Monterey Jack Cheese 🧀 | 3 cups | Or cheddar-Monterey Jack blend |
| Shredded Cheddar Cheese 🧀 | 2 cups | Sharp cheddar for extra flavor |
| Olive Oil 🫒 | 3 tbsp | Divided for cooking and skillet |
| Lime 🍈 | 1 whole | Cut into wedges for serving |
| Fresh Cilantro 🌿 | ¼ cup | Chopped, for garnish |
| Sour Cream 🥣 | ½ cup | For serving, optional |
| Salsa 🍅 | 1 cup | For serving, optional |
| Salt 🧂 | 1 tsp | To taste for seasoning |
| Black Pepper 🌶️ | ½ tsp | Freshly ground preferred |
[recipe_ingredient_scaler]
The tortillas are the foundation here. Mission brand burrito-sized works perfectly—they’re sturdy enough to hold up to the cheese weight without tearing. For the chicken, boneless, skinless breasts cut into even strips cook quickly and absorb the fajita seasoning well. Look for bell peppers with firm, glossy skins—they’ll hold their crunch better during cooking. Most grocery stores carry pre-sliced fajita veggie mixes (save time).
No fajita seasoning? Mix 1 tbsp chili powder, 1 tsp cumin, 1 tsp garlic powder, 0.5 tsp paprika. Monterey Jack not available? Pepper Jack adds a nice kick, or use all cheddar (sharp for best melt). Chicken can be swapped for skirt steak or shrimp—both cook quickly and pair well with the seasoning. Pre-shredded cheese works in a pinch, but block cheese melts better.
Assemble and serve immediately—the cheese crisp is best hot from the skillet. Leftovers keep in the fridge for 2-3 days (reheat in a skillet to recapture crispiness). Prep veggies ahead—store sliced peppers and onions in the fridge for up to 2 days.
Why You’ll Love This Recipe
- One Pan Wonder: I toss the chicken, peppers, and onions on a single sheet pan with the seasoning—hardly any cleanup.
- That Cheese Crisp Magic: The melted cheddar gets this golden, crackly edge over the warm tortillas and fajita mix. Honestly, it’s the best part.
- Weeknight Rescue: I’ve served this for quick dinners, game day snacks, even a make-ahead lunch that reheats beautifully.
- Budget Stretcher: A pound of chicken and a few tortillas feed my family of four with leftovers for tomorrow’s lunch.
Step-by-Step Instructions for Fajita Cheese Crisp
Master the technique for restaurant-quality results with melty cheese and sizzling fajita flavors.
Step 1: Sear the Chicken and Vegetables
Heat 1 tablespoon olive oil in a large skillet over medium-high heat. Add the 1.5 lb chicken breast strips and cook for 5-6 minutes until no longer pink and lightly browned. You want the pieces to develop a slight crust while remaining juicy inside.
Remove the chicken and set aside. In the same skillet, add another 1 tablespoon olive oil and toss in the 2 whole bell peppers and 1 whole yellow onion. Sauté for 4-5 minutes until the vegetables soften and begin to caramelize at the edges. This builds the flavor foundation for your dish.
Step 2: Season and Warm the Tortillas
Return the chicken to the skillet with the vegetables. Sprinkle with the 2 tbsp fajita seasoning, 1 tsp salt, and 0.5 tsp black pepper. Stir well to coat everything evenly and cook for an additional 2 minutes until fragrant.
In a separate clean skillet, heat 1 tablespoon olive oil over medium heat. Warm the 8 pieces flour tortillas one at a time for 30 seconds per side until soft and pliable. This prevents them from tearing when you add the toppings. Keep them warm by wrapping in a clean towel.
Step 3: Layer Cheese and Fajita Mixture
On a large oven-safe skillet or baking sheet, arrange the warmed tortillas in a single layer, slightly overlapping. Distribute the chicken and vegetable mixture evenly over the tortillas. Then sprinkle the 3 cups shredded Monterey Jack cheese and 2 cups shredded cheddar cheese evenly across the top.
The cheese should completely cover the other ingredients to create that signature melted blanket. This is where the magic happens—when the cheese melts, it binds everything together into a crispy, gooey masterpiece.
Step 4: Broil to Perfection
Place the skillet under a preheated broiler for 3-4 minutes until the cheese is fully melted and bubbling with golden brown spots. Watch closely—this happens quickly and you want to pull it out just as the edges begin to crisp.
The broiler’s intense heat creates that sizzling effect reminiscent of your favorite restaurant. The cheese should be completely molten with a slightly crisp top layer, while the tortillas underneath remain soft and sturdy enough to hold everything together.
Step 5: Garnish and Serve Immediately
Remove from the broiler and let it rest for 1 minute to set slightly. Garnish with the 0.25 cup fresh cilantro chopped finely across the top. Cut into wedges and serve with the 1 whole lime cut into wedges, 0.5 cup sour cream, and 1 cup salsa on the side.
Serve while the cheese is still hot and gooey. The contrast of the crispy cheese edges, tender chicken, and sizzling peppers delivers that authentic sizzling skillet experience. Each bite should be a perfect balance of melty cheese, savory fajita flavors, and fresh garnishes.
Pro Tips For Making Carlos O’Kelly’S Fajita Cheese Crisp
- Preheat the Comal: Get your skillet or comal ripping hot before adding the tortilla—I learned this the hard way after too many soggy cheese crisps that refused to get that golden, crispy edge.
- Slice Against the Grain: Cut the chicken breast into thin strips against the grain so it stays tender, not chewy. Sounds obvious, but I skipped this once and spent the meal sawing through rubbery bites.
- Skip the Overcrowding: Cook the peppers and onions in batches if needed. Steaming them in a packed pan turns them mushy instead of keeping that slight crunch Carlos O’Kelly’s is known for.
- Warm the Tortillas First: Heat your flour tortillas for about 10 seconds per side in a dry pan before adding cheese—this prevents the crisp from tearing when you fold it and actually changes the outcome.
Serving Suggestions for This Recipe
Family-Style Presentation
Serve this creation directly from the cast iron skillet at the center of your table for maximum impact. The sizzling presentation keeps the cheese molten and the edges crisp. I love watching guests dig in with tortilla chips or warm flour tortillas for scooping. 💛
Individual Portions
For a more refined approach, cut the cheese crisp into 8 equal wedges using a pizza cutter. Plate each portion on a small cast iron skillet or oval platter with a dollop of sour cream and a sprinkle of cilantro on top.
Taco Bar Setup
Create a DIY station with warm corn tortillas, extra salsa, and lime wedges. Let everyone build their own bites. I find this works perfectly for game day or casual get-togethers. The cheese stays gooey when kept warm in the skillet.
Garnish Like a Pro
Beyond cilantro, try adding diced avocado, pickled jalapeños, or a drizzle of hot sauce. The acid from lime and the creaminess of avocado balance the richness beautifully. Fresh toppings make all the difference. 🌟
Beverage Pairings
A crisp Mexican lager like Model cuts through the cheese perfectly. For non-alcoholic options, sparkling limeade or iced tea with lime works wonders. I always keep a pitcher of agua fresca ready for these meals.
Leftovers Hack
Reheat portions in a dry skillet over medium heat for 2-3 minutes to recapture the crispiness. The microwave works in a pinch but adds a damp paper towel to absorb moisture. Honestly, it’s almost as good as fresh.
Nutrition Facts
Frequently Asked Questions
Can I use a different protein instead of chicken?
Try skirt steak or shrimp for equally delicious results. Steak cooks in 4-5 minutes, while shrimp only needs 2-3 minutes per side.
What if my cheese isn’t melting properly?
Use block cheese instead of pre-shredded, as it melts smoother. Also, ensure your broiler is fully preheated and the skillet is 6-8 inches from the heat source for even melting.
How do I keep the tortillas from getting soggy?
Warm them briefly in a dry skillet first to create a barrier. Also, serve immediately after broiling to maintain the crisp texture.
Can I make this ahead of time?
Prep the filling and tortillas in advance, but assemble and broil just before serving. Reheat leftovers in a skillet for 2-3 minutes to restore crispiness.

Trained in classic French technique but raised on slow-cooked ribs and spicy rubs, she blends culinary skill with smoke and soul.
- Recipe for Boneless Pork Chops in Cast Iron Skillet: Sear and Baste to Juicy Perfection - October 3, 2026
- Recipe for Boneless Cross Rib Roast: Slow-Roasted Beef with Herb Crust - October 3, 2026
- Hamburgers in Sauce Recipe Crock Pot: Slow-Cooked Savory Delight - October 3, 2026