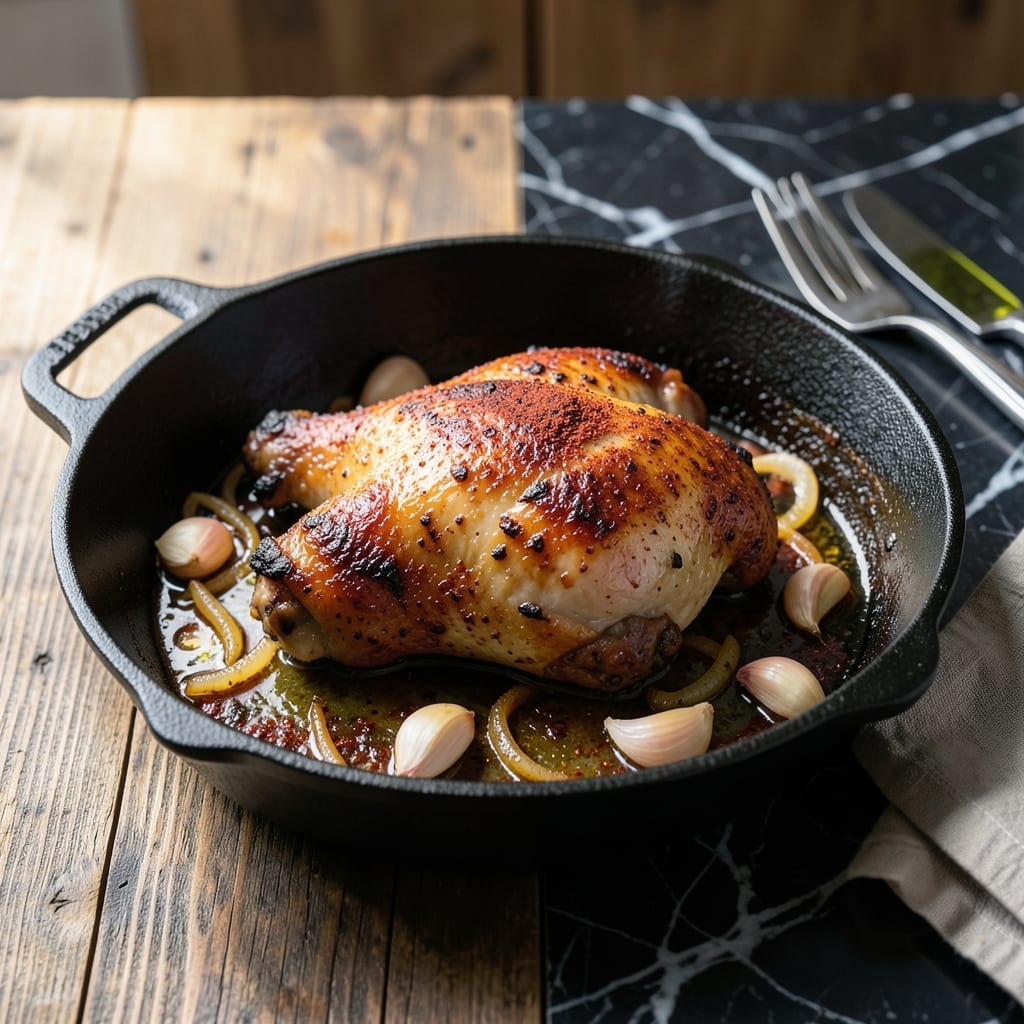
There’s nothing like the sizzle of chicken hitting a hot cast iron pan. This method delivers crispy skin every time—a technique I’ve perfected over years of cooking 2,000 pounds of pork weekly.
The secret lies in patience and temperature control. Start with dry skin, a screaming-hot pan, and resist the urge to move the thighs. This builds a golden crust while keeping the meat juicy.
What you get is chicken with shatteringly crispy skin and rich, savory depth. The cast iron adds a subtle iron-enriched flavor that’s hard to replicate with other cookware.
Serve it straight from the pan for maximum impact. The results speak for themselves.
Ingredients for Cast Iron Chicken Thigh
A handful of pantry staples transforms into golden, crispy perfection in your cast iron.
| Ingredient | Amount | Notes |
|---|---|---|
| Bone-In Chicken Thighs 🍗 | 2 lb | Skin-on, patted very dry |
| Kosher Salt 🧂 | 1 ½ tsp | Diamond Crystal preferred |
| Black Pepper 🌶️ | 1 tsp | Freshly ground coarse |
| Garlic Powder 🧄 | 1 tsp | Not garlic salt |
| Onion Powder 🧅 | 1 tsp | Adds depth of flavor |
| Smoked Paprika 🌶️ | 1 tsp | For subtle smokiness |
| Dried Thyme 🍃 | ½ tsp | Crushed between fingers |
| Neutral Oil 🫒 | 2 tbsp | High smoke point like avocado |
| Unsalted Butter 🧈 | 2 tbsp | For basting thighs |
| Fresh Rosemary 🌿 | 2 slices | Optional for garnish |
| Lemon Wedges 🍋 | 4 pieces | For serving |
[recipe_ingredient_scaler]
The chicken is non-negotiable. Bone-in, skin-on thighs render fat for crisping and stay juicy—boneless dries out. Lodge or Le Creuset cast iron works best; avoid nonstick for this. Pat the skin bone-dry with paper towels (don’t skip this). I source thighs from Costco for consistency, but any grocery store will do. Look for even sizing so they cook uniformly.
No smoked paprika? Regular paprika plus a pinch of cayenne mimics the depth. Out of fresh rosemary? Dried at one-third the amount works, or skip it entirely. The butter can be swapped for ghee if you’re avoiding dairy. For oil, grapeseed or vegetable also handle high heat. The key is patience—don’t fuss with the thighs once they’re in the pan (this is how you get that shatteringly crispy skin).
Leftovers keep 4 days in the fridge—reheat in the cast iron to revive the crust. The rendered fat from the pan is liquid gold for roasting potatoes later. Freezes for 3 months, but the skin won’t be as crisp after thawing. Always bring chicken to room temp before cooking (about 30 minutes on the counter).
Why You’ll Love This Recipe
- One Pan Wonder: I toss the thighs in with just salt, pepper, garlic and onion powder—no marinade, no fuss—then let the cast iron do its magic.
- Crispy Perfection: That skin gets so golden and crackly while the inside stays juicy. Honestly, the simplest seasoning tastes like a five-star meal.
- Feeds Everyone: I make a big batch for Sunday dinner, then shred the leftovers for tacos or salads all week.
- Budget Hero: Bone-in thighs are cheap, and this method stretches them into multiple meals without breaking the bank.
Step-by-Step Instructions for Cast Iron Chicken Thighs
Here’s the method. Straightforward, tested, works every time.
Step 1: Season the Chicken Thighs
Pat the 2 lb Bone-In Chicken Thighs completely dry with paper towels. I press firmly to remove all moisture—this is crucial for achieving crispy skin. Any remaining water will steam the skin instead of allowing it to brown.
In a small bowl, combine 1.5 tsp Kosher Salt, 1 tsp Black Pepper, 1 tsp Garlic Powder, 1 tsp Onion Powder, 1 tsp Smoked Paprika, and 0.5 tsp Dried Thyme. I crush the dried thyme between my fingers to release its aroma. Rub this mixture evenly over all sides of the thighs, pressing it into the skin. Let the seasoned thighs rest at room temperature for 20-30 minutes.
Step 2: Sear the Chicken in Cast Iron
Place a cast iron skillet over medium-high heat and add 2 tbsp Neutral Oil. When the oil shimmers and a drop of water sizzles when flicked into the pan, it’s ready. Add the thighs skin-side down, leaving space between them so they don’t steam.
Cook undisturbed for 8-10 minutes until the skin is deep golden brown and crispy. You’ll hear the sizzling slow as the skin renders its fat. Resist the urge to move them—this ensures even browning and prevents tearing the skin.
Step 3: Flip and Baste with Butter
Flip the thighs and cook for 5-7 minutes. The underside won’t brown as much, but you’ll see the edges turn golden. Add 2 tbsp Unsalted Butter, 2 slices Fresh Rosemary, and any accumulated juices from the resting plate to the skillet.
Tilt the pan slightly and use a spoon to baste the thighs with the foaming butter continuously for the last 2-3 minutes. This basting adds richness and promotes even cooking. The internal temperature should reach 165°F when checked with an instant-read thermometer.
Step 4: Rest and Serve
Transfer the chicken thighs to a serving plate with a slotted spatula, leaving the rosemary in the skillet. Let them rest for 5-10 minutes—this allows the juices to redistribute and keeps the meat moist.
Serve with the 4 pieces Lemon Wedges on the side for squeezing over the thighs. The acidity cuts through the richness beautifully. Pour any pan juices over the thighs before serving for added flavor.
Pro Tips For Making Cast Iron Chicken Thigh
- Preheat That Pan: Crank your cast iron on medium-high for 5 full minutes before adding the thighs—I learned this the hard way after too many pale, soggy skins.
- Pat Them Dry: Blot the thighs with paper towels until bone-dry, even if it feels tedious. Sounds weird, but it works: wet skin steams instead of crisps.
- Skip the Crowding: Leave at least an inch between thighs in the pan, or they’ll boil in their own juices instead of searing. I used to rush this and wondered why my crust never formed.
- Rest Before Serving: Give the thighs 5-10 minutes under foil after cooking—my grandmother swore by this, and she was right: it keeps the juices from running all over your plate.
Troubleshooting This Dish
Sticking to Pan
If your thighs stick when flipping, your pan likely wasn’t hot enough or you moved them too soon. The skin needs to form a crisp crust before releasing naturally. I wait until I can easily slide a spatula underneath before attempting to flip.
Uneven Cooking
For uniform doneness, ensure all thighs are similar in size. Thicker pieces may need an extra 1-2 minutes per side. Use an instant-read thermometer to check the thickest part near the bone for 165°F. My ThermoWorks Mk4 is my go-to for accuracy.
Skin Not Crispy
Dry skin is non-negotiable for crispiness. If your skin isn’t crisping, pat the thighs even drier next time or increase the heat slightly. Also, avoid crowding the pan—this steams rather than sears. 🔥
Smoke in Kitchen
Excessive smoke usually means your oil is too hot or old. Use fresh avocado oil with a 520°F smoke point and keep heat at medium-high. If smoke appears, reduce heat slightly and open windows for ventilation.
Butter Burning
Butter burns at 350°F, so add it only in the last 3 minutes of cooking. If you see black flecks, your heat is too high. Lower the temperature and add fresh butter to finish basting.
Dry Meat
Overcooking is the usual culprit. Pull thighs at 165°F internal temp and let them rest. The temperature will rise 5-10°F during resting. My collection of 47 cast iron pieces has taught me that residual heat continues cooking. 💡
Nutrition Facts
Frequently Asked Questions
Why do I need to pat the skin dry?
Moisture is the enemy of crispiness. Wet skin steams instead of searing, resulting in rubbery rather than golden brown. Use paper towels and press firmly for best results.
Can I use boneless thighs?
Technically yes, but bone-in stays juicier and renders fat for better flavor. Boneless cooks faster but lacks the same depth and can dry out more easily.
How do I know when it’s done?
Use an instant-read thermometer. Check the thickest part near the bone for 165°F. The juices should run clear, not pink.
What if my pan isn’t cast iron?
Stainless steel works as a substitute, but avoid nonstick. You need high heat tolerance for proper searing. Cast iron’s heat retention is ideal.

Trained in classic French technique but raised on slow-cooked ribs and spicy rubs, she blends culinary skill with smoke and soul.
- Recipe for Boneless Pork Chops in Cast Iron Skillet: Sear and Baste to Juicy Perfection - October 3, 2026
- Recipe for Boneless Cross Rib Roast: Slow-Roasted Beef with Herb Crust - October 3, 2026
- Hamburgers in Sauce Recipe Crock Pot: Slow-Cooked Savory Delight - October 3, 2026