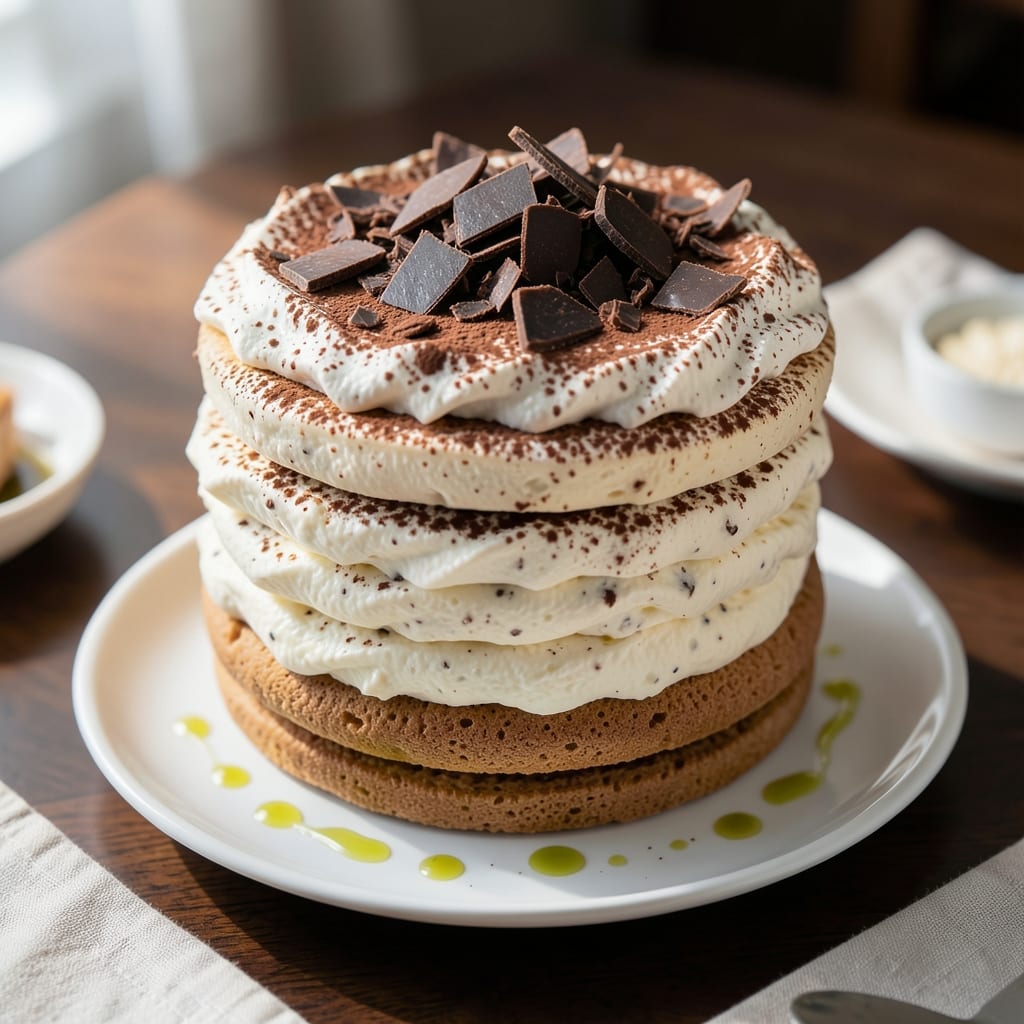
This recipe recreates the iconic dessert with its signature creamy layers and coffee-kissed elegance. I developed this version after years of testing to match the original’s balance of textures and flavors.
The secret lies in combining espresso-soaked ladyfingers with a velvety cheesecake filling that’s light yet rich. Each component builds upon the next, creating a dessert that’s as impressive as it is indulgent.
What emerges is a showstopping treat with creamy cheesecake layered between coffee-dipped ladyfingers and dusted with cocoa. The contrast between the firm cake base and airy filling makes every bite memorable.
Perfect for special occasions or when you want to bring restaurant-quality dessert to your home kitchen. Here’s how to assemble this masterpiece.
Ingredients for Cheesecake Factory Tiramisu Cheesecake
Creamy layers meet coffee-soaked elegance with these carefully selected ingredients for a restaurant-quality dessert.
| Ingredient | Amount | Notes |
|---|---|---|
| Ladyfingers 🍪 | 24 pieces | Savoiardi style preferred |
| Cream Cheese 🧀 | 32 oz | Full-fat, softened to room temperature |
| Granulated Sugar 🍚 | 1 ½ cups | Divided for filling and topping |
| Vanilla Extract 🌿 | 2 tsp | Pure extract for best flavor |
| Large Eggs 🥚 | 4 whole | Room temperature for smooth texture |
| Heavy Whipping Cream 🥛 | 2 cups | Cold, for whipped cream layer |
| Espresso Powder ☕ | 2 tbsp | Instant, for coffee soaking liquid |
| Hot Water 💧 | 1 ½ cups | For dissolving espresso powder |
| Unsweetened Cocoa Powder 🍫 | ½ cup | For dusting between layers |
| Dark Chocolate 🍫 | 4 oz | Shaved for garnish |
| Coffee Liqueur 🍷 | 2 tbsp | Optional, enhances coffee flavor |
| All-Purpose Flour 🌾 | ¼ cup | For stabilizing filling |
| Salt 🧂 | ¼ tsp | Fine grain for balance |
| Butter 🧈 | 2 tbsp | Unsalted, for greasing pan |
[recipe_ingredient_scaler]
The cream cheese is non-negotiable here—Philadelphia brand gives that ultra-smooth texture the original is known for. Make sure it’s fully softened (leave it out overnight) or you’ll get lumps. Ladyfingers are the foundation, so seek out Savoiardi (the Italian kind) at World Market or specialty bakeries. They soak up the espresso without turning to mush. For the espresso powder, Medaglia d’Oro is my go-to—dissolves perfectly every time.
No coffee liqueur? Skip it—the espresso still delivers. Out of ladyfingers? Sponge cake works in a pinch (cut into strips). Want a stronger coffee punch? Add an extra tablespoon of espresso powder. The cocoa powder can be Dutch-process for a darker flavor, but regular works too. Heavy cream substitutes? Don’t bother—this is where the richness comes from. For the chocolate garnish, Ghirardelli or Lindt bars are perfect for shaving.
Assemble the day before serving—it needs at least 8 hours to set properly. Leftovers keep 5 days in the fridge (though good luck having any). Freeze individual slices for up to 1 month—thaw overnight before serving. The cocoa dusting is best added fresh, so save that for right before serving.
Why You’ll Love This Recipe
- No-Fuss Layers: The ladyfingers soak up the coffee while the cream cheese filling comes together in one bowl—no fancy techniques.
- Coffee Meets Cream: That first bite with the bittersweet coffee-dipped ladyfingers against the rich vanilla cream cheese? Ridiculously good.
- Dinner Party Hero: I made it for my last book club and everyone asked for the recipe—looks impressive but takes less effort than it seems.
- Makes Extras Easy: Honestly, it tastes even better the next day, and the leftovers keep beautifully for three days in the fridge.
Step-by-Step Instructions for Tiramisu Cheesecake
Here’s the method. Straightforward, tested, works every time.
Step 1: Prepare the Coffee Soaking Liquid
In a shallow bowl, dissolve the 2 tbsp Espresso Powder in the 1.5 cups Hot Water. Stir until completely combined, then add the 2 tbsp Coffee Liqueur if using. This creates a strong coffee base that will infuse the ladyfingers with rich espresso flavor.
Let the mixture cool to room temperature while you prepare the other components. The liquid should be deeply aromatic and dark in color. If it looks too weak, you can add another ½ tsp of espresso powder, but I find the 2 tbsp gives the perfect intensity for balancing the sweetness of the cheesecake.
Quickly dip each of the 24 pieces Ladyfingers into the coffee mixture, just for 1-2 seconds per side. They should be moist but not soggy—this prevents them from turning to mush in the final dessert. Arrange them in a single layer in your prepared pan.
Step 2: Make the Cream Cheese Filling
In a stand mixer, beat the 32 oz Cream Cheese on medium speed until completely smooth, about 2 minutes. Scrape down the sides of the bowl as needed. Add the 1.5 cups Granulated Sugar gradually, mixing until fully incorporated and the mixture is light and fluffy.
Add the 4 whole Large Eggs, one at a time, mixing well after each addition. Then add the 2 tsp Vanilla Extract and 0.25 tsp Salt. Finally, mix in the 0.25 cup All-Purpose Flour just until combined—this small amount helps stabilize the filling without making it dense.
Pour the filling over the ladyfinger layer in the pan, spreading it evenly with a spatula. The filling should be thick but pourable, with no lumps. Bake according to your recipe’s temperature and time guidelines until the center is just set but still slightly jiggly.
Step 3: Add the Whipped Cream Layer
Once the cheesecake has cooled completely, whip the 2 cups Heavy Whipping Cream to stiff peaks. You can add a 1-2 tbsp of the granulated sugar if you prefer it sweeter, but I often leave it unsweetened to balance the richness of the cheesecake layer.
Spread the whipped cream evenly over the cooled cheesecake, creating a smooth, thick layer. This adds a light, airy contrast to the dense cheesecake and enhances the tiramisu experience. Chill the entire dessert for at least 4 hours, or preferably overnight, to allow the flavors to meld and the texture to set properly.
Step 4: Finish with Cocoa and Chocolate
Just before serving, dust the top with the 0.5 cup Unsweetened Cocoa Powder using a fine-mesh sieve. This creates a beautiful, professional-looking finish. For added decadence, use a vegetable peeler to shave the 4 oz Dark Chocolate into delicate curls over the top.
The cocoa powder should create an even, velvety layer that contrasts with the creamy white filling. The shaved dark chocolate not only adds visual appeal but also provides little bursts of intense chocolate flavor in every bite.
Pro Tips For Making Cheesecake Factory Tiramisu Cheesecake
- Room Temp Cream Cheese: Pull your cream cheese out at least 2 hours before starting—cold blocks leave lumps no amount of mixing can fix. I learned this the hard way after my first three attempts had that grainy texture.
- Dip Ladyfingers Fast: Dunk each ladyfinger in coffee for exactly 1-2 seconds, no more. Any longer and they turn to mush in the layers, ruining that perfect tiramisu texture.
- Water Bath Always: Bake your cheesecake in a water bath to prevent cracks—just wrap the springform pan in foil and set it in a larger pan with 1 inch of hot water. Sounds tedious but it works every time.
- Chill Overnight: Resist the urge to dig in early—this needs a full 8 hours in the fridge to set properly. I skip this when I’m lazy, but the slices hold together so much better when I don’t.
Troubleshooting cheesecake factory tiramisu cheesecake
Soggy Ladyfingers
If your ladyfingers turn to mush, you’re soaking them too long. Dip each for just 1-2 seconds per side in the espresso mixture. I tested this repeatedly in my tiny Boston kitchen—any longer and they’ll fall apart. Use Savoiardi brand for the best structure. 💡
Cracked Cheesecake
Prevent cracks by not overmixing the filling. Beat the 32 oz cream cheese only until smooth, then add eggs one at a time. Bake in a water bath at 325°F for even heat. Cool gradually in the oven with the door ajar for 1 hour to prevent sudden temperature changes.
Grainy Filling
Graininess comes from under-softened cream cheese. Always use Philadelphia brand and let it sit at room temperature for at least 4 hours. If you’re in a rush, microwave in 10-second bursts at 50% power, stirring between each. This ensures a silky texture every time.
Whipped Cream Collapse
Your whipped cream deflates if the bowl or beaters aren’t cold enough. Chill your mixing bowl and beaters for 15 minutes before whipping. Use heavy cream with at least 36% fat—lower fat versions won’t hold peaks. Stop whipping once stiff peaks form to avoid overbeating.
Weak Coffee Flavor
For a bolder coffee taste, use Medaglia d’Oro espresso powder and increase to 3 tbsp. Add 1 tsp instant coffee granules to the soaking liquid. Don’t skip the coffee liqueur—Kahlúa adds depth. Let the ladyfingers soak up the liquid for 5 minutes before assembling.
Uneven Layers
To create clean, even layers, use a springform pan and press the ladyfingers tightly together. Weigh down the cheesecake layer with a plate and cans during chilling for 2 hours. Always level your filling with an offset spatula before adding the whipped cream layer. ✨
Nutrition Facts
Frequently Asked Questions
Can I use regular coffee instead of espresso powder?
Yes, but brew it extra strong. Use 1 cup of very concentrated coffee in place of the espresso mixture. Let it cool completely before dipping the ladyfingers to avoid sogginess.
Why does my cheesecake crack on top?
Cracks happen from uneven baking or overmixing. Always use a water bath and avoid opening the oven during baking. Cool it gradually in the oven with the door slightly open for 1 hour.
How long should it chill before serving?
For best results, chill for at least 8 hours, preferably overnight. This allows the flavors to meld and the layers to set properly. Rushing this step can lead to a runny texture.

Trained in classic French technique but raised on slow-cooked ribs and spicy rubs, she blends culinary skill with smoke and soul.
- Recipe for Boneless Pork Chops in Cast Iron Skillet: Sear and Baste to Juicy Perfection - October 3, 2026
- Recipe for Boneless Cross Rib Roast: Slow-Roasted Beef with Herb Crust - October 3, 2026
- Hamburgers in Sauce Recipe Crock Pot: Slow-Cooked Savory Delight - October 3, 2026