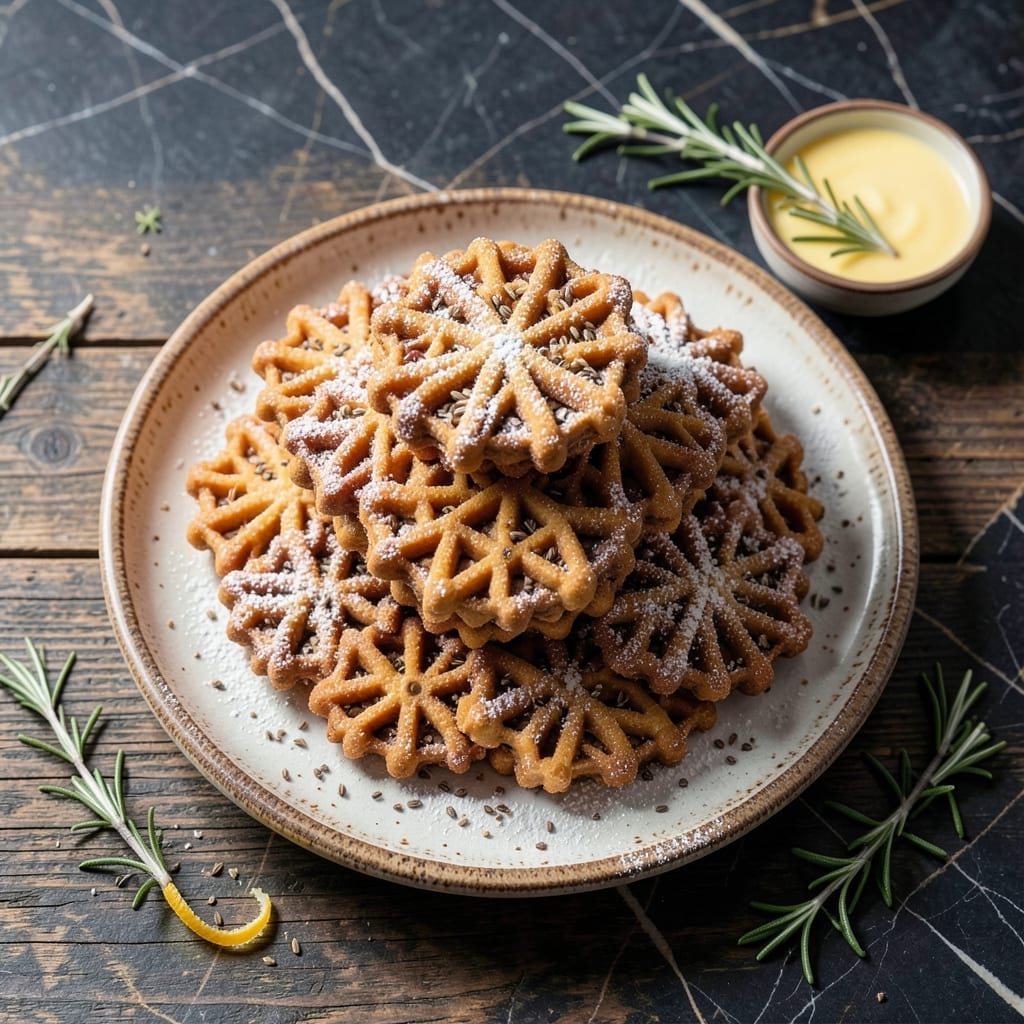
There’s something magical about the delicate, snowflake-like patterns of traditional pizzelle. These Italian wafer cookies carry generations of heritage in every crisp bite.
This recipe preserves the authentic technique and flavor that make pizzelle a beloved holiday treat. The secret lies in the precise balance of ingredients and the proper iron temperature.
Ingredients for Ciao Italia Pizzelle
Traditional ingredients create those delicate, heirloom-quality Italian wafer cookies everyone loves.
| Ingredient | Amount | Notes |
|---|---|---|
| All-Purpose Flour 🌾 | 2 cups | Sifted for light texture |
| Granulated Sugar 🍚 | ¾ cup | Fine white sugar preferred |
| Large Eggs 🥚 | 3 whole | Room temperature for best results |
| Unsalted Butter 🧈 | ½ cup | Melted and cooled slightly |
| Pure Vanilla Extract 🌿 | 1 tsp | High-quality for authentic flavor |
| Anise Seed 🌿 | 1 ½ tsp | Freshly ground recommended |
| Baking Powder 🧂 | 1 tsp | Ensures proper rise in batter |
| Salt 🧂 | ¼ tsp | Fine sea salt preferred |
| Lemon Zest 🍋 | 1 tsp | Finely grated for brightness |
| Powdered Sugar 🍚 | ½ cup | For dusting finished cookies |
[recipe_ingredient_scaler]
The anise seed defines authentic pizzelle flavor. Penzeys carries high-quality options, but most grocery stores stock it in the spice aisle. Freshly grind the seeds just before using for maximum aroma. The vanilla extract should be pure, not imitation—Nielsen-Massey is a professional favorite. Use room-temperature eggs to ensure proper batter consistency and even cooking on the iron.
No anise? Anise extract at one-fourth the amount works, but use sparingly—it’s potent. For a citrus twist, swap lemon zest for orange or add half a teaspoon of almond extract. The butter must be unsalted to control sodium levels. If using salted, omit the added salt. Vegetable shortening can replace butter in a pinch, though flavor will differ slightly.
The batter can be refrigerated for up to 24 hours before baking. Once baked, pizzelle stay crisp for 1 week in an airtight container at room temperature. Freeze for 3 months in layers separated by parchment paper to prevent sticking.
Why You’ll Love This Recipe
- One Bowl Easy: I just mix flour, sugar, eggs, butter, and vanilla—no fancy steps, no extra dishes.
- Buttery Vanilla Magic: The melted butter and real vanilla make these taste like a bakery treat, but from my own kitchen.
- Holiday or Tuesday: Honestly, I make these for Christmas cookies or just because it’s a dreary afternoon.
- Batch and Store: They keep for weeks in an airtight container, so I can bake ahead and still have fresh-tasting pizzelle.
Step-by-Step Instructions for Traditional Italian Wafer Cookies
Master the technique behind these classic Italian treats with precision and tradition in every bite.
Step 1: Prepare the Batter with Authentic Flavors
In a large mixing bowl, whisk together the 2 cups All-Purpose Flour, 0.75 cup Granulated Sugar, 1 tsp Baking Powder, 0.25 tsp Salt, and 1.5 tsp Anise Seed until thoroughly combined. The anise seed should be freshly ground for optimal aromatic release.
Create a well in the center and add the 3 whole Large Eggs, 0.5 cup Unsalted Butter (melted and cooled), 1 tsp Pure Vanilla Extract, and 1 tsp Lemon Zest. The lemon zest provides the necessary brightness to balance the anise’s intensity.
Using a wooden spoon or silicone spatula, gradually incorporate the dry ingredients into the wet until a smooth, thick batter forms. The consistency should resemble pancake batter, thick enough to hold its shape briefly when dropped from a spoon.
Step 2: Preheat and Prepare the Pizzelle Iron
Preheat your pizzelle iron according to manufacturer instructions, typically to medium-high heat. Most traditional irons require 3-5 minutes to reach the proper temperature. The iron is ready when water droplets sizzle and evaporate immediately upon contact.
Lightly brush both sides of the iron with melted butter or nonstick spray, even if your iron claims to be nonstick. This ensures the delicate cookies release cleanly without tearing. Skip this step and you risk losing half your cookie to the iron.
Step 3: Cook the Pizzelle to Golden Perfection
Using a small spoon or cookie scoop, place 1 tablespoon of batter slightly off-center on each patterned plate of the iron. The batter will spread slightly during cooking, so don’t overfill. Close the iron firmly but gently.
Cook for 30-45 seconds until the cookies turn deep golden brown and the edges look crisp. The exact time depends on your iron’s heat—check the first few and adjust as needed. The steam will subside when they’re nearly done.
Carefully remove the cookies using a fork or heatproof spatula. They’ll be pliable for 10-15 seconds after removal, so work quickly if shaping into cones or cannoli shells. For traditional flat pizzelle, lay them on a wire rack to cool completely.
Step 4: Finish with Traditional Dusting
Once completely cooled, dust the pizzelle generously with 0.5 cup Powdered Sugar using a fine-mesh sieve. The sugar should create a snowy, even coating that contrasts beautifully with the golden-brown patterns.
Stack the cookies carefully—they’re delicate. For presentation, arrange them in a single layer on a serving platter with additional powdered sugar dusted between layers if stacking. The sugar not only adds sweetness but also enhances the traditional appearance.
Serve at room temperature with espresso or dessert wine. These cookies keep well in an airtight container for up to 2 weeks, though they’re best enjoyed within the first few days when the anise flavor is most pronounced.
Pro Tips For Making Ciao Italia Pizzelle
- Preheat the Iron: I learned this the hard way—always heat your pizzelle iron for at least 5 minutes before adding batter. Cold iron means uneven cooking and batter sticking like glue.
- Soften the Butter: Use room-temperature butter, about 65°F, so it creams smoothly with the sugar. I skip this when I’m in a rush, but the texture suffers every time.
- Skip Overmixing: Stir the batter just until the flour disappears—overworking it makes tough pizzelle. My grandmother swore by this, and she was right.
- Chill the Dough: After burning three batches, I finally figured out resting the dough 15 minutes in the fridge makes it easier to handle and prevents spreading.
Troubleshooting This Recipe
Batter Too Thick
If your batter seems too stiff, add 1-2 tbsp milk or water gradually until it reaches pancake batter consistency. I’ve found that room temperature ingredients blend more smoothly, so ensure your eggs and butter aren’t cold. 💡
Sticking to Iron
Even nonstick irons need a light coating of melted butter or nonstick spray between batches. If cookies tear, your iron may not be hot enough—wait until it’s fully preheated at medium-high heat. Let the iron close gently but firmly.
Uneven Cooking
Uneven browning often means inconsistent heat. Rotate your pizzelle iron 180 degrees halfway through cooking if using an electric model. For stovetop irons, ensure the flame evenly heats the base. Cook in 30-45 second intervals.
Pizzelle Too Soft
Soft cookies usually mean they needed more time. Extend cooking by 10-15 seconds per side. Also, cool them completely on a wire rack—residual heat continues cooking. Store in a single layer to maintain crispness.
Lost Patterns
Overfilling the iron causes batter to spill and obscure designs. Use exactly 1 tbsp batter per cookie and place it slightly off-center. Clean iron plates between batches with a dry brush to prevent buildup that can blur patterns. 🔥
Bland Flavor
If the anise flavor seems weak, use freshly ground seeds and ensure they’re not expired. Adding ½ tsp anise extract can boost flavor, but use sparingly. Let cooled cookies rest 1 hour before tasting to allow flavors to meld.
Nutrition Facts
Frequently Asked Questions
Can I make the batter the night before?
Yes! The batter can be refrigerated for up to 24 hours before baking. Just give it a quick stir before using.
What if I don’t have anise seed?
Use 1/4 tsp anise extract instead or swap in 1/2 tsp almond extract for a different flavor. Both work well in a pinch.
How do I store pizzelle to keep them crisp?
Store in an airtight container at room temperature. For best results, layer them between sheets of parchment paper.
Why are my pizzelle not crispy?
They likely needed more time. Cook for 45 seconds and cool completely on a wire rack to ensure crispness.

Trained in classic French technique but raised on slow-cooked ribs and spicy rubs, she blends culinary skill with smoke and soul.
- Recipe for Boneless Pork Chops in Cast Iron Skillet: Sear and Baste to Juicy Perfection - October 3, 2026
- Recipe for Boneless Cross Rib Roast: Slow-Roasted Beef with Herb Crust - October 3, 2026
- Hamburgers in Sauce Recipe Crock Pot: Slow-Cooked Savory Delight - October 3, 2026