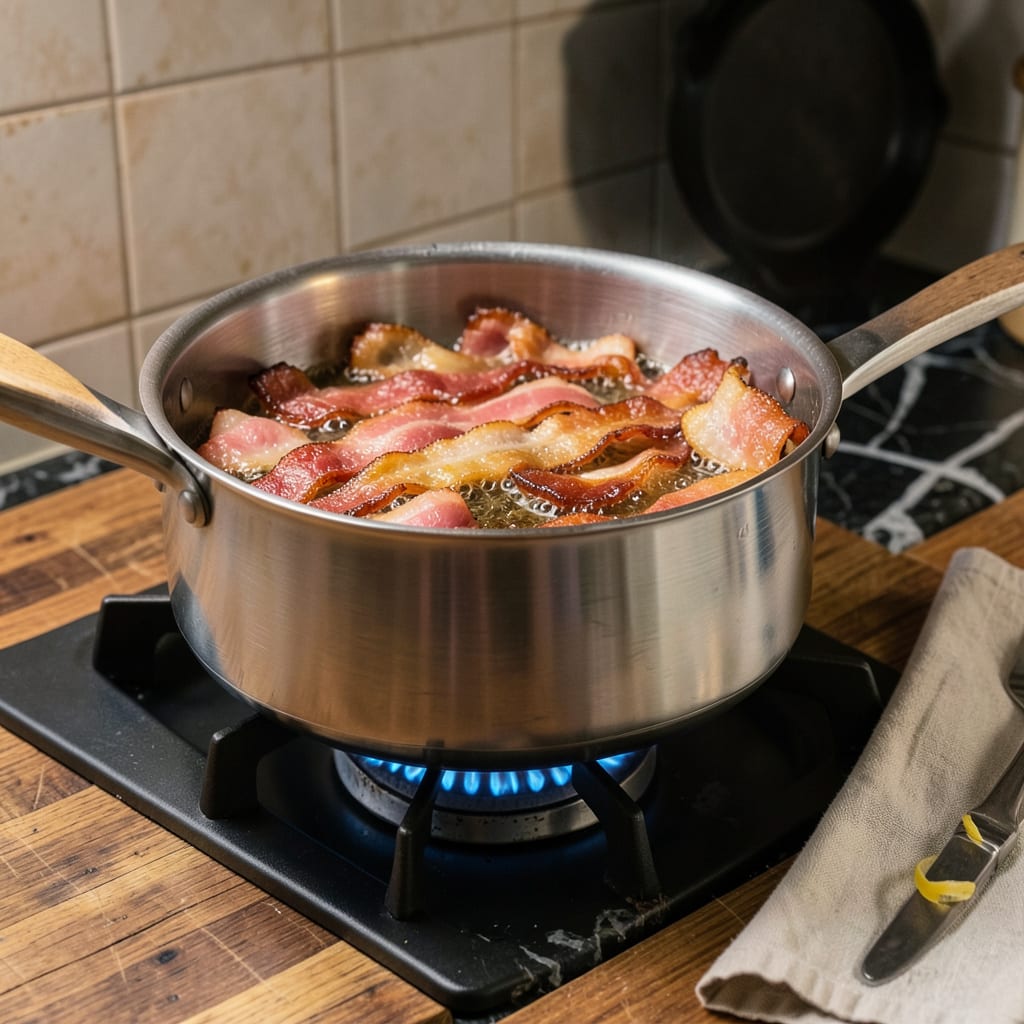
Let me tell you, cooking bacon in a pot on the stove changed my breakfast game forever. No more uneven strips or grease splatters everywhere—just perfectly crispy bacon with minimal mess. I stumbled on this method during a busy morning when I needed to feed a crowd, and it’s been my go-to ever since.
The secret is all in the heat control. Start with a cold pot, add your bacon, then slowly bring it up to medium-low. This renders the fat gently while the bacon cooks evenly—no burnt edges or chewy centers. I like to stir occasionally instead of flipping, which helps every piece get that ideal golden-brown crispiness.
What you end up with is bacon that’s crispy without being brittle, with all that delicious rendered fat ready for your next dish. The best part? Cleanup is a breeze compared to frying in a skillet. Just pour off the grease (carefully!) and you’re left with a pot that wipes clean.
Perfect for breakfast plates, BLTs, or even crumbled over salads. Here’s how to nail it every time—no special equipment needed, just a pot and about 10 minutes of mostly hands-off cooking.
📚 In This Guide
- What You’ll Need
- Instructions
- Tips and Common Mistakes
What Youll Need
- ● Bacon: 6–12 slices (thick-cut or regular, depending on preference). Opt for uncured or applewood-smoked for extra flavor! 🥓
- ● Cooking pot: A heavy-bottomed pot (3–4 quarts) like stainless steel, cast iron, or enamel-coated Dutch oven for even heat distribution.
- ● Stove: Gas, electric, or induction—just ensure medium heat control.
- ● Tongs or fork: For safe flipping (avoid piercing bacon to retain juices).
- ● Paper towels: 4–6 sheets for draining excess grease.
- ● Plate or tray: Lined with paper towels to rest cooked bacon.
- ● Splatter screen: Keeps your stovetop clean from grease pops. 🛡️
- ● Thermometer: Instant-read (for precise temp checks if rendering fat for other recipes).
- ● Wooden spoon: To press bacon gently for extra crispiness.
- ● Baking sheet: For oven-finishing (if you prefer a hybrid method).
Instructions
Here’s my foolproof method for perfectly crispy bacon every time—no splatter, no mess, just delicious results.
Choose the Right Pot and Prep the Bacon
Select a heavy-bottomed pot that’s at least 3-4 quarts in size. I prefer stainless steel or enameled cast iron because they distribute heat evenly and prevent hot spots. The pot should be deep enough to contain any potential splatter but wide enough to lay bacon strips in a single layer without crowding.
Separate your bacon slices carefully and lay them flat in the cold pot. I like to arrange them in a single layer with minimal overlap—this ensures even cooking. Don’t preheat the pot; starting with cold bacon in a cold pot renders the fat slowly for maximum crispiness with minimal curling.
Cook Low and Slow for Even Rendering
Turn the heat to medium-low and let the bacon cook undisturbed for 8-10 minutes. You’ll hear a gentle sizzle as the fat begins to render. Watch for the edges to start curling slightly—that’s your first visual cue that the cooking process has begun properly.
Resist the urge to stir or flip too early. The bacon will release from the pot naturally when it’s ready. You’ll know it’s time to flip when the undersides turn light golden brown and the fat has rendered enough to pool slightly in the bottom of the pot. This patient approach prevents sticking and ensures even cooking.
Flip and Crisp to Perfection
Using tongs, carefully flip each slice of bacon. The first side should be light to medium brown with some crispy edges forming. Cook for another 5-7 minutes on the second side, adjusting the heat slightly if needed to maintain a steady sizzle without smoking.
Watch for the fat to turn from opaque to translucent—this visual change tells you the bacon is nearing doneness. The slices should be deep golden brown with crispy edges when fully cooked. For extra-crispy bacon, let it cook 1-2 minutes longer until the edges are nearly dark brown but not burnt.
Drain and Serve While Hot
Transfer the cooked bacon to a paper towel-lined plate to drain. I like to tilt the plate slightly so any excess fat runs off. The bacon will crisp up even more as it cools for 1-2 minutes on the paper towels. This resting time is crucial—it allows the bacon to reach its final crispy texture.
Pour the rendered bacon fat through a fine-mesh strainer into a heatproof container to save for cooking later. Serve the bacon immediately while it’s still hot and at its crispiest. The perfect slice should snap cleanly when bent and have a satisfying crunch with every bite.
Tips and Common Mistakes
Perfect bacon comes down to patience and attention to detail—here’s how to nail it every time.
Heat Control: The medium-low setting in Step 2 is crucial for even rendering. Too high and you’ll burn the outside before the fat renders; too low and you’ll end up with flabby bacon. I adjust my burner so the bacon sizzles gently but never smokes. If your stovetop runs hot, err on the lower side—better to take an extra minute than rush and scorch.
The Technique That Changed Everything: Don’t skip the cold start method from Step 1. Placing bacon in a cold pot and letting it warm gradually renders fat more evenly than starting hot. I learned this trick after years of dealing with curled, unevenly cooked strips. The gradual heat allows the fat to melt slowly, creating that perfect crisp texture without burnt edges.
Visual Cues Matter: In Step 3, watch for the fat to change from opaque to translucent—that’s your signal the bacon is nearly done. The deep golden brown color mentioned in the instructions is ideal; if you’re aiming for extra crispy, those final 1-2 minutes make all the difference. I pull mine when the edges are just starting to darken but before they blacken.
Resting is Critical: Those 1-2 minutes of resting in Step 4 aren’t just for draining—they let the bacon finish crisping up. If you eat it straight from the pot, it’ll seem softer than expected. The residual heat continues cooking the bacon slightly as it cools on the paper towels, giving you that satisfying snap when you bite into it.
Pro Tips for Cooking Bacon In Pot On Stove
- Perfect bacon comes down to patience and attention to detail—here’s how to nail it every time.
- Heat Control: The medium-low setting in Step 2 is crucial for even rendering. Too high and you’ll burn the outside be…
- The Technique That Changed Everything: Don’t skip the cold start method from Step 1. Placing bacon in a cold pot and …
Frequently Asked Questions
Got questions about cooking bacon in a pot? You’re not alone! Here are the most common queries—and quick answers—to help you nail that crispy, golden perfection.
How long does it take to cook bacon in a pot on the stove?
Cooking time varies by thickness: regular-cut takes 8–10 minutes on medium heat, while thick-cut needs 12–15 minutes. Flip every 2–3 minutes for even crispiness. Pro tip: Start with cold bacon in a cold pot to render fat slowly!
Do I need to add oil to the pot when cooking bacon?
Nope! Bacon’s natural fat is enough—adding oil can make it greasy. Start with a dry pot on medium-low heat. If sticking occurs, lower the heat slightly or use a stainless steel or cast-iron pot for better searing.
Can I cook bacon in a pot without splattering grease everywhere?
Yes! Use a splatter screen or partially cover the pot with a lid (leave a gap for steam). Alternatively, cook on low heat and blot excess grease with a paper towel mid-cook. Less mess, same crispy results!
What’s the best way to drain bacon grease from the pot?
Let the grease cool slightly (but not harden), then pour it into a heat-safe container (like a glass jar) via a fine-mesh strainer. Never dump it down the drain! Store grease in the fridge for up to 3 months—great for cooking eggs or potatoes later.
Can I bake bacon instead of using a pot?
For hands-off cooking, try the oven method: Arrange bacon on a parchment-lined sheet at 400°F (200°C) for 15–20 minutes. It’s less splattery but lacks the pot’s caramelized edges. Pick your priority: convenience or texture!
Cooking bacon in a pot on the stove is a game-changer—less mess, even crispiness, and perfect results every time. Whether you prefer chewy or extra-crunchy slices, this method delivers consistent flavor with minimal effort. Now that you’ve mastered the basics, why not experiment? Try adding a sprinkle of brown sugar for candied bacon or toss in some garlic for a savory twist!
Ready to level up your breakfast game? Grab your pot, fire up the stove, and get sizzling—your taste buds will thank you! 🍳

Trained in classic French technique but raised on slow-cooked ribs and spicy rubs, she blends culinary skill with smoke and soul.
- Recipe for Boneless Pork Chops in Cast Iron Skillet: Sear and Baste to Juicy Perfection - October 3, 2026
- Recipe for Boneless Cross Rib Roast: Slow-Roasted Beef with Herb Crust - October 3, 2026
- Hamburgers in Sauce Recipe Crock Pot: Slow-Cooked Savory Delight - October 3, 2026