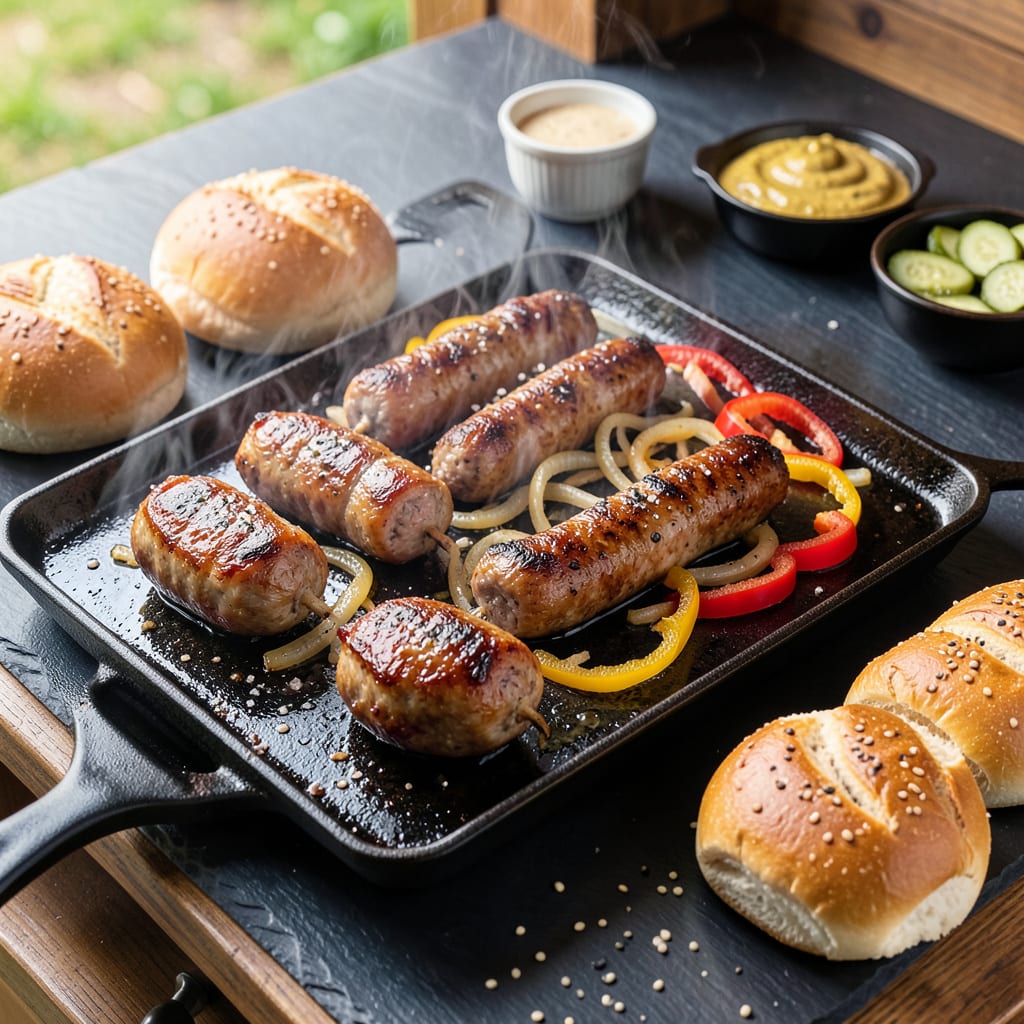
There’s nothing like the sizzle of brats hitting a screaming-hot Blackstone griddle—it’s the sound of summer cookouts done right. I’ve cooked more brats than I can count on my griddle, and let me tell you, this flat-top method delivers juicy results with that perfect caramelized crust every single time. No flare-ups, no guessing games, just even heat and restaurant-quality flavor.
What makes Blackstone griddles ideal for brats is that consistent, high heat across the entire surface. You get even cooking without hot spots, and the flat top creates that signature char without burning. I start with a quick sear at 400°F, then move them to a cooler zone to finish cooking through—simple technique, perfect results.
The secret to next-level brats? Don’t skip the butter baste. As they cook, I melt butter right on the griddle and spoon it over the brats, adding layers of flavor while keeping them moist. By the time they hit 160°F internally, you’ve got sausages with crispy edges and tender centers that practically burst with juice.
Serve them on toasted buns with grilled onions and peppers—maybe a smear of mustard or sauerkraut if you’re feeling fancy. This method turns basic brats into something special, and cleanup’s a breeze. Let’s fire up that griddle and get cooking.
📚 In This Guide
- What You’ll Need
- Instructions
- Tips and Common Mistakes
What Youll Need
- ● Brats: 6–8 fresh or thawed uncooked bratwursts (1–1.5 lbs total; opt for beer brats or classic pork for best results).
- ● Blackstone griddle: 22”–36” flat-top (preheated to 375–400°F).
- ● Cooking oil: 2–3 tbsp high-smoke-point oil (avocado, canola, or Blackstone’s seasoning oil).
- ● Tongs & spatula: Heavy-duty stainless steel or griddle-safe tools.
- ● Buns: 6–8 brat buns or hoagie rolls (lightly toasted on the griddle).
- ○ Toppings (optional): 1 large white or yellow onion, sliced (for caramelized onions).
- ● 1 green bell pepper, sliced (for grilled peppers).
- ● Mustard, ketchup, sauerkraut, or cheese slices (Swiss or cheddar).
- ○ Beer or broth (optional): 12 oz lager beer, chicken broth, or apple juice (for steaming).
- ● Thermometer: Instant-read meat thermometer (to hit 160°F internal temp).
- ● Safety gear: Heat-resistant grill gloves and apron (splatter happens!).
Instructions
Here’s the foolproof method I use to get perfectly charred, juicy brats every time on my Blackstone.
Preheat and Prepare the Griddle Surface
Start by turning all burners on your Blackstone to medium-high heat and let it preheat for 10-12 minutes. You want the surface to be screaming hot—when you sprinkle water droplets on it, they should dance and evaporate instantly. This high heat is crucial for getting that beautiful sear without steaming your brats.
While it heats, I like to scrape the griddle clean with a metal spatula to remove any residue from previous cooks. Then I’ll add a thin layer of neutral oil (like vegetable or canola) and spread it evenly with a paper towel. The oil should shimmer but not smoke—if it’s smoking, your heat is too high.
Sear the Brats for Maximum Flavor
Place your brats on the hot griddle, leaving about 2 inches between each one so you have room to work. Don’t move them for the first 2-3 minutes—this is when that gorgeous crust forms. You’ll hear them sizzling and see the edges starting to brown. That’s exactly what you want.
After the initial sear, I rotate each brat 45 degrees to create those classic crosshatch grill marks. Let them cook for another 2-3 minutes before flipping. The first side should be deep golden brown with some charred spots. If they’re sticking, give them another 30 seconds—they’ll release when they’re ready.
Cook Through While Building Flavor
Once flipped, reduce the heat to medium to prevent burning while the brats cook through. I like to add sliced onions and peppers to the griddle at this point—they’ll cook in the rendered brat fat, absorbing all that flavor. Cook the brats for another 6-8 minutes, turning occasionally for even browning.
You’ll know they’re done when they reach an internal temperature of 160°F (use an instant-read thermometer) and the casings are firm to the touch with a nice snap when pressed. The onions should be caramelized and the peppers slightly charred by now—perfect for serving alongside or on top of your brats.
Rest and Serve for Perfect Juiciness
Transfer the brats to a clean plate and let them rest for 3-5 minutes before serving. This short rest allows the juices to redistribute throughout the meat instead of running out when you cut into them. I’ll often tent them loosely with foil to keep them warm, but don’t wrap tightly—you want to preserve that crispy exterior.
Serve your brats on toasted buns with your favorite toppings. I love mine with the caramelized onions and peppers we cooked alongside, plus a generous squirt of yellow mustard and a sprinkle of fresh parsley for brightness. The first bite should give you that perfect snap of the casing, followed by juicy, flavorful meat with just the right amount of char.
Tips and Common Mistakes
Getting that perfect char and juicy snap on your Blackstone takes a few key techniques I’ve learned from years of griddle cooking.
Heat Control: The 10-12 minute preheat in Step 1 isn’t just a suggestion—it’s critical for creating that screaming hot surface that gives you a proper sear instead of steaming your brats. I always test my griddle by sprinkling water droplets; they should dance and disappear instantly. If they just sit and bubble, your surface isn’t hot enough yet. This initial high heat creates the foundation for those beautiful char marks we’re after.
Searing Technique: In Step 2, when you’re getting that initial crust, resist the urge to move the brats prematurely. Those 2-3 minutes of undisturbed contact are when the magic happens. I learned this the hard way after ruining several batches by peeking too soon. The brats will release naturally from the griddle when they’re ready to turn—if they’re sticking, they need more time. That 45-degree rotation after the first sear creates those professional-looking crosshatch marks that make your brats look as good as they taste.
Temperature Matters: The 160°F internal temperature in Step 3 isn’t just about safety—it’s the sweet spot for juiciness. I’ve found that pulling brats at exactly 160°F gives you that perfect snap in the casing while keeping the interior moist. Use an instant-read thermometer and check multiple spots, especially if you’re cooking different sizes. The casing should feel firm with a slight give when pressed, not rock hard.
Resting Period: Those 3-5 minutes of resting time in Step 4 might seem unnecessary when you’re hungry, but they make all the difference. I tent mine loosely with foil to keep them warm while allowing just enough airflow to preserve that crispy exterior we worked so hard to create. This short rest lets the juices redistribute throughout the meat instead of running out onto your plate when you cut into them.
Pro Tips for Cooking Brats On Blackstone
- Getting that perfect char and juicy snap on your Blackstone takes a few key techniques I’ve learned from years of gri…
- Heat Control: The 10-12 minute preheat in Step 1 isn’t just a suggestion—it’s critical for creating that screaming ho…
- Searing Technique: In Step 2, when you’re getting that initial crust, resist the urge to move the brats prematurely. …
Frequently Asked Questions
How long should I cook brats on a Blackstone griddle?
Cook brats for 12–15 minutes total, flipping every 2–3 minutes. Aim for an internal temp of 160°F (use a meat thermometer!). Pre-cooked brats need just 5–7 minutes to warm through and get that perfect sear.
Can I boil brats before grilling on a Blackstone?
You can, but it’s optional! Boiling (in beer or broth) for 10–15 minutes first ensures juiciness, but skip it if you prefer a snappier casing. Pat brats dry before grilling to avoid steaming instead of searing.
What’s the best oil for cooking brats on a Blackstone?
Use oils with a high smoke point like avocado, canola, or vegetable oil. A light coating prevents sticking and adds flavor. Avoid olive oil—it burns at high temps! Pro tip: Add a pat of butter at the end for extra richness.
Why are my brats splitting open on the griddle?
Splitting happens if the heat’s too high or you puncture the casing. Cook on medium heat (350–400°F) and don’t prick the brats! Let them slowly render fat to avoid bursts. Too late? Serve them anyway—they’ll still taste great!
What are good side dishes for Blackstone brats?
Classic pairings include:
- Grilled onions & peppers (cook them right on the griddle!)
- Crispy Blackstone potatoes or hash browns
- Fresh coleslaw or a tangy mustard potato salad
- Toasted buns brushed with garlic butter
Now you’ve got the secrets to perfectly juicy, char-grilled brats on your Blackstone! 🌭 With the right prep, heat control, and a few pro tips, you’ll be serving up crowd-pleasing brats every time—whether it’s game day or a casual backyard cookout.
Ready to fire up the griddle? Grab your favorite toppings, invite some friends, and make your next cookout unforgettable. For even more Blackstone magic, try experimenting with different brat flavors or sides—like grilled onions or crispy potatoes! 🔥

Trained in classic French technique but raised on slow-cooked ribs and spicy rubs, she blends culinary skill with smoke and soul.
- Recipe for Boneless Pork Chops in Cast Iron Skillet: Sear and Baste to Juicy Perfection - October 3, 2026
- Recipe for Boneless Cross Rib Roast: Slow-Roasted Beef with Herb Crust - October 3, 2026
- Hamburgers in Sauce Recipe Crock Pot: Slow-Cooked Savory Delight - October 3, 2026