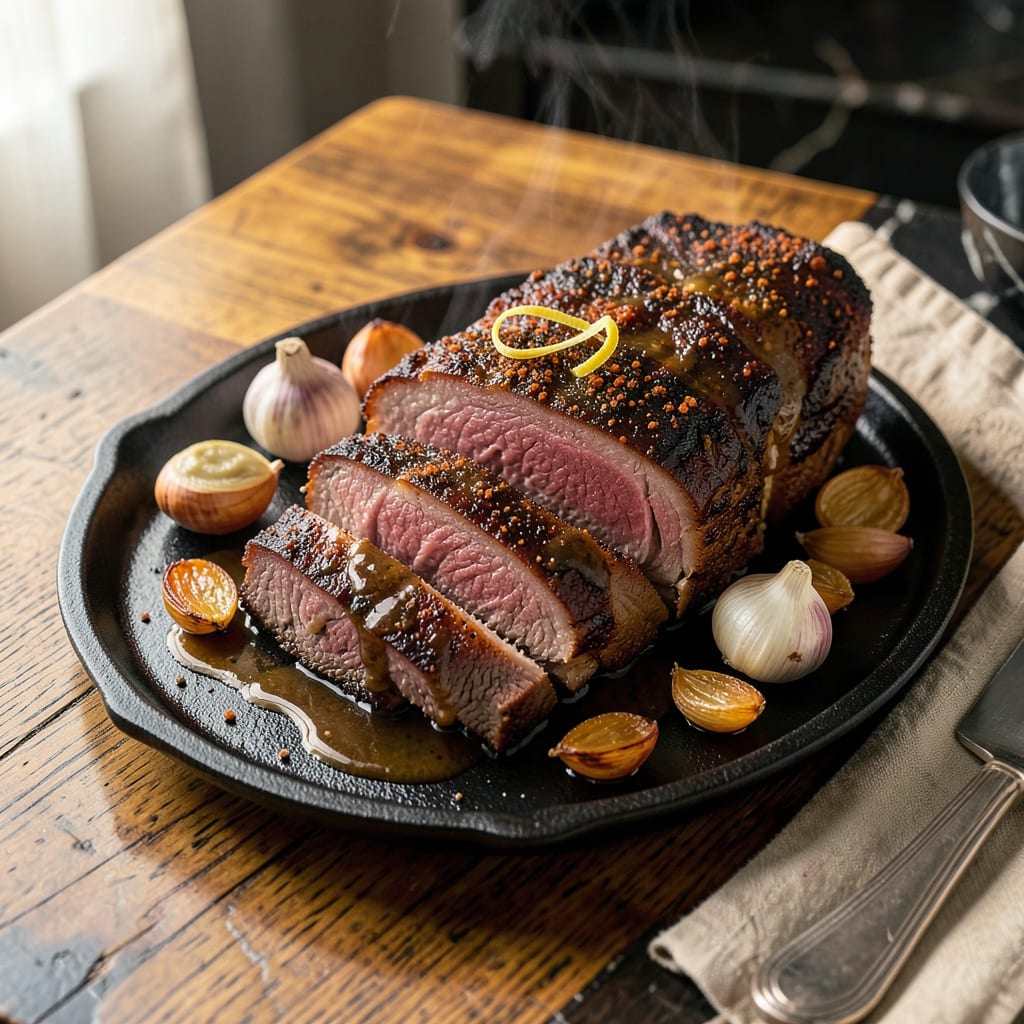
I’ll be real with you: cooking brisket without a smoker used to intimidate me. Then I discovered the magic of oven-braising, and suddenly that tough cut transforms into fall-apart tender perfection every time. No fancy equipment, no all-day babysitting—just reliable results that taste like they came from a pitmaster’s rig.
Here’s the thing—brisket doesn’t need smoke to be incredible. My method uses a bold spice rub and low-and-slow oven heat to break down the connective tissue while keeping the meat juicy. I even sneak in a trick with liquid smoke (just a touch!) to mimic that deep, smoky flavor without overpowering the beef’s natural richness.
You’ll know it’s done when the internal temp hits that sweet spot between 195-203°F, and the meat practically melts at the touch of a fork. The best part? While it’s in the oven, you’re free to prep sides—maybe some buttery cornbread or tangy coleslaw to round out the meal.
Confession: The first time I tried this, I nearly ruined it by peeking too often. Now I know the secret is patience. Let the oven do its work, then give the brisket a good rest before slicing. That’s when the real magic happens—the juices redistribute, and every bite becomes worth the wait.
📚 In This Guide
- What You’ll Need
- Instructions
- Tips and Common Mistakes
What Youll Need
- ● Brisket: 1 whole packer-cut brisket (10–14 lbs) or flat-cut (5–7 lbs), preferably USDA Choice or Prime grade 🍖
- ● Spices & Rub: ¼ cup coarse kosher salt (or 3 tbsp table salt)
- ● ¼ cup black pepper (freshly ground)
- ● 2 tbsp smoked paprika (for that smoky flavor!)
- ● 1 tbsp garlic powder
- ● 1 tbsp onion powder
- ○ 1 tsp cayenne pepper (optional, for heat 🌶️)
- ○ Liquid for Braising: 4 cups beef broth (low-sodium preferred) + 1 cup apple cider vinegar or red wine (optional, for depth)
- ● Aromatics: 1 large yellow onion (sliced), 4 garlic cloves (smashed), 2 bay leaves, 1 tbsp whole black peppercorns
- ● Oven-safe pot: Dutch oven (5–7 qt) or deep roasting pan with tight lid
- ● Aluminum foil: Heavy-duty, enough to seal the pot if lid isn’t snug
- ● Meat thermometer: Instant-read (critical for doneness! 🌡️)
- ● Sharp knife: For trimming fat (a boning knife works best)
- ● Cutting board: Large enough for the brisket (18″x12″ or bigger)
- ● Tongs & meat fork: For handling the brisket without piercing
- ● Liquid smoke: 1–2 tsp (if you want extra smokiness)
- ● Butcher paper: For wrapping during rest (alternative to foil)
- ● Cooling rack: To rest the brisket post-cook (keeps it crisp)
- ● Basting brush: For applying juices while cooking
Instructions
Here’s how to transform that tough cut into melt-in-your-mouth perfection using just your oven.
Prep the Brisket for Maximum Flavor
Start by patting the brisket completely dry with paper towels. This is crucial – moisture prevents that beautiful crust from forming. Trim any large chunks of fat, leaving about ¼-inch fat cap to protect the meat during cooking.
Season aggressively on all sides with salt and pepper – don’t be shy. I like to use about 1 tablespoon of salt for every 2 pounds of meat. Let it sit at room temperature for 30 minutes while your oven preheats. This helps the seasoning penetrate and ensures even cooking.
Sear for Deep, Rich Flavor
Heat a large Dutch oven over medium-high heat until very hot. Add a thin layer of oil and carefully place the brisket in the pot. Sear for 4-5 minutes per side until you develop a deep, golden-brown crust.
Don’t move the brisket around – let it sit undisturbed to get that perfect sear. You’ll know it’s ready to flip when it releases easily from the pot. Remove the brisket and set it aside temporarily while you build the braising liquid.
Create the Braising Environment
In the same pot, add aromatic vegetables like onions, carrots, and celery. Cook for 5-6 minutes until softened and beginning to caramelize. Deglaze with beef broth or your preferred liquid, scraping up all those flavorful browned bits from the bottom.
Return the brisket to the pot, fat-side up. The liquid should come about halfway up the meat. Add any additional seasonings or herbs you’re using. Bring everything to a gentle simmer before covering with a tight-fitting lid.
Slow Braise to Tenderness
Transfer the covered pot to a 300°F oven. Let it braise undisturbed for 3-4 hours, depending on size. The brisket is done when a fork slides in and out with absolutely no resistance – it should feel like butter.
Check the liquid level occasionally, adding more broth if needed to maintain that halfway point. The meat will shrink during cooking, so you may need to adjust the liquid level. When done, the brisket should be fork-tender and the braising liquid reduced to a rich, flavorful sauce.
Rest and Serve
Carefully remove the brisket from the pot and transfer to a cutting board. Tent loosely with foil and let it rest for 20-30 minutes. This allows the juices to redistribute throughout the meat instead of running out when you slice it.
While it rests, skim any excess fat from the braising liquid and reduce it on the stovetop if needed. Slice the brisket against the grain and serve with the rich, flavorful sauce spooned over the top. The meat should be incredibly tender, practically falling apart at the touch of your fork.
Tips and Common Mistakes
After years of perfecting oven-braised brisket, I’ve learned these key details make all the difference between good and extraordinary results.
The Seasoning Secret: In Step 1, when you’re salting the brisket, don’t just sprinkle—really press the salt into the meat. I use my hands to work it into every crevice, which helps create that perfect crust during searing. The 30-minute rest at room temperature is crucial too; it lets the salt penetrate deeper rather than just sitting on the surface.
Searing for Maximum Flavor: During Step 2, make sure your Dutch oven is screaming hot before adding the oil. You want to hear that immediate sizzle when the brisket hits the pot. Those 4-5 minutes per side might seem long, but resist the urge to peek or move the meat. The crust that forms here is the foundation of your braising liquid’s flavor.
Braising Liquid Wisdom: In Step 3, when you’re cooking the aromatic vegetables, let them develop some real color—those 5-6 minutes should give you caramelized edges. This adds depth to your braising liquid. Also, when returning the brisket to the pot, make sure it’s fat-side up so it bastes itself during the long cook.
Oven Temperature Control: For Step 4, that 300°F temperature is perfect for breaking down collagen without drying out the meat. If your oven runs hot, check the brisket at the 3-hour mark. The meat should yield easily to a fork but not fall apart completely—you want it to hold together for slicing.
Pro Tips for Cooking Brisket Without A Smoker
- After years of perfecting oven-braised brisket, I’ve learned these key details make all the difference between good a…
- The Seasoning Secret: In Step 1, when you’re salting the brisket, don’t just sprinkle—really press the salt into the …
- Searing for Maximum Flavor: During Step 2, make sure your Dutch oven is screaming hot before adding the oil. You want…
Frequently Asked Questions
Got questions about cooking brisket without a smoker? You’re not alone! Here are the most common queries—and quick answers—to help you nail that tender, juicy brisket every time.
Can I cook brisket in the oven instead of a smoker?
While smokers add a distinct flavor, your oven can deliver fall-apart tender brisket with the right technique. Use low heat (275–300°F), a flavorful liquid (like broth or beer), and a tight seal (foil or Dutch oven) to lock in moisture.
How long does it take to cook brisket in the oven?
Plan for 1–1.5 hours per pound at 275°F. A 5-pound brisket typically takes 5–7 hours. Pro tip: Use a meat thermometer—it’s done at 195–205°F internal temp for perfect tenderness.
What’s the best liquid to braise brisket in?
Beef broth, beer (stout or ale), or a mix of apple cider vinegar + water work great. Add aromatics like garlic, onions, or smoked paprika for depth. Avoid overpowering liquids—balance is key!
My brisket turned out dry—what went wrong?
Dry brisket usually means too high heat or not enough liquid. Next time, cook low-and-slow, baste every 1–2 hours, and wrap tightly in foil. Slicing against the grain also helps retain juices!
Can I use a slow cooker or Instant Pot instead?
Yes! A slow cooker needs 8–10 hours on low, while an Instant Pot takes 90 minutes on high pressure (plus natural release). Both lack smoky flavor, so add liquid smoke or smoked spices to compensate.
Who says you need a smoker to nail tender, flavorful brisket? 😉 With the right techniques—like slow oven-braising, smart seasoning, and a little patience—you can achieve fall-apart perfection right in your kitchen. Whether it’s a weeknight dinner or a special gathering, this method proves that great brisket is always within reach.
Ready to impress? Grab a cut of brisket, preheat that oven, and start your next culinary adventure—your taste buds (and dinner guests) will thank you! For extra inspiration, try experimenting with different rubs or sauces to make it your own. Happy cooking! 🍖✨

Trained in classic French technique but raised on slow-cooked ribs and spicy rubs, she blends culinary skill with smoke and soul.
- Recipe for Boneless Pork Chops in Cast Iron Skillet: Sear and Baste to Juicy Perfection - October 3, 2026
- Recipe for Boneless Cross Rib Roast: Slow-Roasted Beef with Herb Crust - October 3, 2026
- Hamburgers in Sauce Recipe Crock Pot: Slow-Cooked Savory Delight - October 3, 2026