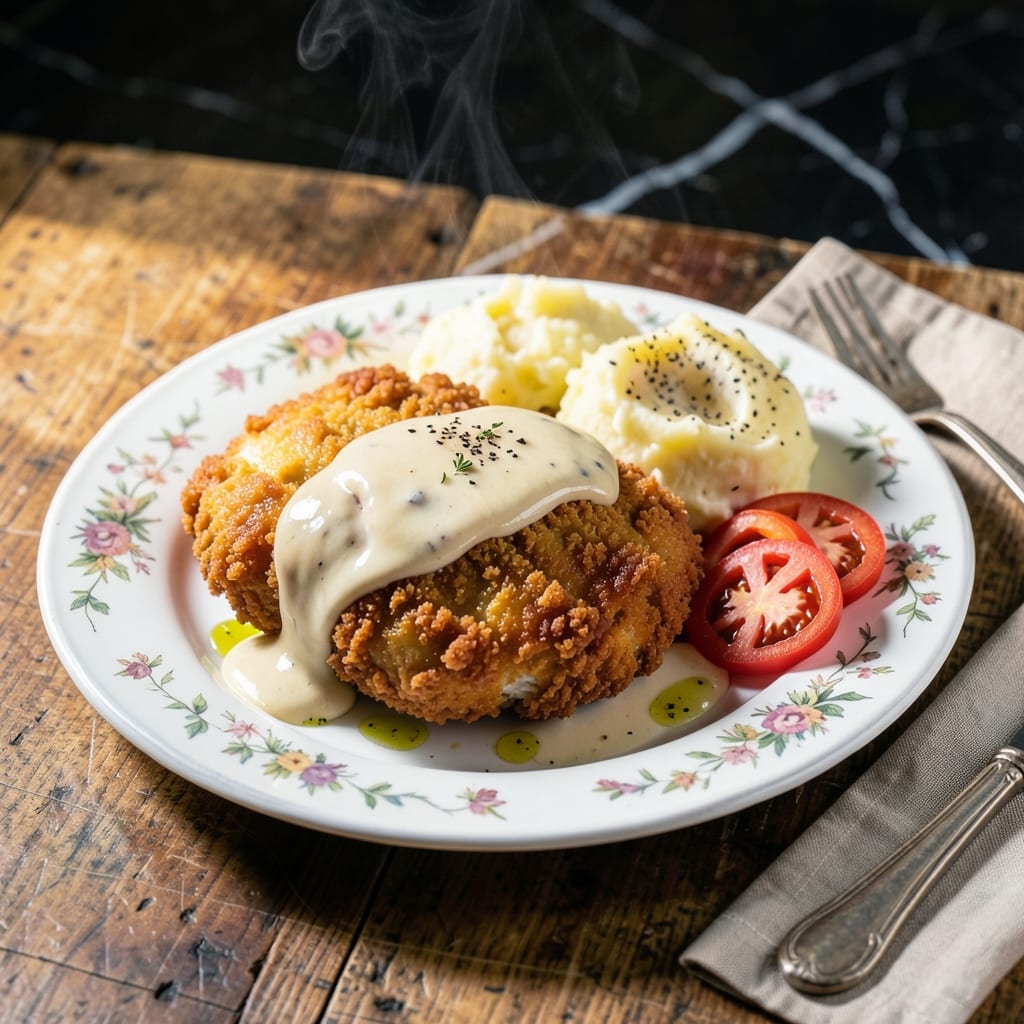
This chicken fried chicken delivers the same nostalgic comfort as the classic diner version, with a golden crust that stays crispy long after frying. The secret lies in a well-seasoned flour coating and the right oil temperature—both non-negotiable for that signature crunch.
I learned the importance of resting the coated chicken before frying during my early kitchen years. This step ensures the coating adheres properly, preventing those frustrating bare spots that ruin the texture.
The result is tender, juicy chicken encased in a shatteringly crispy exterior, ready to be smothered in creamy country gravy. It’s the kind of dish that turns a simple weeknight into a celebration.
Serve it with mashed potatoes and green beans for the full homestyle experience. Here’s how to bring that country flavor to your table.
Ingredients for Cracker Barrel Chicken Fried Chicken
Classic diner comfort starts with tender chicken and a golden, crispy crust ready for gravy.
| Ingredient | Amount | Notes |
|---|---|---|
| Chicken Breast Cutlets 🍗 | 1 ½ lb | Pounded to 1/4-inch thickness |
| All-Purpose Flour 🌾 | 2 cups | Divided for coating and gravy |
| Buttermilk 🥛 | 1 cup | For marinating chicken |
| Large Eggs 🥚 | 2 whole | Beaten for egg wash |
| Salt 🧂 | 2 tsp | Divided for seasoning and gravy |
| Black Pepper 🌶️ | 1 tsp | Freshly ground preferred |
| Paprika 🌶️ | 1 tsp | For color in coating |
| Garlic Powder 🧄 | 1 tsp | For depth in seasoning |
| Onion Powder 🧅 | 1 tsp | For savory flavor balance |
| Vegetable Oil 🫒 | 4 cups | For deep frying |
| Whole Milk 🥛 | 2 cups | For creamy country gravy |
| Chicken Broth 🍲 | 1 ½ cups | Low-sodium preferred |
| Unsalted Butter 🧈 | 2 tbsp | For richness in gravy |
[recipe_ingredient_scaler]
The chicken cutlets are key here. Buy boneless, skinless breasts and pound them yourself to an even thickness—this ensures even cooking and maximum crispiness. Most supermarkets sell pre-cut chicken tenderloins that work great too. For the buttermilk, full-fat is ideal (the tang helps tenderize the meat). Vegetable oil with a high smoke point is a must for frying—peanut oil is traditional but any neutral oil works.
No buttermilk on hand? Whole milk plus 1 tbsp vinegar or lemon juice per cup does the trick. Out of paprika? Cayenne for heat or smoked paprika for depth can stand in. The gravy is forgiving—half-and-half instead of whole milk makes it extra rich. For gluten-free, swap the all-purpose flour for a 1:1 gluten-free blend (just add xanthan gum if it’s not included).
Fry in batches to avoid crowding the pan—keeps the oil temp steady and the coating crisp. Leftovers? They reheat best in a 350°F oven for 15-20 minutes (microwaving makes them soggy). The gravy thickens as it cools, so thin with a splash of milk if needed. Stays fresh for 2-3 days in the fridge.
Why You’ll Love This Recipe
- One Pan Meal: I love that I only need a skillet and a bowl—no fancy equipment, just simple steps with flour, buttermilk, and eggs.
- That Crispy Crunch: The buttermilk soak makes the chicken so tender inside, while the flour coating fries up golden and crispy.
- Feeds the Fam: It’s a hit with both kids and adults, and I can stretch it for leftovers without breaking the bank.
- Leftovers? Yes Please: Honestly, it tastes just as good reheated the next day—if there’s any left after dinner.
Step-by-Step Instructions for Chicken Fried Chicken
Here’s my tested method for achieving that signature crispy crust and tender interior we all love.
Step 1: Marinate and Season the Chicken
Begin by submerging the 1.5 lb Chicken Breast Cutlets in the 1 cup Buttermilk for at least 30 minutes. I’ve found this step tenderizes the meat and ensures it stays juicy throughout the frying process. The buttermilk’s acidity works magic on the texture.
While the chicken marinates, combine 1 tsp Salt, 1 tsp Black Pepper, 1 tsp Paprika, 1 tsp Garlic Powder, and 1 tsp Onion Powder with 1 cup of the 2 cups All-Purpose Flour. This seasoned flour mixture will create that flavorful crust we’re after.
Step 2: Create the Breading Station
Beat the 2 whole Large Eggs in a shallow dish. Remove the chicken from the buttermilk, letting excess drip off, then dredge each piece in the seasoned flour, shaking off any excess. Next, dip it in the beaten eggs, ensuring complete coverage, before coating it in the remaining 1 cup All-Purpose Flour.
Press the flour into the chicken gently to ensure it adheres well. The double-dredging technique creates that extra-crispy coating that’s characteristic of this dish. You’ll notice the coating looks slightly thick—that’s exactly what we want.
Step 3: Fry to Golden Perfection
Heat the 4 cups Vegetable Oil in a large, deep skillet to 350°F. I use a candy thermometer to monitor the temperature precisely—this is crucial for even cooking and that perfect golden color. Carefully place the breaded chicken in the hot oil, being careful not to overcrowd the pan.
Fry for 4-5 minutes per side until the crust is deep golden brown and the internal temperature reaches 165°F. You’ll see the edges start to bubble—that’s your visual cue that it’s cooking properly. Transfer to a wire rack set over a baking sheet to drain excess oil.
Step 4: Make the Country Gravy
After frying, pour off all but ¼ cup of the oil from the skillet. Add the 2 tbsp Unsalted Butter and let it melt over medium heat. Whisk in 2 tablespoons of the reserved seasoned flour from your breading station, creating a roux that will thicken your gravy.
Gradually pour in the 1.5 cups Chicken Broth and 2 cups Whole Milk, whisking constantly to prevent lumps. Simmer for 5-7 minutes until the gravy thickens enough to coat the back of a spoon. Season with the remaining 1 tsp Salt to taste. Serve this creamy gravy generously over the fried chicken.
Pro Tips For Making Cracker Barrel Chicken Fried Chicken
- Pound the Cutlets: Use a meat mallet to pound the chicken breast cutlets to an even 1/4-inch thickness—I learned this the hard way after my first batch cooked unevenly, with burnt edges and raw centers.
- Soak Overnight: Let the chicken soak in the buttermilk for at least 12 hours, or overnight if you can. Sounds weird, but it works: the longer soak makes the meat juicier and helps the coating stick better.
- Double-Dredge Properly: After the buttermilk, dredge in flour, dip back in buttermilk, then back in flour again—make sure each piece is fully coated, especially the edges, or you’ll get bare spots that don’t crisp up.
- Rest Before Frying: Give the dredged cutlets a solid 10 minutes on a wire rack before frying. This lets the coating set, so it doesn’t slide off in the oil—I skip this when I’m lazy, but the crust is noticeably better when I don’t.
Creative Variations of This Recipe
Spicy Nashville Hot
Transform your dish with a Nashville-style kick by adding 2 tbsp cayenne pepper and 1 tbsp brown sugar to your seasoned flour. After frying, drizzle with ¼ cup hot oil infused with 1 tbsp cayenne and 2 tsp hot sauce. I learned this trick from a pitmaster in Charleston.
Herb-Crusted Variation
For a fresher twist, mix 2 tbsp dried thyme and 1 tbsp rosemary into your flour coating. Add 1 tsp lemon zest for brightness. The herbs create a fragrant crust that pairs beautifully with the creamy gravy. I love this for spring gatherings.
Gluten-Free Option
Swap the all-purpose flour for a 1:1 gluten-free blend—I recommend King Arthur’s with xanthan gum. Use cornstarch in your gravy for thickening. The texture stays just as crispy if you let the coated chicken rest for 10 minutes before frying. 🌟
Air Fryer Method
For a lighter take, coat the chicken as usual and cook in batches in a preheated 375°F air fryer for 12-15 minutes, flipping halfway. Spray with oil between flips for extra crispiness. Works great when I’m short on time but craving that crunch.
Double-Crunch Coating
For extra thickness, repeat the egg and flour dredging process a second time. Press crushed cornflakes into the final coating before frying. This creates a shatteringly crisp texture that reminds me of my grandma’s Sunday suppers. 💛
Buttermilk Gravy Swap
Replace the country gravy with a tangy buttermilk version. Use 1 cup buttermilk instead of whole milk in the gravy, and add ½ tsp white pepper for a classic diner touch. The acidity cuts through the richness perfectly.
Nutrition Facts
Frequently Asked Questions
Can I use chicken thighs instead of breasts?
Chicken thighs stay even juicier. Use boneless, skinless thighs and pound to 1/4-inch thickness for even cooking. They may need an extra 1-2 minutes per side to reach 165°F internally.
Why does my coating fall off during frying?
This usually happens if the chicken isn’t dry before dredging or the oil isn’t hot enough. Pat cutlets dry with paper towels first and maintain 350°F oil. Let coated chicken rest for 5-10 minutes before frying too.
How can I keep the chicken crispy longer?
Place fried chicken on a wire rack, not paper towels. This prevents steam from making the crust soggy. If reheating, use a 350°F oven for 10-15 minutes—never the microwave.
Can I make the gravy ahead of time?
Yes, but it thickens as it cools. Store in the fridge for up to 3 days. Reheat over low heat, whisking in a splash of milk to restore the creamy texture.

Trained in classic French technique but raised on slow-cooked ribs and spicy rubs, she blends culinary skill with smoke and soul.
- Recipe for Boneless Pork Chops in Cast Iron Skillet: Sear and Baste to Juicy Perfection - October 3, 2026
- Recipe for Boneless Cross Rib Roast: Slow-Roasted Beef with Herb Crust - October 3, 2026
- Hamburgers in Sauce Recipe Crock Pot: Slow-Cooked Savory Delight - October 3, 2026