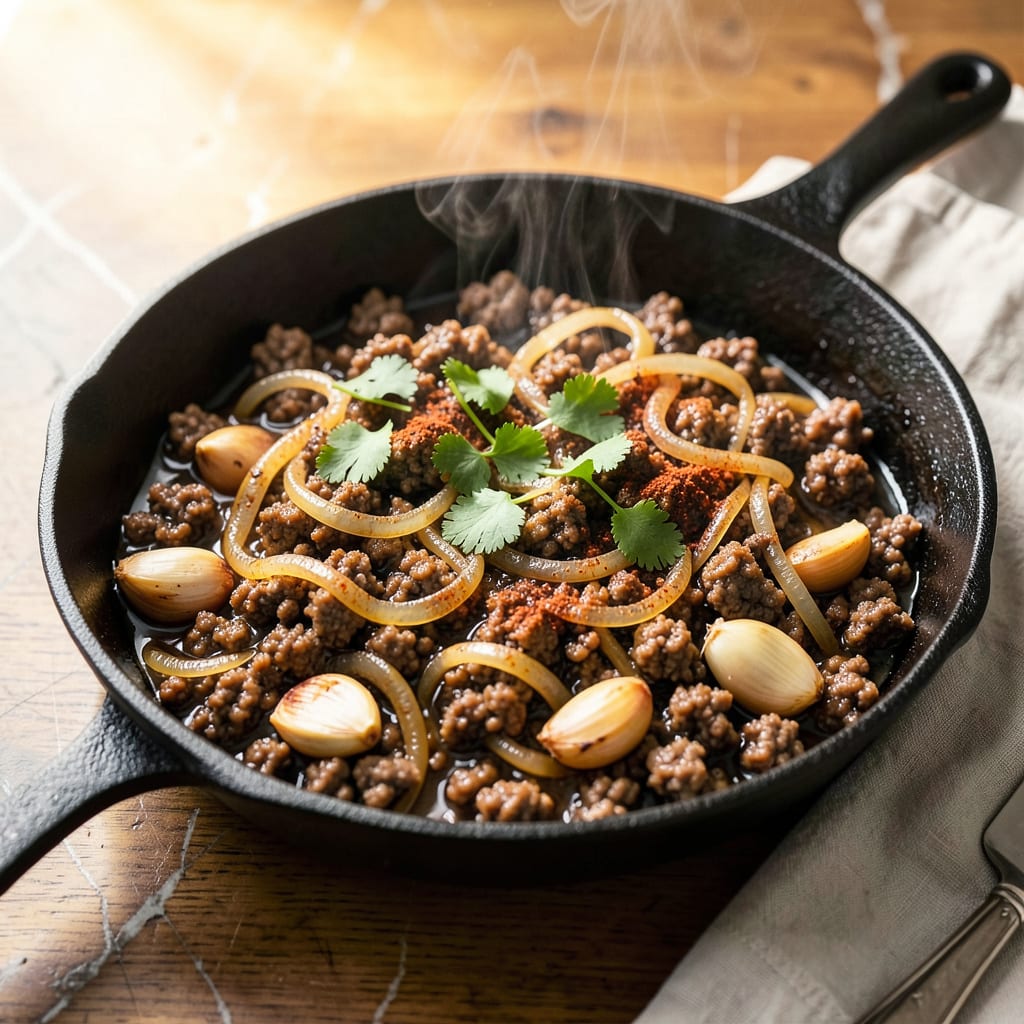
Perfectly seasoned crumbled meat is the foundation for countless meals, from tacos to pasta to breakfast scrambles. This versatile technique transforms simple ground protein into flavorful building blocks that elevate any dish. Whether using beef, turkey, or plant-based alternatives, mastering this method ensures consistent results every time.
The key lies in proper browning and seasoning. Cooking at medium-high heat creates that essential caramelized crust while maintaining juicy tenderness inside. I’ve found that breaking the meat into even pieces as it cooks prevents clumping and ensures uniform texture. A simple salt-pepper base works, but strategic spice blends can transform the same crumbles into Italian, Mexican, or breakfast-style variations.
What makes this technique indispensable is its adaptability. The same batch of seasoned crumbles can become taco filling one night, pasta sauce the next, or breakfast hash the following morning. It’s a time-saving strategy that reduces midweek cooking stress while delivering restaurant-quality flavor. The method works equally well on stovetop or in air fryer for those preferring hands-off cooking.
For vegetarian adaptations, lentils or crumbled tofu absorb flavors beautifully when prepared using the same browning technique. The result maintains the satisfying texture that makes crumbled meat so versatile. This approach to protein preparation changes how you approach meal planning entirely.
📚 In This Guide
- What You’ll Need
- Instructions
- Tips and Common Mistakes
What Youll Need
- ● 1 lb (450g) ground beef (80% lean, 20% fat for best flavor 🥩)
- ● 1 small yellow onion (about ½ cup finely diced)
- ● 3 garlic cloves (minced or pressed)
- ● 1 tbsp olive oil or butter (for sautéing)
- ● 1 tsp salt (adjust to taste)
- ● ½ tsp black pepper (freshly ground preferred)
- ○ 1 tsp smoked paprika (optional, for depth)
- ○ ½ tsp cumin (optional, great for tacos)
- ● Large skillet or frying pan (10-12 inches, non-stick or cast iron)
- ● Wooden spoon or spatula (for breaking up meat)
- ● Cutting board & sharp knife (for prep work)
- ● Measuring spoons (for spices)
- ○ Food processor (optional, for ultra-fine crumbles)
Instructions for Perfectly Crumbled Meat
Mastering the technique for evenly browned, flavorful crumbled meat transforms your everyday cooking.
Select and Prepare Your Ground Meat
Begin by choosing the right fat-to-meat ratio for your application. For tacos or hearty sauces, I recommend 80/20 ground beef—the fat content ensures rich flavor and prevents dryness. For lighter dishes like stuffed peppers, opt for 90/10 lean ground beef or a mixture of beef and turkey.
Remove the meat from packaging and transfer it to a mixing bowl. Break it apart gently with your hands or a fork to separate any compacted portions. This preliminary separation makes the cooking process more efficient and prevents large chunks from forming during browning.
Heat the Cooking Surface Properly
Place a heavy-bottomed skillet or sauté pan over medium-high heat and allow it to preheat for 2-3 minutes until hot. A properly heated pan creates the Maillard reaction essential for developing deep, savory flavors. For best results, I use a cast-iron skillet—its superior heat retention ensures even browning.
Add a thin layer of neutral oil (just enough to coat the bottom) and swirl to distribute. The oil should shimmer but not smoke. This step prevents the meat from sticking while promoting caramelization. Avoid overcrowding the pan—work in batches if necessary to maintain proper temperature.
Brown the Meat in Stages
Add the prepared meat to the hot pan, spreading it into an even layer with a wooden spoon. Resist the urge to stir immediately—let it cook undisturbed for 2-3 minutes until the bottom layer develops a rich brown crust. This initial sear locks in juices and builds fundamental flavor.
Begin breaking the meat apart with your spoon, scraping the bottom to incorporate any browned bits. Continue cooking, stirring occasionally, until the meat is evenly browned with no pink remaining—typically 6-8 minutes total. The texture should resemble coarse crumbles, not fine granules.
Drain and Season Strategically
Once fully cooked, tilt the pan slightly and use a spoon to remove excess fat, leaving about 1 tablespoon for flavor. For leaner results, transfer the meat to a paper towel-lined plate and press gently to absorb remaining fat. The ideal crumbled meat should glisten slightly but not pool in grease.
Return the meat to the pan over low heat and add your seasonings. For Mexican applications, I use a blend of cumin, chili powder, and smoked paprika. For Italian dishes, oregano, basil, and garlic powder work beautifully. Cook for an additional 1-2 minutes to allow the flavors to meld.
Rest and Incorporate
Remove the pan from heat and let the meat rest for 2-3 minutes before using. This brief pause allows the juices to redistribute throughout the crumbles, ensuring maximum flavor in every bite. The meat should appear uniformly browned with visible seasoning distribution.
For immediate use in tacos or nachos, the crumbles are now ready. For sauces or casseroles, you may incorporate them directly into your recipe. The properly cooked meat will maintain its texture when mixed with other ingredients, providing consistent flavor and appearance throughout your dish.
Tips and Common Mistakes for Perfectly Crumbled Meat
Achieving ideal texture and flavor in crumbled meat requires attention to specific techniques that elevate this fundamental cooking process.
Heat Management: The 2-3 minutes of preheating your pan at medium-high heat in Step 2 is non-negotiable for proper browning. I’ve found that cast iron maintains this heat most consistently, but stainless steel works well too. The oil should shimmer but not smoke—this is the visual cue that your pan is at the optimal temperature for creating the Maillard reaction that builds deep, savory flavors.
Browning Technique: When you add the meat in Step 3, resist the instinct to stir immediately. That initial 2-3 minutes of undisturbed cooking creates the flavorful crust that defines properly browned meat. Use a wooden spoon to break apart the meat after this sear—metal utensils can damage your pan’s surface and don’t provide the same control for creating uniform crumbles.
Seasoning Strategy: In Step 4, when you return the meat to low heat for the final 1-2 minutes of seasoning, this isn’t just about adding flavor—it’s about allowing those spices to bloom and meld with the meat’s natural juices. I recommend toasting whole spices briefly before grinding for maximum potency, though pre-ground spices work well in this application.
Texture Control: The 6-8 minutes total cooking time in Step 3 should yield coarse crumbles, not fine granules. If you’re getting powdery results, you’re likely overworking the meat. Use a gentle folding motion with your spoon rather than vigorous stirring, and don’t break apart the meat until after that initial sear has formed.
Pro Tips for Crumble Meat
- Achieving ideal texture and flavor in crumbled meat requires attention to specific techniques that elevate this funda…
- Heat Management: The 2-3 minutes of preheating your pan at medium-high heat in Step 2 is non-negotiable for proper br…
- Browning Technique: When you add the meat in Step 3, resist the instinct to stir immediately. That initial 2-3 minute…
Frequently Asked Questions
Got questions about making the perfect crumble meat? You’re not alone! Here are the most common queries—answered fast so you can get back to cooking.
How do I keep crumble meat from turning into clumps?
Use a wooden spoon or potato masher to break it up while cooking, not after. Start with cold meat straight from the fridge—it crumbles easier than room-temp ground beef. Pro tip: Add a splash of water or broth if it sticks!
Can I use ground turkey or chicken instead of beef?
Absolutely! Lean ground turkey or chicken works great, but add 1 tbsp oil to the pan first (they’re drier than beef). Season well—poultry needs more herbs/spices to match beef’s rich flavor.
How long does crumble meat last in the fridge or freezer?
Fridge: 3–4 days in an airtight container. Freezer: 3 months (label with the date!). Reheat frozen meat directly from frozen in a skillet with a splash of water to prevent dryness.
Why is my crumble meat soggy or greasy?
Two fixes: Drain excess fat after browning (use a colander or tilt the pan). For sogginess, cook on medium-high heat to evaporate moisture—don’t cover the pan! Pat dry any veggies (like onions) before adding.
What’s the best way to season crumble meat for tacos vs. pasta?
Tacos: Cumin, chili powder, garlic, and smoked paprika. Pasta: Italian seasoning, fennel seeds, and a pinch of red pepper flakes. Secret weapon: Add seasoning mid-cook (not at the end) for deeper flavor!
Now that you’ve mastered the art of crumble meat, the kitchen is your playground! 🎉 Whether you’re whipping up taco night, layering it into lasagna, or prepping meal-prep bowls, perfectly seasoned ground beef is your secret weapon for quick, flavorful dishes. The best part? This versatile base adapts to any cuisine—so don’t stop here!
Ready to level up? Try swapping proteins (turkey or plant-based crumbles work great!) or experiment with global spices. Your next culinary adventure starts with a single skillet—happy cooking! 🍳

Trained in classic French technique but raised on slow-cooked ribs and spicy rubs, she blends culinary skill with smoke and soul.
- Recipe for Boneless Pork Chops in Cast Iron Skillet: Sear and Baste to Juicy Perfection - October 3, 2026
- Recipe for Boneless Cross Rib Roast: Slow-Roasted Beef with Herb Crust - October 3, 2026
- Hamburgers in Sauce Recipe Crock Pot: Slow-Cooked Savory Delight - October 3, 2026