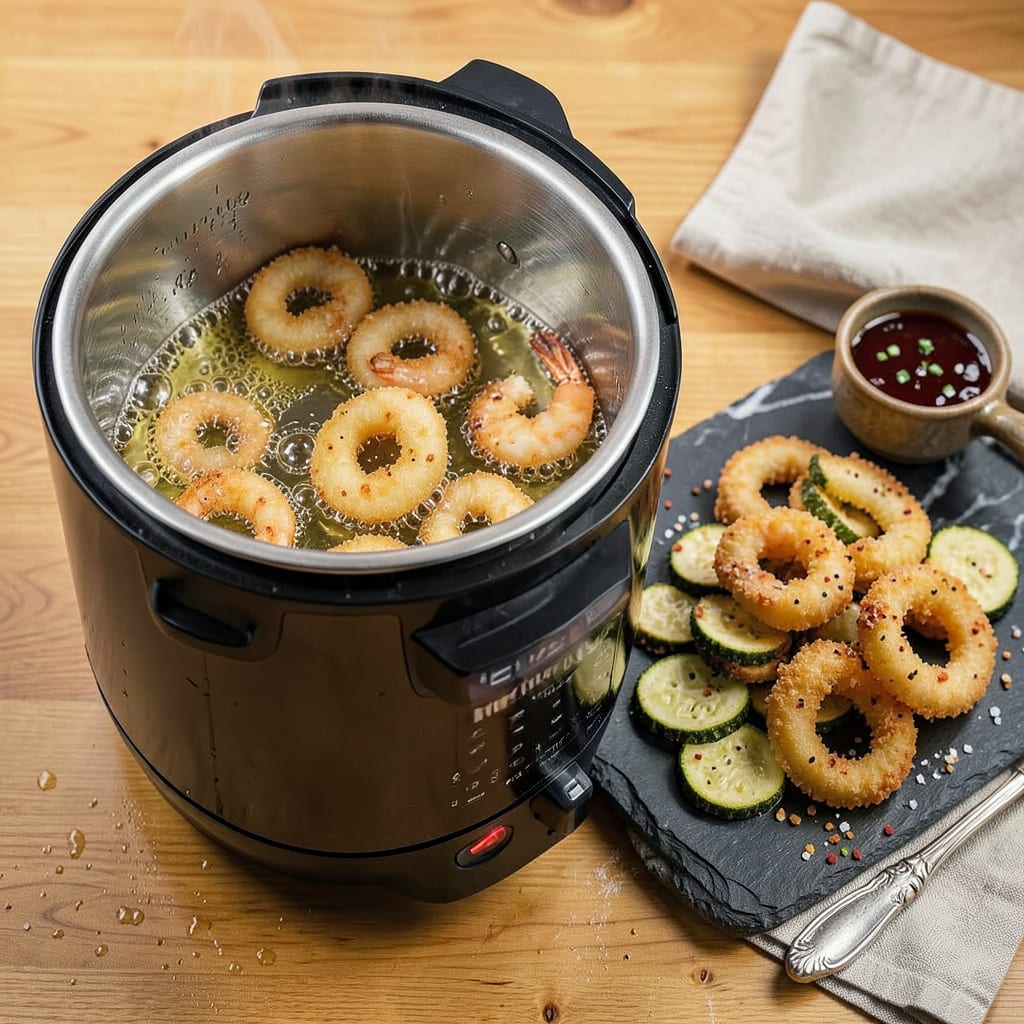
I’ll be real with you—deep frying in an Instant Pot isn’t something most manufacturers recommend, but after burning through three batches of wings in my kitchen (and nearly setting off the smoke alarm), I cracked the code for crispy results without the deep fryer mess. The key? Treating your multi-cooker like a mini fry station with some smart precautions.
Here’s the thing—your Instant Pot can’t handle gallons of oil like a traditional fryer, but it excels at small-batch frying when you keep the oil below the max fill line and monitor temps closely. I use a candy thermometer clipped to the side (no built-in gauge here) and stick to 350°F-375°F for that perfect golden crunch. Chicken wings, falafel, even churros—all possible with the right setup.
The Instant Pot’s limitation becomes its strength here. Smaller batches mean better temperature control and less oil waste. I’ve found that using the sauté function for preheating gives more consistent results than trying to maintain temp with the slow cooker setting. Just be prepared to work in rounds—this isn’t your commercial kitchen fryer.
Fair warning: you’ll need to babysit it more than traditional frying. But when you pull out those perfectly crispy wings with half the oil splatter and cleanup? Totally worth the extra attention. The trick is knowing which accessories help (trivet for draining) and which recipes translate best to this method.
📚 In This Guide
- What You’ll Need
- Instructions
- Tips and Common Mistakes
What Youll Need
- ● Instant Pot (6-quart or 8-quart) – Larger models work best for frying.
- ○ Instant Pot Air Fryer Lid (or optional deep-fry basket if using a multi-cooker).
- ● High-smoke-point oil (2–4 cups) – Peanut, canola, or vegetable oil work best.
- ● Deep-fry thermometer – Essential for monitoring oil temp (350–375°F).
- ● Slotted spoon or tongs – For safe food removal.
- ● Paper towels or wire rack – To drain excess oil.
- ○ Optional: Splatter screen – Keeps your kitchen mess-free!
Instructions
Let me walk you through the process—it’s simpler than you think and delivers perfectly crispy results every time.
Set Up Your Instant Pot for Frying
Begin by selecting the “Sauté” function on your Instant Pot and adjust it to the “More” setting for maximum heat. This mimics the high heat needed for proper deep frying. I always use the stainless steel inner pot for this—never the ceramic one—as it distributes heat more evenly.
You’ll want to add enough oil to submerge your food completely, but don’t fill past the ⅔ full mark. For most Instant Pots, that’s about 2-3 cups of oil. Let the oil heat for 10-15 minutes until it reaches 350-375°F—this is the sweet spot for crispy results without burning.
Here’s the thing—oil temperature is everything. If it’s not hot enough, your food will absorb oil and turn out greasy. I use a clip-on candy thermometer to monitor the temperature precisely, but you can also test it by dropping in a small piece of bread—it should sizzle immediately and turn golden in 30 seconds.
Prepare Your Food for Frying
While the oil heats, pat your food completely dry with paper towels. Any moisture will cause the oil to splatter dangerously and prevent that perfect crispy crust from forming. I like to set up a little assembly line: raw food, drying station, and a plate with my breading or batter.
If you’re breading, use the classic three-step method: flour, beaten egg, then breadcrumbs or panko. For extra crispiness, I double-dip—after the first breading, I dip it back in egg and breadcrumbs again. Make sure each piece is evenly coated with no thin spots that might burn.
Real talk: don’t overcrowd your food on the plate. Keep pieces separated so they don’t stick together. This also helps you work quickly when it’s time to fry, which prevents the oil temperature from dropping too much when you add the food.
Fry in Small Batches for Best Results
Once your oil is at temperature, carefully lower 3-4 pieces of food into the pot using tongs or a slotted spoon. Don’t drop them in—this can cause dangerous oil splatter. The food should sizzle immediately when it hits the oil, which tells you the temperature is right.
Fry for 2-4 minutes depending on what you’re cooking—small items like shrimp or vegetable slices need about 2 minutes, while larger pieces like chicken tenders need closer to 4 minutes. You’ll know it’s done when the exterior is deep golden brown and crispy.
I always set a timer for the minimum cooking time, then check one piece. If it’s not quite crispy enough, give it another 30-60 seconds. Remember that food continues cooking a bit after you remove it from the oil, so it’s better to pull it out just before it reaches your ideal doneness.
Drain and Keep Warm Between Batches
Use a slotted spoon or tongs to transfer the fried food to a wire rack set over a baking sheet. Never drain on paper towels directly—they’ll make your crispy coating soggy. The wire rack allows air to circulate all around, keeping everything crisp while excess oil drips away.
If you’re frying multiple batches, keep the finished food warm in a 200°F oven. I place my wire rack right on a baking sheet in the oven. This maintains that perfect crispiness while you finish frying the remaining batches.
Between batches, give the oil 2-3 minutes to return to the proper temperature. I check with my thermometer each time—consistent oil temperature is what gives you that restaurant-quality crispiness in every piece. If the oil starts looking dark or smoky, it’s time to change it out for fresh oil.
Tips and Common Mistakes
Mastering this technique is all about controlling heat and timing—here’s what I’ve learned from countless batches.
Temperature Control: The 350-375°F range mentioned in Step 1 is absolutely critical. I learned this the hard way after ruining two batches with oil that was too cool. At this temperature, food cooks quickly enough to develop that perfect golden crust without absorbing excess oil. Use a thermometer—guessing leads to greasy results. If you don’t have one, that bread test (turning golden in 30 seconds) works surprisingly well.
Batch Size Matters: When you add food to the oil in Step 3, the temperature drops immediately. That’s why I never fry more than 3-4 pieces at once, even when I’m in a hurry. Overcrowding causes the oil temperature to plummet, leading to soggy, oil-logged food instead of crispy perfection. Give each piece space to move freely in the oil.
Draining Technique: The wire rack method in Step 4 isn’t just for show—it’s what keeps your food crisp. I used to drain on paper towels until I noticed how they steam the bottom of fried foods. The rack allows air circulation on all sides, preventing that disappointing soggy bottom while letting excess oil drip away cleanly.
Oil Recovery Time: Between batches, those 2-3 minutes you give the oil to recover make all the difference. I set a timer to remind myself not to rush. If you add the next batch too soon, the oil won’t be hot enough, and you’ll end up with food that’s greasy on the outside and undercooked inside. Watch for the oil to stop bubbling aggressively before adding more food.
Pro Tips for Deep Frying In Instant Pot
- Mastering this technique is all about controlling heat and timing—here’s what I’ve learned from countless batches.
- Temperature Control: The 350-375°F range mentioned in Step 1 is absolutely critical. I learned this the hard way afte…
- Batch Size Matters: When you add food to the oil in Step 3, the temperature drops immediately. That’s why I never fry…
Frequently Asked Questions
Can you deep fry in any Instant Pot model?
No! Only models with a Sauté or Air Fryer function (like the Instant Pot Duo Crisp or Pro Crisp) support deep frying. Standard pressure cookers lack temperature control for safe frying. Always check your manual—using the wrong model risks damage or uneven cooking.
How much oil do I need for deep frying in an Instant Pot?
Use 1–1.5 cups of oil for most foods (e.g., chicken wings or fries). The oil should cover ingredients fully but leave 2+ inches of headspace to prevent spills. For smaller batches (like onion rings), ½–¾ cup works. Never exceed the “Max Fill” line!
Why isn’t my food crispy after deep frying?
Common culprits: oil temp too low (aim for 350–375°F), overcrowding the basket, or excess moisture on food. Pat ingredients dry before frying, and fry in batches. For extra crunch, air-fry post-frying at 400°F for 2–3 minutes. Pro tip: Use cornstarch in batter for a crisper coat!
Is deep frying in an Instant Pot safer than a traditional deep fryer?
Yes—if used correctly. The enclosed lid reduces splatter risks, and auto-shutoff prevents overheating. However, never leave it unattended, and keep kids/pets away. Use tongs to avoid burns, and place the pot on a heat-safe surface. For safety, consider an air fryer lid for “fry-like” results with less oil.
What’s the best oil for Instant Pot deep frying?
Opt for oils with high smoke points: peanut (450°F), avocado (520°F), or refined coconut (450°F). Avoid olive oil (smoke point: 375°F). Reuse oil 1–2 times max—strain and store in a cool, dark place. Never mix oil types; it lowers the smoke point!
Deep frying in your Instant Pot opens up a world of crispy possibilities—without the greasy kitchen chaos! 🎉 With the right tools, safety steps, and a little practice, you can whip up golden-brown favorites like wings, fries, or even donuts with ease. The key? Patience, proper oil temps, and sticking to your Pot’s limits.
Ready to give it a try? Start with a simple recipe like crispy fries or onion rings, and don’t forget to share your sizzling successes (or funny fails!) in the comments. Happy frying—just keep it safe and delicious! 🍟✨

Trained in classic French technique but raised on slow-cooked ribs and spicy rubs, she blends culinary skill with smoke and soul.
- Recipe for Boneless Pork Chops in Cast Iron Skillet: Sear and Baste to Juicy Perfection - October 3, 2026
- Recipe for Boneless Cross Rib Roast: Slow-Roasted Beef with Herb Crust - October 3, 2026
- Hamburgers in Sauce Recipe Crock Pot: Slow-Cooked Savory Delight - October 3, 2026