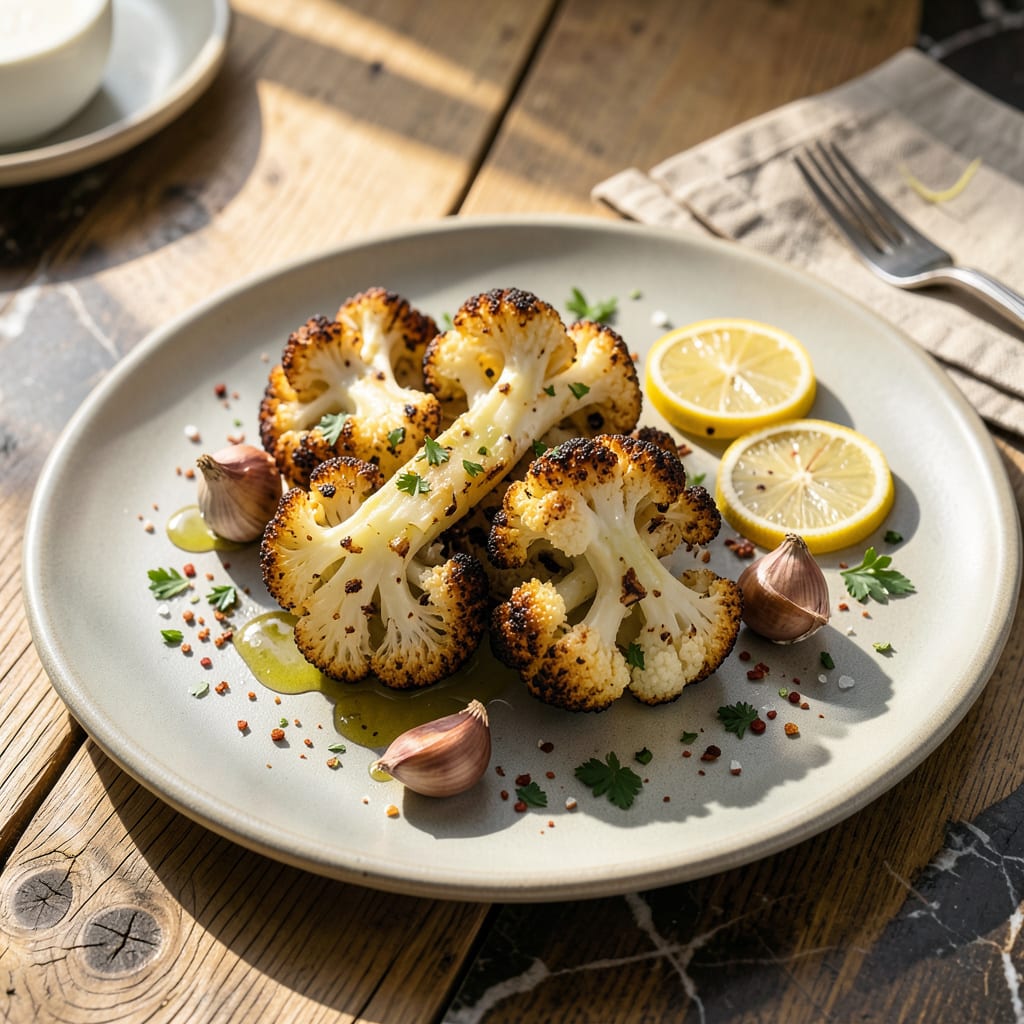
I’ll be real with you—frozen cauliflower doesn’t have to mean mushy, sad side dishes. After burning through more bags of freezer-burnt florets than I’d like to admit, I finally cracked the code for turning them into crispy, golden roasted bites that actually taste good. No thawing required, no fancy ingredients—just straight-up deliciousness in 20 minutes flat.
Here’s the thing—your oven is the secret weapon. Crank it up high (we’re talking 425°F) and give those frozen florets space to breathe on the baking sheet. A quick toss with olive oil and whatever seasonings you’ve got (I’m partial to smoked paprika and garlic powder) transforms them from icy to irresistibly crispy. The high heat blasts away moisture while creating those caramelized edges we all love.
What comes out of the oven will surprise you: cauliflower with actual texture—crispy tips, tender centers, and a flavor that makes you forget it came from the freezer aisle. I’ve served these to skeptical friends who asked for seconds, no joke. They’re that good. Whether you’re meal prepping or need a last-minute side, this method delivers.
Fair warning: once you try this, you’ll never microwave frozen cauliflower again. Toss it with hot sauce for buffalo-style bites, sprinkle with nutritional yeast for cheesy flavor, or just eat straight off the pan. The possibilities are endless, and the cleanup is minimal. Let’s get roasting.
📚 In This Guide
- What You’ll Need
- Instructions
- Tips and Common Mistakes
What Youll Need
- ● 1 bag (16 oz / 450g) frozen cauliflower florets – No need to thaw! (Check for pre-cut or whole florets based on preference.)
- ● 2 tbsp olive oil or melted coconut oil – For that crispy, caramelized edge. 😉
- ● ½ tsp salt – Adjust to taste (or try smoked salt for extra flavor!).
- ● ½ tsp garlic powder – A must for savory depth.
- ● ¼ tsp black pepper – Freshly ground is best!
- ○ ½ tsp paprika or cayenne (optional) – For a spicy kick or smoky touch.
- ○ 1 tbsp grated Parmesan or nutritional yeast (optional) – Adds a cheesy, umami boost.
- ● Large mixing bowl – For tossing the florets evenly.
- ● Baking sheet – Rimmed (to prevent rolling!) + parchment paper or silicone mat for easy cleanup.
- ● Oven – Preheated to 425°F (220°C) (convection works even better!).
- ● Tongs or spatula – For flipping halfway through.
- ● Measuring spoons – Precision matters for seasoning!
Instructions
Transforming frozen cauliflower into crispy oven-roasted perfection is easier than you think—here’s how to do it right.
Preheat and Prepare for Maximum Crispiness
Start by preheating your oven to 425°F and positioning the rack in the upper third of the oven. This high heat and top placement are crucial for achieving that golden-brown crispiness we’re after. While the oven heats, line a large baking sheet with parchment paper—this prevents sticking and makes cleanup a breeze.
There’s no need to thaw the frozen cauliflower florets. In fact, keeping them frozen helps create steam inside each piece, which contributes to that perfect crispy exterior once they hit the hot oven. Just make sure to use a full-size baking sheet to give the florets enough space to roast rather than steam.
Season Generously for Bold Flavor
Spread the frozen cauliflower florets in a single layer on your prepared baking sheet. The key here is not to overcrowd—each piece should have its own space to crisp up. Drizzle lightly with olive oil, just enough to coat but not soak the florets. I find that about 1-2 tablespoons is perfect for a standard baking sheet.
Now season aggressively with salt and pepper—don’t be shy. The high heat will mellow the saltiness, and you want every bite to be flavorful. Add any other seasonings you love at this point: garlic powder, smoked paprika, or a pinch of cayenne all work beautifully. Toss everything together with your hands to ensure even coating, then spread the florets back into a single layer.
Roast Undisturbed for Even Browning
Place the baking sheet in your preheated oven and roast for 15 minutes without stirring. This undisturbed time allows the florets to develop a deep golden crust on one side. You’ll start to smell that wonderful roasting aroma—this is your signal that the magic is happening.
After the initial 15 minutes, carefully remove the baking sheet and use a spatula to flip the florets. Don’t worry if some of the smaller pieces are already deeply browned—that’s exactly what we want. Return the sheet to the oven and roast for another 5-10 minutes, keeping a close eye on them during this final stretch.
Check for Perfect Doneness
Your cauliflower is ready when the edges are deep golden brown and crispy, while the stems are tender when pierced with a fork. The florets should have shrunk slightly and developed those beautiful caramelized spots that indicate maximum flavor development.
If you notice some pieces browning faster than others, simply remove those early and let the rest continue cooking. Remember that carryover heat will continue crisping them slightly even after you take them out of the oven. Let them cool for just 2-3 minutes on the baking sheet before serving—they’re best enjoyed hot and crispy!
Serve Immediately for Best Texture
Transfer the roasted cauliflower to a serving platter while it’s still hot. The contrast between the crispy edges and tender centers is at its peak right out of the oven. I love serving these with a squeeze of lemon juice or a sprinkle of fresh herbs to brighten up the rich, caramelized flavors.
These roasted florets make a fantastic side dish, but they’re also delicious as a snack or even tossed into salads for added crunch. If you happen to have leftovers (though they rarely last long), store them in an airtight container in the fridge for up to 3 days. To revive the crispiness, simply reheat in a 400°F oven for 5-7 minutes.
Tips and Common Mistakes
Getting that perfect crispy texture from frozen cauliflower is all about understanding how heat and moisture work together. Here’s what I’ve learned from making this dozens of times.
Heat Distribution: The 425°F temperature in Step 1 isn’t arbitrary—it’s the sweet spot where cauliflower caramelizes quickly without drying out. Positioning the rack in the upper third of the oven, as specified, ensures direct heat exposure for maximum crispiness. I’ve found that even moving the rack one position lower can result in softer, less crispy florets because they’re not getting that intense top-down heat.
The Frozen Advantage: Don’t be tempted to thaw your cauliflower before roasting. The frozen florets create internal steam when they hit the hot oven, which actually helps develop that crispy exterior we want. This steam bursts through the surface as it escapes, creating all those beautiful nooks and crannies that get perfectly browned. Just be sure to spread them in a single layer as mentioned in Step 2—crowding will make them steam rather than roast.
Timing Precision: Those 15 minutes of undisturbed roasting in Step 3 are crucial. This is when the first side develops that deep golden crust. When you flip them after the initial 15 minutes, you’re not just browning the other side—you’re also allowing any remaining moisture to escape. The final 5-10 minutes are when you need to watch closely, as the edges can go from perfectly crispy to burnt quickly at this high temperature.
Visual Doneness Cues: The instructions mention looking for “deep golden brown” edges, and this is exactly what you want. The florets should have shrunk by about 20-25% from their original size, and when you pierce the stem with a fork, it should go in easily but you should feel some resistance from the crispy exterior. Some of the smaller pieces might look almost charred—that’s perfect! Those crispy bits are the most flavorful.
Pro Tips for Diepvries Bloemkool Oven
- Getting that perfect crispy texture from frozen cauliflower is all about understanding how heat and moisture work tog…
- Heat Distribution: The 425°F temperature in Step 1 isn’t arbitrary—it’s the sweet spot where cauliflower caramelizes …
- The Frozen Advantage: Don’t be tempted to thaw your cauliflower before roasting. The frozen florets create internal s…
Frequently Asked Questions
Can I roast frozen cauliflower without thawing it first?
Roasting diepvries bloemkool straight from the freezer actually helps retain texture. Just toss it with oil and seasonings while still frozen, then add 5-10 extra minutes to the baking time. No soggy results—just crispy edges!
How long does frozen cauliflower take to cook in the oven at 400°F (200°C)?
At 400°F (200°C), frozen cauliflower florets typically need 20-25 minutes, flipping halfway. For extra crispiness, broil for 2-3 minutes at the end. Larger pieces? Extend time by 5 minutes and check for doneness with a fork.
Why is my roasted frozen cauliflower mushy instead of crispy?
Mushy cauliflower usually means too much moisture or overcrowding. Pat florets dry before seasoning, space them evenly on the tray, and avoid covering with foil. A hotter oven (425°F/220°C) and a light cornstarch dusting can also help!
What are the best seasonings for oven-roasted frozen cauliflower?
Classic combos include garlic powder + paprika + salt or turmeric + cumin for a golden hue. For cheesy flavor, sprinkle nutritional yeast or Parmesan in the last 5 minutes. Pro tip: A dash of lemon zest post-roasting brightens the dish!
Can I air-fry frozen cauliflower instead of using the oven?
Yes! Air-fry at 375°F (190°C) for 10-12 minutes, shaking the basket halfway. It’s faster and yields ultra-crispy results. For smaller batches, reduce time by 2 minutes. Just don’t overfill the basket—single-layer only for even cooking!
Roasting frozen cauliflower in the oven is the easiest way to turn a humble freezer staple into a crispy, flavor-packed side dish in just 20 minutes! 🌟 With minimal prep and endless seasoning options, it’s a foolproof way to add veggies to any meal—no thawing required. Whether you’re meal prepping or whipping up a last-minute dinner, this method delivers restaurant-quality results with almost zero effort.
Ready to give it a try? Grab a bag of frozen cauliflower and experiment with your favorite spices—smoky paprika, garlicky parmesan, or zesty lemon pepper are all fantastic starting points. Once you’ve mastered the basics, why not pair it with a protein-packed main or toss it into a grain bowl for a complete meal? Happy roasting! 🍽️

Trained in classic French technique but raised on slow-cooked ribs and spicy rubs, she blends culinary skill with smoke and soul.
- Recipe for Boneless Pork Chops in Cast Iron Skillet: Sear and Baste to Juicy Perfection - October 3, 2026
- Recipe for Boneless Cross Rib Roast: Slow-Roasted Beef with Herb Crust - October 3, 2026
- Hamburgers in Sauce Recipe Crock Pot: Slow-Cooked Savory Delight - October 3, 2026