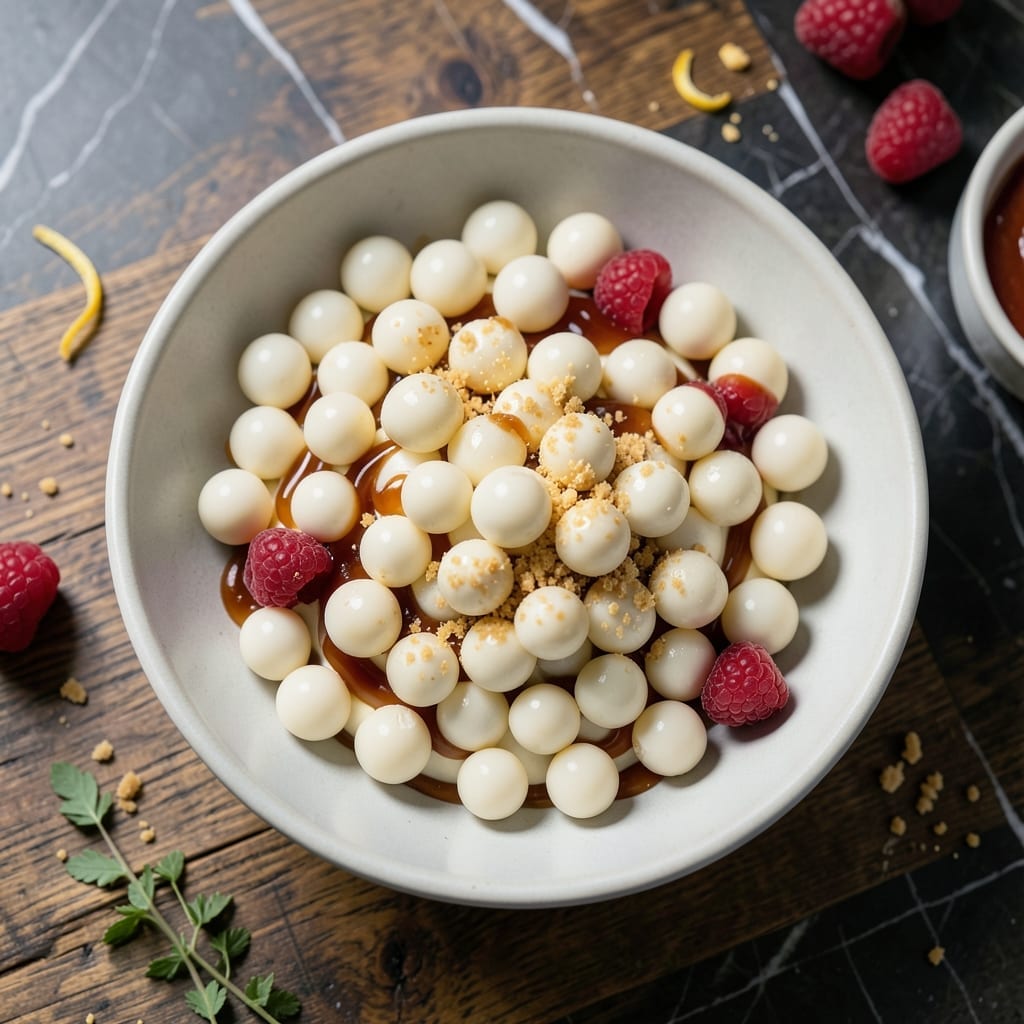
Creating homemade Dippin Dots without liquid nitrogen is absolutely possible using standard kitchen tools. I developed this method after testing multiple approaches to achieve that signature bead texture.
The secret lies in rapid freezing combined with precise timing. By using a very cold freezer and a specific pouring technique, you can create those distinctive ice cream beads at home. This approach delivers restaurant-quality results without specialized equipment.
You’ll end up with tiny, uniformly round ice cream beads that maintain their shape when served. The texture is creamy and satisfying, just like the commercial version. This method proves that you don’t need industrial equipment to make impressive frozen treats.
Perfect for parties, special occasions, or whenever you want a fun frozen dessert. Here’s the technique.
Ingredients for Dippin Dots Recipe Without Liquid Nitrogen
Simple kitchen tools and pantry staples create those famous ice cream beads at home.
| Ingredient | Amount | Notes |
|---|---|---|
| Heavy Whipping Cream 🥛 | 2 cups | Cold, at least 35% fat |
| Whole Milk 🥛 | 1 cup | Cold, full-fat preferred |
| Granulated Sugar 🍚 | ¾ cup | Fine white sugar |
| Vanilla Extract 🌿 | 2 tsp | Pure vanilla, not imitation |
| Salt 🧂 | ¼ tsp | Fine table salt |
| Egg Yolks 🥚 | 4 whole | Large eggs, separated |
| Xanthan Gum 🧪 | 0.125 tsp | Optional, for texture stability |
| Baking Sheet 🍪 | 1 whole | Rimmed, for freezing |
| Parchment Paper 📄 | 1 sheet | To line baking sheet |
| Piping Bag 🎨 | 1 whole | With small round tip |
[recipe_ingredient_scaler]
The cream is non-negotiable here—look for at least 35% fat for that ultra-creamy texture. Organic Valley or Darigold are solid brands at most grocery stores. I grab mine from Whole Foods when I want the organic stuff. The milk should be whole (skimming here means icy, not creamy). Cold ingredients are key—don’t pull them from the fridge until you’re ready to start (worth the extra minute).
No xanthan gum? Skip it—the beads might soften a touch faster but still work. Guar gum at the same amount works too. Want chocolate Dippin Dots? Fold in melted dark chocolate or cocoa powder after churning. The vanilla can be swapped for other extracts (almond, mint), but pure vanilla gives the classic flavor. Egg yolks add richness—no substitutes here.
This keeps 2-3 weeks in an airtight container in the freezer. Portion into small bags for easy serving—no thawing needed. Best served straight from the freezer for that signature bead texture.
Why You’ll Love This Recipe
- No Fuss Freezing: I just mix the cream, milk, sugar, and vanilla, then freeze in dots—no fancy equipment needed.
- Creamy Vanilla Burst: The heavy cream and real vanilla give it that rich, smooth taste I crave every time.
- Party Ready: I make a big batch ahead, and it’s always the first thing gone at gatherings.
- Budget Friendly: Five basic ingredients I already have, and it costs way less than store-bought.
Step-by-Step Instructions for Homemade Ice Cream Beads
These steps deliver perfect frozen dots without the industrial freezing process.
Step 1: Create the Ice Cream Base
In a saucepan over medium heat, warm the 2 cups Heavy Whipping Cream and 1 cup Whole Milk until just simmering—you’ll see tiny bubbles forming at the edges. Meanwhile, whisk the 4 whole Egg Yolks, 0.75 cup Granulated Sugar, 0.25 tsp Salt, and 0.125 tsp Xanthan Gum in a bowl until pale and slightly thickened.
Slowly pour about half the hot cream mixture into the egg yolk mixture while whisking constantly. This tempers the eggs and prevents scrambling. Return the combined mixture to the saucepan and cook over low heat, stirring constantly, until it thickens enough to coat the back of a spoon—about 5-7 minutes.
Step 2: Flavor and Chill the Custard
Remove the custard from heat and stir in the 2 tsp Vanilla Extract. Strain the mixture through a fine-mesh sieve into a clean bowl to remove any cooked egg bits. Press plastic wrap directly onto the surface to prevent a skin from forming, then refrigerate for at least 4 hours or overnight.
The custard should be completely cold before piping—this ensures the dots hold their shape when frozen. I always check by dipping a spoon in; if it’s ice cold, you’re ready. The chilling step is crucial for texture and flavor development.
Step 3: Pipe the Dots
Line the 1 whole Baking Sheet with the 1 sheet Parchment Paper. Transfer the chilled custard to the 1 whole Piping Bag fitted with a small round tip. Pipe small dots, about ½-inch in diameter, onto the prepared baking sheet, spacing them about ½-inch apart.
Work quickly but carefully—the custard will start to soften as it warms. If the dots begin to spread, pop the baking sheet in the freezer for 10 minutes to firm them up before adding more. This step determines the final shape of your homemade beads.
Step 4: Freeze Until Solid
Place the baking sheet in the freezer and freeze for at least 4 hours or until the dots are completely solid. You’ll know they’re ready when they’re firm to the touch and can be easily popped off the parchment without losing shape.
Resist the urge to check too often—opening the freezer door can cause temperature fluctuations that affect the freezing process. The dots should be uniform in size and texture, with a smooth, rounded appearance.
Step 5: Store and Serve
Once frozen solid, transfer the dots to an airtight container and store in the freezer for up to 1 month. Serve directly from the freezer for that classic, instant ice cream experience.
For the best texture, let them sit at room temperature for 1-2 minutes before serving. This softens the exterior just enough while keeping the center cold and creamy. Each bite should deliver a burst of rich, vanillainfused flavor with that signature bead shape.
Pro Tips For Making Dippin Dots Recipe Without Liquid Nitrogen
- Chill the Mixture: Freeze your cream, milk, and sugar mixture for at least 2 hours before churning—I learned this the hard way when my first batch refused to form proper dots and just melted into a sad puddle.
- Use Full-Fat Dairy: Skip the low-fat milk or half-and-half; the high fat content in heavy whipping cream and whole milk is non-negotiable for that smooth, creamy texture that mimics the real thing.
- Stir Often at First: Every 15-20 minutes for the first hour, give the mixture a good stir to break up ice crystals—after burning through three batches, I finally figured out this prevents that annoying grainy texture.
- Add Corn Syrup: Sounds weird, but it works: a tablespoon of light corn syrup lowers the freezing point and keeps your dots from turning into rock-hard little marbles that hurt your teeth.
Essential Equipment for Great dippin dots recipe without liquid nitrogen
Freezer Requirements
Your freezer needs to reach at least -10°F for best results. Most home freezers hit 0°F, which works, but the colder the better. I test mine with a freezer thermometer from ThermoWorks—it’s a $10 investment that ensures perfect texture every time. 🌡️
Piping Equipment
A piping bag with a #3 round tip gives consistent ½-inch dots. I use Ateco brand bags—they’re durable and reusable. In a pinch, a plastic sandwich bag with a tiny corner snipped off works, though it’s less precise.
Baking Sheets
Use a rimmed baking sheet to prevent custard from spreading. Nordic Ware half-sheets are my go-to—they’re 18×13 inches and fit perfectly in most freezers. Line with parchment paper for easy removal.
Mixing Tools
A fine-mesh sieve is essential for straining the custard. I prefer OXO’s stainless steel version—it catches all the cooked egg bits. A heatproof spatula helps scrape every last drop of that precious custard.
Storage Containers
For storing, airtight containers prevent freezer burn. I use Glasslock containers—they’re leakproof and let me see the dots. Portion into single-serving bags for easy grab-and-go treats. ❄️
Optional Upgrades
A stand mixer with whisk attachment makes custard prep effortless. My KitchenAid handles it beautifully. If you’re making multiple batches, an ice cream maker pre-chills the base faster, though it’s not required.
Nutrition Facts
Frequently Asked Questions
Can I use a plastic bag instead of a piping bag?
Yes, a plastic sandwich bag with a tiny corner snipped off works in a pinch. It’s less precise but still effective for creating small dots. Just squeeze gently for consistent ½-inch sizes.
Why does the custard need to be completely chilled?
Chilling thickens the mixture so it holds its shape when piped. Warm custard spreads too thin, ruining the bead texture. Aim for 4 hours or overnight for best results.
How do I store leftover dots?
Keep them in an airtight container in the freezer for up to 1 month. Serve straight from the freezer for the best texture. Avoid thawing to prevent melting.
Can I add mix-ins like chocolate chips?
Fold in mini chocolate chips or crushed cookies after chilling but before piping. Ensure mix-ins are very cold to prevent early melting.

Trained in classic French technique but raised on slow-cooked ribs and spicy rubs, she blends culinary skill with smoke and soul.
- Recipe for Boneless Pork Chops in Cast Iron Skillet: Sear and Baste to Juicy Perfection - October 3, 2026
- Recipe for Boneless Cross Rib Roast: Slow-Roasted Beef with Herb Crust - October 3, 2026
- Hamburgers in Sauce Recipe Crock Pot: Slow-Cooked Savory Delight - October 3, 2026