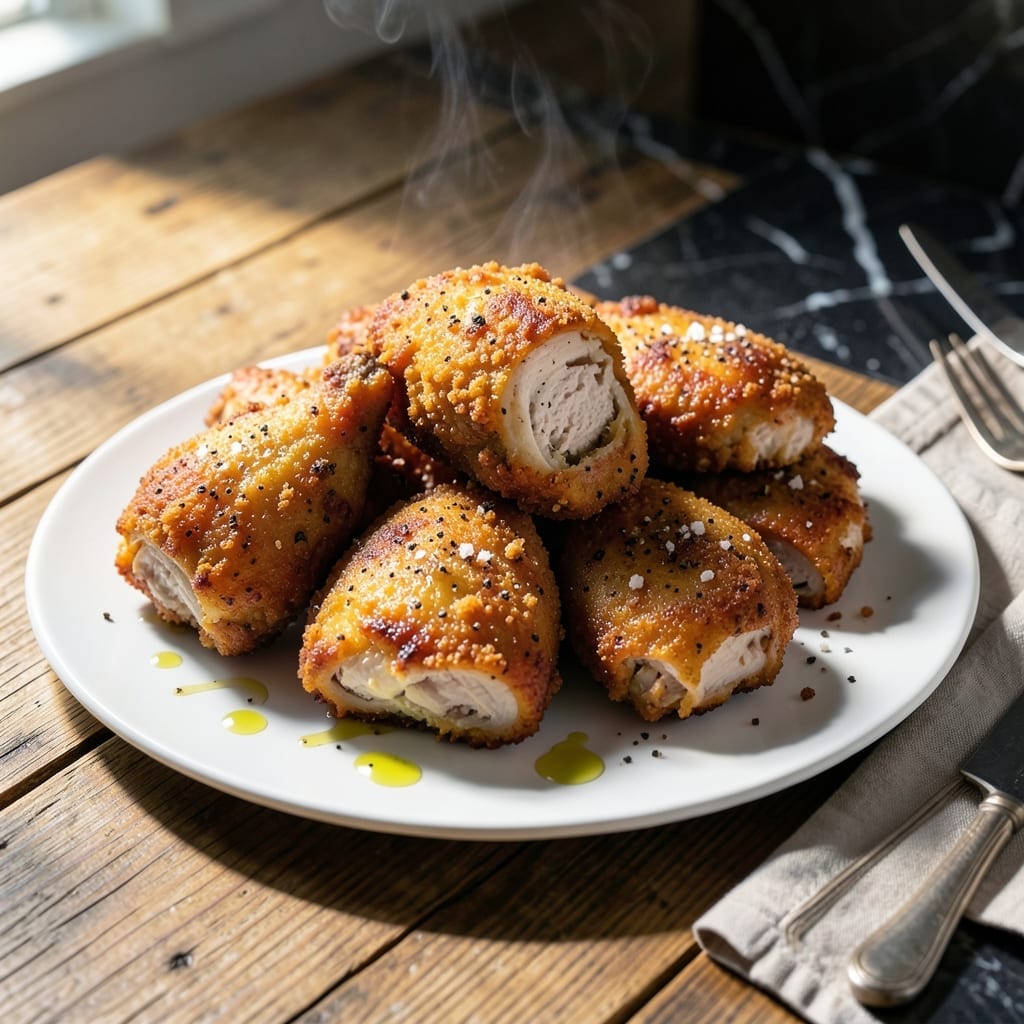
This straightforward method delivers crispy, golden fried chicken with a simple flour and egg coating. No complicated steps—just reliable results.
I developed this after years of testing, ensuring it works in any home kitchen. The egg acts as the perfect binder for the flour, creating a coating that stays put during frying.
The result is juicy chicken with a shatteringly crunchy exterior. Each bite offers that classic fried chicken experience without the fuss of buttermilk or multiple dredges.
Serve hot for the best texture. This recipe proves great fried chicken doesn’t require a long ingredient list or advanced techniques.
Ingredients for Easy Fried Chicken Recipe with Flour and Egg
Simple pantry staples and fresh chicken create that shatteringly crispy, golden exterior with minimal effort.
| Ingredient | Amount | Notes |
|---|---|---|
| Chicken Thighs 🍗 | 2 lb | Boneless, skinless, patted dry |
| Chicken Breasts 🍗 | 1 lb | Boneless, skinless, pounded even |
| All-Purpose Flour 🌾 | 2 cups | For dredging and crispy coating |
| Large Eggs 🥚 | 2 whole | Beaten for binding flour |
| Kosher Salt 🧂 | 1 ½ tbsp | Diamond Crystal preferred for seasoning |
| Freshly Ground Black Pepper 🌶️ | 1 tsp | Coarse grind for texture |
| Garlic Powder 🧄 | 1 tsp | For savory depth in coating |
| Onion Powder 🧅 | 1 tsp | Balances seasoning blend |
| Paprika 🌶️ | 1 tbsp | Sweet or smoked for color |
| Vegetable Oil 🫒 | 4 cups | For frying, high smoke point |
| Buttermilk 🥛 | ½ cup | Optional for extra tang |
| Cayenne Pepper 🔥 | ¼ tsp | Optional for heat adjustment |
[recipe_ingredient_scaler]
The chicken quality is paramount. Thighs yield the juiciest results due to higher fat content, while breasts require pounding to even thickness for consistent cooking. Source from Whole Foods or Costco for reliable quality. For the flour, King Arthur or Gold Medal all-purpose provide the ideal texture. Ensure your oil has a high smoke point—peanut or vegetable oil are standard choices.
No buttermilk? Whole milk with a splash of vinegar works as a substitute. Thoroughly pat the chicken dry for optimal flour adhesion—this prevents the coating from slipping. For a spicier kick, increase the cayenne to half a teaspoon. If avoiding dairy entirely, use water or plant-based milk for the egg wash. The paprika can be smoked or sweet based on preference.
Fry in batches to maintain oil temperature—350°F to 375°F is ideal. Drain on a wire rack to preserve crispiness. Leftovers keep in the fridge for 3-4 days but are best eaten fresh. Reheat in the oven at 375°F for 10-15 minutes to revive the crunch.
Why You’ll Love This Recipe
- No-Fuss Coating: I just dip the chicken in egg, roll it in flour, and fry—no complicated steps or hard-to-find ingredients.
- Crispy Outside, Juicy Inside: The flour and egg combo creates that golden crunch, while the chicken stays tender and flavorful with just salt.
- Weeknight Hero: It’s my go-to for busy evenings when I need something quick, filling, and universally loved by the family.
- Budget Stretcher: Chicken thighs and breasts are affordable, and this recipe makes them shine without breaking the bank.
Step-by-Step Instructions for Easy Fried Chicken With Flour And Egg
Here’s the method. Straightforward, tested, works every time.
Step 1: Season and Prepare the Chicken
Pat the 2 lb Chicken Thighs and 1 lb Chicken Breasts completely dry with paper towels. Any moisture will prevent the coating from adhering properly. I always pound the chicken breasts to an even thickness—this ensures they cook at the same rate as the thighs.
Season both sides of all pieces aggressively with 1.5 tbsp Kosher Salt, 1 tsp Freshly Ground Black Pepper, 1 tsp Garlic Powder, 1 tsp Onion Powder, 1 tbsp Paprika, and 0.25 tsp Cayenne Pepper. The seasoning should be visible on the surface—don’t be shy. Let the chicken sit at room temperature for 15 minutes while you prepare the dredging station.
Step 2: Set Up the Dredging Station
In a shallow dish, whisk the 2 whole Large Eggs with the 0.5 cup Buttermilk until fully combined. This creates a rich, tangy wash that helps the flour adhere and adds tenderness to the finished product. If you’re skipping the buttermilk, just use the beaten eggs.
In a separate large dish, combine the 2 cups All-Purpose Flour with any excess seasoning from your cutting board. I like to whisk the flour to break up any lumps and ensure even distribution of the dry ingredients. This two-step dredging process is what creates that signature crunch.
Step 3: Coat the Chicken
Working with one piece at a time, dip the chicken into the egg mixture, letting any excess drip off. Then dredge it through the seasoned flour, pressing firmly so the coating adheres well to all sides. I use one hand for the wet ingredients and one for the dry to keep things tidy and prevent cross-contamination.
Place the coated pieces on a wire rack set over a baking sheet. This setup allows air to circulate around the chicken, preventing the coating from becoming soggy while you finish breading the rest. Let the coated chicken rest for 10 minutes—this helps the coating set and adhere better during frying.
Step 4: Fry to Golden Perfection
Heat the 4 cups Vegetable Oil in a large, heavy pot or Dutch oven to 350°F over medium-high heat. Use a deep-fry thermometer to monitor the temperature—it’s the only way to ensure consistent results. The oil is ready when a pinch of flour sizzles immediately when dropped in.
Carefully lower 3-4 pieces of chicken into the hot oil, being careful not to overcrowd the pot. Fry for 12-15 minutes, turning occasionally, until the coating is deep golden brown and the internal temperature reaches 165°F. Dark meat may finish a minute or two before white meat, so check each piece. Maintain the oil temperature between 325-350°F throughout cooking.
Step 5: Drain and Rest Before Serving
Transfer the fried chicken to a wire rack set over a baking sheet or to paper towels to drain. Don’t stack the pieces—this would trap steam and make the coating soggy. I always place the rack in a 200°F oven while frying subsequent batches to keep the finished pieces warm.
Let the chicken rest for 5-10 minutes before serving. This brief rest allows the juices to redistribute, ensuring moist meat, and lets the coating crisp up fully. The internal temperature will also rise a few degrees during this time. Serve immediately while hot and crispy.
Pro Tips For Making Easy Fried Chicken Recipe With Flour And Egg
- Pat Dry First: I learned this the hard way—wet chicken makes the flour clump and the crust slide off. Use paper towels and really press to get every bit of moisture off before dredging.
- Double Dip Coating: After the first egg and flour pass, do it again. That second dip in egg and flour is what actually changes the outcome from sad to golden and crispy.
- Skip the Crowding: Resist the urge to fill the pan—overcrowding steams the chicken instead of frying it. Leave at least an inch between pieces so the crust can crisp up properly.
- Rest Before Serving: Give it a solid 5-10 minutes on a rack after frying. Sounds weird, but it works: the juices redistribute and the crust stays crunchy instead of turning soggy.
Troubleshooting This Dish
Coating Not Sticking
If your flour isn’t adhering to the chicken, the most likely culprit is moisture on the surface. Always pat the pieces completely dry with paper towels before seasoning. David and I learned this the hard way during recipe testing—even a little dampness ruins the coating.
Soggy Coating
This usually happens when you stack fried pieces on top of each other. Use a wire rack to drain, never paper towels alone. Also, maintain oil temperature between 325-350°F—if it drops too low, the coating absorbs oil instead of crisping. 💡
Uneven Cooking
Thick chicken breasts are the main offender here. Pound them to an even ½-inch thickness before coating. I use a meat mallet from Central Market. For dark meat, ensure thighs are similar in size so they cook at the same rate.
Oil Temperature Issues
Invest in a deep-fry thermometer—it’s non-negotiable for consistent results. If your oil is smoking excessively, it’s too hot (above 375°F). If the chicken absorbs oil without browning, your temperature is too low (below 325°F).
Too Greasy
Drain on a wire rack, not paper towels, to let air circulate. Also, don’t overcrowd the pot—fry in batches of 3-4 pieces at a time. This keeps the oil hot and prevents the chicken from steaming in its own moisture.
Dry Chicken
Overcooking is the usual suspect. Dark meat is done at 175°F, white meat at 165°F. Use an instant-read thermometer and pull pieces as soon as they hit temp. Letting them rest 5-10 minutes also helps retain juices.
Nutrition Facts
Frequently Asked Questions
Can I use only egg without buttermilk?
Yes! The egg alone works perfectly as a binder for the flour. Just whisk 2 eggs thoroughly and proceed with dredging. The buttermilk adds tang but isn’t essential for crispiness.
What oil works best for frying?
Use oils with a high smoke point like vegetable, peanut, or canola. Maintain 350°F for optimal crispiness. Avoid olive oil—its low smoke point can burn and create off flavors.
How do I keep the coating crispy longer?
Drain on a wire rack, not paper towels, to prevent steam buildup. Keep finished pieces warm in a 200°F oven while frying batches. Serve immediately for maximum crunch.
Why did my coating fall off during frying?
Most likely the chicken wasn’t dry before dredging. Pat pieces thoroughly with paper towels first. Also, let coated chicken rest 10 minutes before frying to help adhesion.

Trained in classic French technique but raised on slow-cooked ribs and spicy rubs, she blends culinary skill with smoke and soul.
- Recipe for Boneless Pork Chops in Cast Iron Skillet: Sear and Baste to Juicy Perfection - October 3, 2026
- Recipe for Boneless Cross Rib Roast: Slow-Roasted Beef with Herb Crust - October 3, 2026
- Hamburgers in Sauce Recipe Crock Pot: Slow-Cooked Savory Delight - October 3, 2026