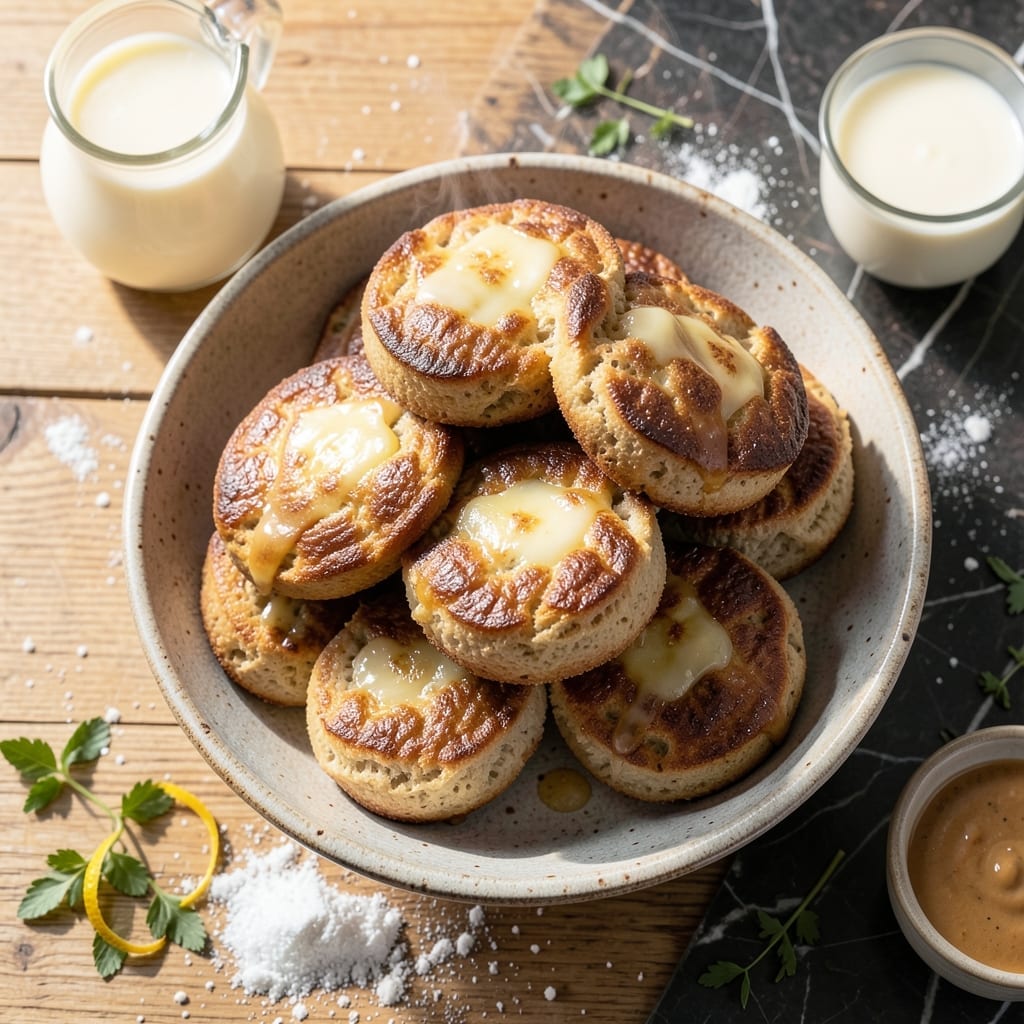
There’s something deeply satisfying about homemade English muffins, with their signature nooks and crannies ready to soak up butter and jam. This perfect recipe delivers bakery-quality results with simple pantry staples and a little patience.
I developed this method to maximize flavor while minimizing friction, using a straightforward dough that requires no special equipment. The key is proper proofing, which creates those distinctive air pockets that define a great English muffin.
What you’ll get is a stack of golden-brown muffins with a tender interior and crisp exterior. They’re ideal for breakfast sandwiches, toasted with honey, or simply enjoyed warm from the griddle.
This homemade version is worth every minute of the process.
Ingredients for English Muffin Recipe Homemade from Scratch
Simple pantry staples transform into bakery-quality muffins with that signature texture we all love.
| Ingredient | Amount | Notes |
|---|---|---|
| Bread Flour 🌾 | 4 cups | Plus extra for dusting |
| Instant Yeast 🍞 | 2 ¼ tsp | Or active dry yeast |
| Granulated Sugar 🍚 | 1 tbsp | Balances yeast activity |
| Kosher Salt 🧂 | 2 tsp | Diamond Crystal preferred |
| Whole Milk 🥛 | 1 cup | Warm to 110°F |
| Unsalted Butter 🧈 | 4 tbsp | Melted and cooled |
| Large Egg 🥚 | 1 whole | Room temperature |
| Cornmeal 🌽 | ½ cup | For dusting griddle |
| Vegetable Shortening 🫒 | 2 tbsp | For greasing rings |
| All-Purpose Flour 🌾 | ¼ cup | For dusting surface |
[recipe_ingredient_scaler]
The flour is critical here—bread flour provides the gluten structure needed for those perfect nooks and crannies. King Arthur is my go-to brand for consistency. The yeast should be fresh; check the expiration date if you’re unsure. Warm the milk to just 110°F—too hot kills the yeast, too cold slows activation. Most grocery stores carry all these in the baking aisle.
No bread flour? All-purpose works at a 1:1 ratio, though the texture won’t be quite as chewy. Out of milk? Warm water plus 1 tbsp butter mimics the richness. For a lighter muffin, replace half the milk with warm water. The cornmeal isn’t just for texture—it prevents sticking. If you don’t have rings, cookie cutters work too.
Dough can rest overnight in the fridge (actually improves flavor). Cooked muffins keep 3-4 days at room temperature in an airtight container, or freeze for 1 month. Split and toast straight from frozen—no thawing needed.
Why You’ll Love This Recipe
- No-Knead Magic: I just mix the bread flour, yeast, sugar, and milk, let it rest, and that’s it—no fancy techniques or tired arms.
- Buttery, Nook-Filled Bites: The whole milk gives them a rich, slightly sweet depth that pairs perfectly with every cranny soaking up jam or egg yolk.
- Breakfast or Brunch Star: They’re my weekend project that turns into toast for the week, or I’ll split and toast them fresh for a lazy Sunday spread.
- Pocket-Friendly Pantry Win: Bread flour and a few staples make a batch for pennies, and honestly, they taste better than the store-bought pack.
Step-by-Step Instructions for English Muffins
Master the technique for achieving those signature nooks and crannies with professional precision.
Step 1: Activate the Yeast and Prepare the Dough
In a stand mixer bowl, combine the 1 cup Whole Milk (warmed to 110°F), 2.25 tsp Instant Yeast, and 1 tbsp Granulated Sugar. Let this mixture sit for 5-7 minutes until it becomes frothy and active—this confirms your yeast is alive and ready to do its job.
Add the 4 cups Bread Flour, 2 tsp Kosher Salt, 4 tbsp Unsalted Butter (melted and cooled), and 1 whole Large Egg. Using the dough hook attachment, mix on low speed for 2 minutes until the ingredients come together, then increase to medium and knead for 8-10 minutes until the dough is smooth and elastic.
Step 2: First Rise for Flavor Development
Transfer the dough to a lightly greased bowl, cover it with a damp towel, and let it rise in a warm, draft-free place for 1-1.5 hours or until doubled in volume. I like to place mine in an oven with the light turned on for consistent warmth.
This first rise is crucial for developing the complex flavors and airy texture that make these muffins special. Don’t rush it—if your kitchen is cool, it might take the full 1.5 hours. You’ll know it’s ready when it springs back slowly when pressed with a finger.
Step 3: Shape and Second Rise
Turn the risen dough onto a surface dusted with 0.25 cup All-Purpose Flour and gently roll it to ½-inch thickness. Using a 3-inch round cutter, stamp out the muffins and place them on a baking sheet dusted with 0.5 cup Cornmeal. Cover and let them rise for another 30-45 minutes until puffy.
The cornmeal prevents sticking and adds a subtle texture to the bottoms. Don’t skip dusting your cutter between each stamp—this prevents the dough from sticking and distorting the shape. You should get about 12 muffins from this recipe.
Step 4: Cook on the Griddle
Heat a griddle or large skillet over medium-low heat and lightly grease it with 2 tbsp Vegetable Shortening. Transfer the risen muffins to the griddle, spacing them 2 inches apart. Cook for 5-7 minutes per side until golden brown and cooked through.
Here’s the thing—low and slow is key. Too high heat will burn the outside before the inside cooks. You’ll know they’re ready to flip when the edges look set and the tops appear slightly dry. Cook the second side until equally golden.
Step 5: Cool and Finish
Transfer the cooked muffins to a wire rack and let them cool completely. This cooling period is essential—it allows the structure to set so you get those perfect nooks and crannies when you split them open.
To serve, split each muffin with a fork around the equator and gently pull apart. Toast if desired, though they’re delicious fresh. Store cooled muffins in an airtight container for up to 3 days, or freeze for longer storage. Reheat in a toaster before serving.
Pro Tips For Making English Muffin Recipe Homemade From Scratch
- Warm the Milk: Heat your whole milk to about 110°F—any hotter and you’ll kill the yeast, any colder and it won’t activate properly. I learned this the hard way after my first few batches refused to rise.
- Don’t Over-Flour: Use just enough bread flour to keep the dough from sticking during shaping, but resist the urge to dump in extra. Too much flour makes dense muffins that won’t split open on the griddle.
- Rest the Dough: After kneading, let the dough rest for 5-10 minutes before portioning. This relaxes the gluten, making it easier to shape and giving you those classic nooks and crannies.
- Use Cornmeal: Dust your griddle or pan with cornmeal instead of flour before cooking. It adds texture and prevents sticking, and I was skeptical until I tried it—now it’s non-negotiable.
Make-Ahead Tips for This Dish
Overnight Dough Rise
Mix your dough as usual, then let it rise in the fridge overnight. This slow fermentation develops deeper flavor and actually improves the texture. Just bring it to room temperature before shaping the next morning. 💡
Pre-Shape Before Bed
After the first rise, shape your muffins and place them on a cornmeal-dusted baking sheet. Cover tightly with plastic wrap and refrigerate. In the morning, let them warm up for 30 minutes before cooking. This saves time without sacrificing quality.
Freeze Uncooked Dough
Shape your muffins, then freeze them on a baking sheet before transferring to a freezer bag. Cook from frozen—just add 2-3 minutes to each side. No thawing needed, and they taste freshly made. ❄️
Batch Cooking
Make a double batch and cook all at once. Cool completely, then freeze in airtight bags for up to 1 month. Toast straight from frozen when you’re ready to enjoy. I always keep a stash for busy mornings.
Pre-Griddle Prep
Grease your griddle rings the night before and store them stacked with parchment between each. This makes morning cooking faster and prevents sticking. A little prep goes a long way with this recipe.
Room Temperature Ingredients
Take your Whole Milk and Large Egg out of the fridge the night before. Room temperature ingredients mix more evenly and activate yeast better, ensuring consistent results every time.
Nutrition Facts
Frequently Asked Questions
Why do my muffins lack nooks and crannies?
Insufficient proofing is usually the culprit. The dough needs 1-1.5 hours for the first rise and 30-45 minutes after shaping to develop those air pockets. Also, avoid over-kneading the dough.
Can I use all-purpose flour instead of bread flour?
Yes, but the texture will be slightly less chewy. Bread flour’s higher protein content creates better structure for the signature nooks. Use the same amount as a direct substitute.
How do I know when they’re done cooking?
Cook on medium-low heat for 5-7 minutes per side until golden brown. The edges should look set and the tops slightly dry before flipping. An internal temperature of 200°F confirms doneness.
What’s the best way to store leftovers?
Cool completely, then store in an airtight container at room temperature for up to 3 days. For longer storage, freeze for up to 1 month and toast straight from frozen.

Trained in classic French technique but raised on slow-cooked ribs and spicy rubs, she blends culinary skill with smoke and soul.
- Stewed Beef Brisket Recipe: Deep-Rich Flavor After 8 Hours of Slow Simmering - October 15, 2026
- Beef Brisket Rolls Recipe: Flaky Layers and Smoky Sweet Filling - October 15, 2026
- Masterbuilt Smoker Beef Brisket Recipe: Bark-To-Meat Ratio Hack for Unmatched Flavor - October 15, 2026