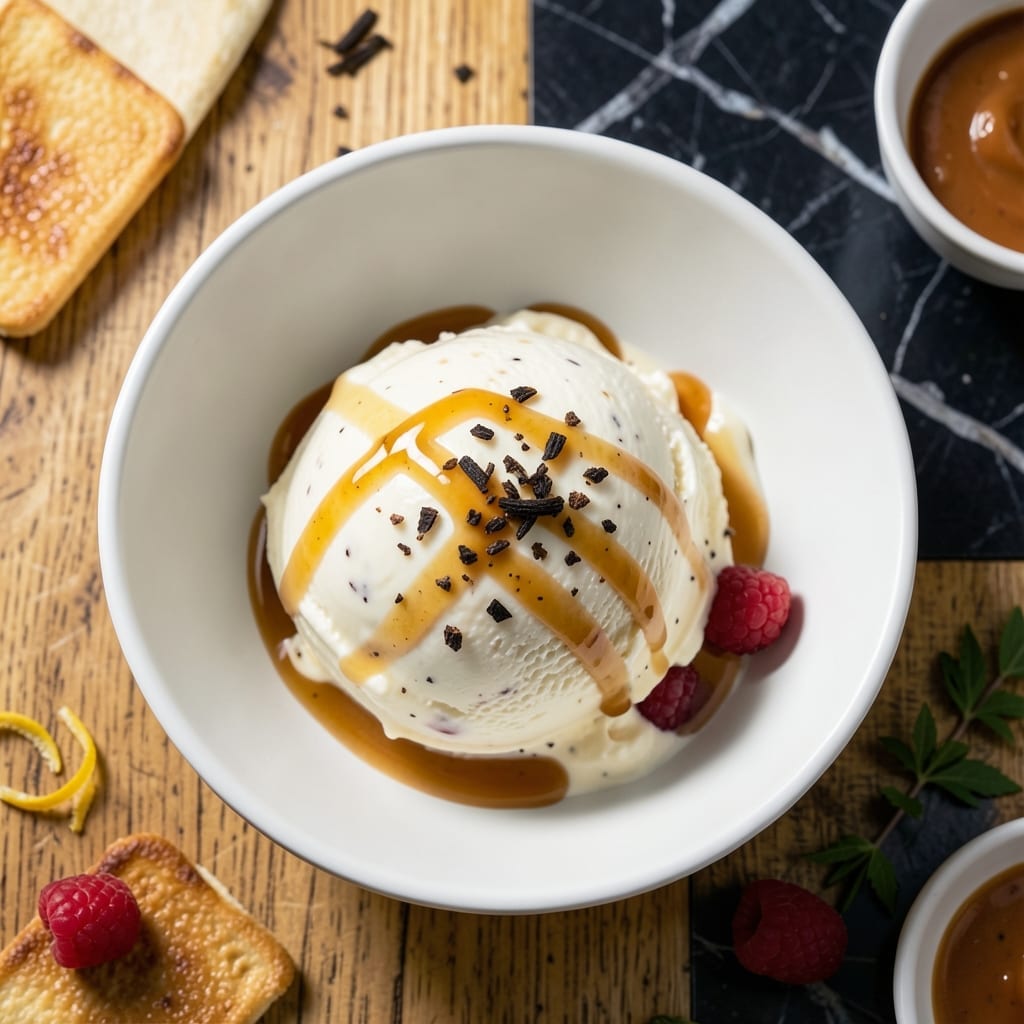
This homemade ice cream delivers a creamy texture that rivals any parlor creation. I developed this method to capture that perfect velvety consistency without an ice cream maker.
The secret lies in using evaporated milk, which reduces the water content and increases richness. Combined with sweetened condensed milk, it creates a base so smooth it feels indulgent with every spoonful.
What emerges from your freezer is a dessert with a luxuriously dense mouthfeel and pure vanilla flavor. The simplicity of the ingredients allows the quality to shine through.
Customize with mix-ins or enjoy it plain for a classic treat. This recipe proves exceptional results don’t require complicated techniques.
Ingredients for Evaporated Milk Ice Cream
Rich, velvety ingredients create this ultra-creamy frozen dessert with minimal effort required.
| Ingredient | Amount | Notes |
|---|---|---|
| Evaporated Milk 🥛 | 12 oz | Full-fat canned variety |
| Sweetened Condensed Milk 🥛 | 14 oz | Standard can size |
| Heavy Cream 🥛 | 1 cup | Cold, for optimal texture |
| Granulated Sugar 🍚 | ¾ cup | Fine grain preferred |
| Pure Vanilla Extract 🌿 | 2 tsp | High-quality for best flavor |
| Vanilla Bean 🌿 | 1 whole | Split and scraped |
| Sea Salt 🧂 | ¼ tsp | Fine grain for dissolution |
| Large Egg Yolks 🥚 | 4 pieces | Room temperature preferred |
| Unsalted Butter 🧈 | 2 tbsp | Melted and cooled slightly |
| Whole Milk 🥛 | ¼ cup | For adjusted consistency |
[recipe_ingredient_scaler]
The evaporated milk is non-negotiable—Carnation brand is widely available and reliable. Look for full-fat cans to ensure maximum creaminess. Sweetened condensed milk from Eagle Brand works perfectly, and the heavy cream should come from a reputable dairy producer. The vanilla bean adds depth, but Nielsen-Massey extract is an excellent substitute if beans aren’t available.
No heavy cream? Whole milk plus 2 tbsp melted butter can substitute, though texture may be slightly less dense. For a richer base, half-and-half works at a 1:1 ratio. The sugar can be adjusted to taste—brown sugar adds caramel notes. Egg yolks are essential for that velvety mouthfeel, but cornstarch at 2 tbsp per cup of liquid can stabilize if avoiding eggs.
Store all dairy components in the coldest part of your fridge until ready to use. The finished ice cream keeps in an airtight container for up to 2 weeks, though it’s best within 5 days. For longer storage, freeze in portions wrapped tightly in plastic.
Why You’ll Love This Recipe
- No-Churn Magic: I just whisk, freeze, and done—no ice cream maker needed, and the evaporated milk gives it that ultra-creamy texture without the fuss.
- Vanilla Dream: The vanilla extract shines through the rich base of condensed and heavy cream, making every bite taste like a premium scoop shop treat.
- Crowd Pleaser: Perfect for summer BBQs or movie nights, and honestly, it disappears faster than I can make it.
- Pantry Hero: I always have evaporated milk on hand, so this is my go-to when I need a last-minute dessert that feels like a splurge.
Step-by-Step Instructions for Evaporated Milk Ice Cream
This method ensures an ultra creamy texture with rich vanilla flavor in every bite.
Step 1: Infuse and Heat the Dairy Base
In a medium saucepan, combine the 12 oz Evaporated Milk, 1 cup Heavy Cream, 0.75 cup Granulated Sugar, and 0.25 tsp Sea Salt. Split the 1 whole Vanilla Bean lengthwise, scrape the seeds into the mixture, and add the pod as well.
Heat over medium heat until the mixture reaches 180°F and the sugar fully dissolves, stirring occasionally. Watch for tiny bubbles forming at the edges—this indicates the proper temperature. Remove from heat once reached and discard the vanilla pod.
Step 2: Temper the Egg Yolks for a Smooth Custard
In a separate bowl, whisk the 4 pieces Large Egg Yolks until smooth and slightly pale. Slowly pour about 1 cup of the hot dairy mixture into the yolks while whisking constantly. This tempering process prevents the eggs from scrambling.
Once tempered, return the egg mixture to the saucepan with the remaining dairy. Cook over low heat, stirring constantly with a wooden spoon, until the custard thickens enough to coat the back of the spoon (170-175°F). This should take 5-7 minutes—don’t rush it.
Step 3: Incorporate Remaining Ingredients and Chill
Remove the custard from heat and stir in the 14 oz Sweetened Condensed Milk, 2 tbsp Unsalted Butter, and 2 tsp Pure Vanilla Extract. The sweetened condensed milk adds richness and eliminates the need for additional sugar adjustments.
Pour the mixture through a fine-mesh strainer into a clean bowl to remove any cooked bits. Stir in the 0.25 cup Whole Milk to adjust the consistency. Cover and refrigerate for at least 4 hours, or preferably overnight, until completely chilled.
Step 4: Churn to Perfection
Pour the chilled custard into your ice cream maker and churn according to the manufacturer’s instructions, typically 20-25 minutes. The mixture will thicken to the consistency of soft-serve ice cream and hold its shape when scooped.
Transfer the ice cream to a lidded container and freeze for at least 4 hours or until firm. The final texture should be smooth and creamy, with no ice crystals. For best results, let it sit at room temperature for 5-10 minutes before scooping.
Pro Tips For Making Evaporated Milk Ice Cream
- Chill the Cans: Pop your evaporated milk and sweetened condensed milk in the fridge for at least 2 hours before mixing—I learned this the hard way after my first batch turned out soupy instead of creamy.
- Whip the Cream First: Beat the heavy cream to stiff peaks before folding in the other ingredients; it gives the ice cream that light, fluffy texture that’s impossible to get otherwise.
- Skip the Sugar Rush: Resist the urge to add extra granulated sugar; the sweetened condensed milk already packs plenty of sweetness, and too much sugar makes the ice cream rock-hard when frozen.
- Freeze with Parchment: Press parchment paper directly on the surface of the mixture before freezing to prevent ice crystals from forming—sounds weird, but it works.
Creative Variations of This Dish
Chocolate Swirl Version
Create a ribbon effect by layering ½ cup melted bittersweet chocolate with the churned base. After churning, alternate spoonfuls of ice cream and chocolate in your container, then swirl gently with a knife. I use Ghirardelli 60% cacao for the perfect balance of sweetness and depth. 🌟
Fruit Infused Delight
Fold in 1 cup diced fresh strawberries or raspberries during the last 2 minutes of churning. For a more intense flavor, macerate the fruit with 2 tbsp sugar for 30 minutes before adding. The natural acidity cuts through the richness beautifully.
Coffee Lovers Twist
Dissolve 2 tbsp instant espresso powder in 1 tbsp hot water and mix into the custard base before chilling. This adds a deep coffee flavor without watering down the mixture. Finish with chocolate-covered espresso beans for crunch.
Salted Caramel Crunch
Drizzle ½ cup store-bought caramel sauce into the ice cream during the last 5 minutes of churning. Just before serving, sprinkle with flaky sea salt and crushed pretzel pieces for that sweet-salty contrast I can’t resist.
Nutty Texture Boost
Toast ¾ cup chopped pecans or almonds in a dry skillet over medium heat for 5-7 minutes until fragrant. Fold into the ice cream during the last 2 minutes of churning. I love how the crunch complements the creamy base.
Tropical Escape
Blend 1 cup toasted coconut flakes and ½ cup crushed pineapple (well-drained) into the custard before chilling. The tropical flavors transport me to those coastal rides I love so much. 💛
Nutrition Facts
Frequently Asked Questions
Can I make this without an ice cream maker?
Yes! Freeze the custard in a shallow container, stirring vigorously with a fork every 30 minutes for 3-4 hours to break up ice crystals. This creates a smooth texture, though slightly less creamy than churned.
Why use evaporated milk instead of regular?
Evaporated milk has 60% less water than regular milk, creating a richer, creamier base with deeper flavor. It also helps prevent icy texture in homemade ice cream.
How long can I store the finished ice cream?
It keeps well in an airtight container for up to 2 weeks. For best texture, press plastic wrap directly on the surface to prevent ice crystals from forming.
Can I substitute the egg yolks?
For an egg-free version, use 2 tbsp cornstarch mixed with 2 tbsp cold milk as a thickener. The texture will be slightly less rich but still delicious.

Trained in classic French technique but raised on slow-cooked ribs and spicy rubs, she blends culinary skill with smoke and soul.
- Recipe for Boneless Pork Chops in Cast Iron Skillet: Sear and Baste to Juicy Perfection - October 3, 2026
- Recipe for Boneless Cross Rib Roast: Slow-Roasted Beef with Herb Crust - October 3, 2026
- Hamburgers in Sauce Recipe Crock Pot: Slow-Cooked Savory Delight - October 3, 2026