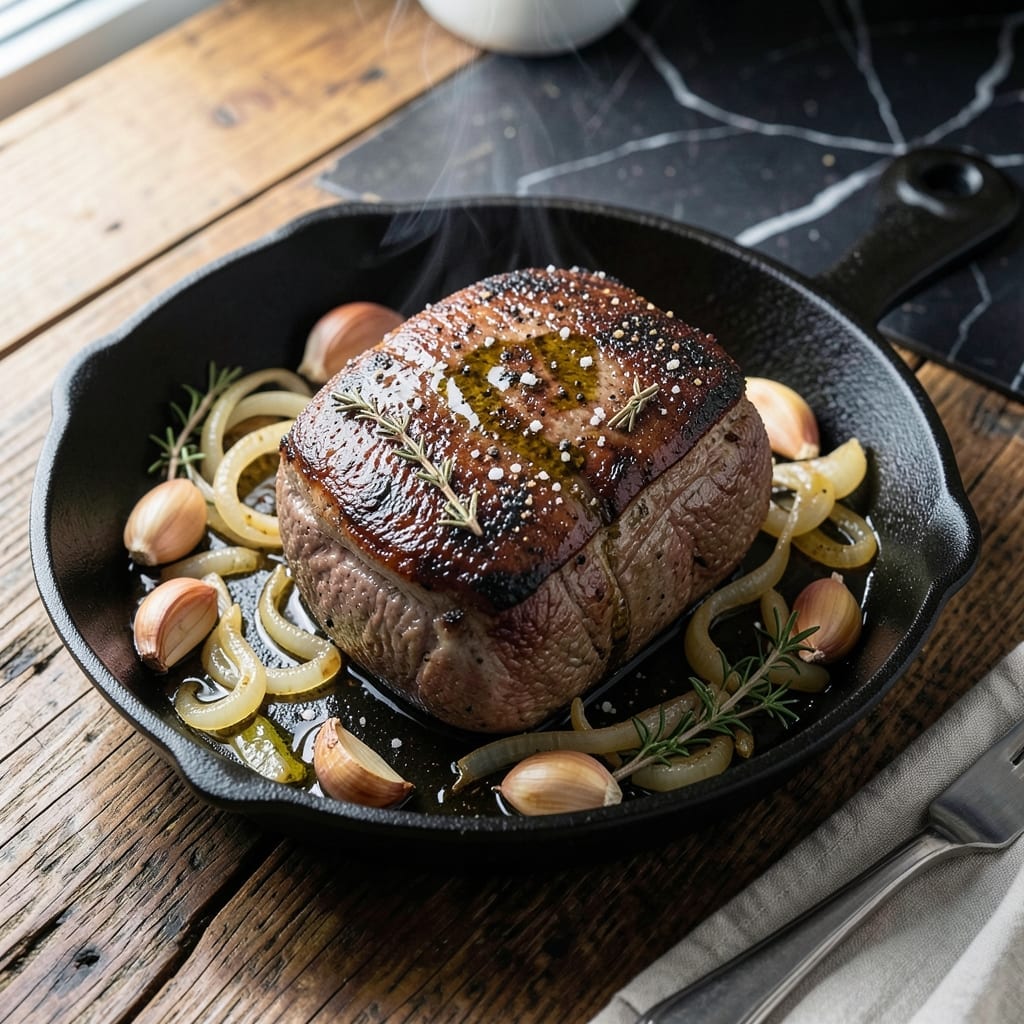
This stove-top method transforms a tough cut like eye of round into tender, flavorful perfection. I developed this technique after years of testing in my small Boston kitchen, where space and time are always limited.
The key is slow-simmering the roast in a covered Dutch oven, allowing the connective tissue to break down gradually. A simple seasoning blend and a hot sear at the start build a flavorful crust that locks in juices.
What emerges is meat so tender it falls apart at the touch of a fork, with a rich, savory depth that belies its humble origins. The slow cooking process ensures every bite delivers that melt-in-your-mouth quality.
Perfect for Sunday suppers or special occasions when you want restaurant-quality results without the fuss. This approach proves that patience and proper technique can turn even the most economical cuts into something extraordinary.
Ingredients for Eye of Round Roast Recipe Stove Top
Pantry staples and a tough cut turn into Sunday supper magic. Twelve ingredients, maximum flavor.
| Ingredient | Amount | Notes |
|---|---|---|
| Eye of Round Roast 🥩 | 2 lb | Trimmed of excess fat |
| Olive Oil 🫒 | 2 tbsp | Divided for searing and cooking |
| Kosher Salt 🧂 | 2 tsp | Diamond Crystal preferred |
| Freshly Ground Black Pepper 🌶️ | 1 tsp | Coarse grind for texture |
| Garlic Powder 🧄 | 1 tsp | For depth in seasoning |
| Onion Powder 🧅 | 1 tsp | Balances savory notes |
| Dried Thyme 🌿 | 1 tsp | Crushed between fingers |
| Beef Broth 🥣 | 2 cups | Low-sodium preferred |
| Red Wine 🍷 | ½ cup | Dry variety like Cabernet |
| Carrots 🥕 | 3 whole | Peeled, cut into chunks |
| Yellow Onion 🧅 | 1 whole | Large, roughly chopped |
| Bay Leaves 🍃 | 2 pieces | Dried, whole leaves |
| Fresh Parsley 🌿 | ¼ cup | Chopped, for garnish |
[recipe_ingredient_scaler]
The beef is non-negotiable here. Eye of round needs that slow simmer to break down—look for pieces with good marbling at Whole Foods or Costco. Ask the butcher to trim it if you’re not confident. The broth matters too; Better Than Bouillon makes a rich base, but homemade is even better (and freezes well for next time).
No red wine? Substitute with extra beef broth and a splash of balsamic vinegar. Fresh herbs can replace dried at triple the volume, but dried work fine in a pinch. The carrots and onion are flexible—use what you’ve got (even frozen works). If you’re out of thyme, rosemary or oregano add a nice twist.
Leftovers taste even better the next day. Store in an airtight container for up to 5 days in the fridge, or freeze for 3 months. Reheat gently to keep the meat tender—microwave works, but the stovetop keeps it juicier.
Why You’ll Love This Recipe
- One Pan Wonder: I sear the eye of round in olive oil, then let it finish on the stove—no oven, no extra dishes.
- Garlic Crust: The combination of olive oil, garlic powder, and black pepper creates a crust so good I sneak bites straight from the pan.
- Feeds a Crowd: This roast is my go-to for Sunday dinners, stretching easily to feed six without breaking the bank.
- Next-Day Magic: The leftovers make unreal sandwiches—sliced thin and piled high on crusty bread. Honestly, sometimes better than the original meal.
Step-by-Step Instructions for Eye of Round Roast Stove Top
This slow-simmered method transforms a tough cut into fork-tender perfection every time.
Step 1: Sear and Season the Roast
Pat the 2 lb Eye of Round Roast dry with paper towels. This ensures a good sear and prevents steaming. Season all sides aggressively with the 2 tsp Kosher Salt, 1 tsp Freshly Ground Black Pepper, 1 tsp Garlic Powder, 1 tsp Onion Powder, and 1 tsp Dried Thyme.
Heat 1 tbsp Olive Oil in a large Dutch oven over medium-high heat until shimmering. Sear the roast on all sides for 3-4 minutes per side until deeply browned. You’ll see a dark crust forming—that’s the flavor foundation building. Remove the roast and set aside.
Step 2: Build the Aromatic Base
In the same pot, add the remaining 1 tbsp Olive Oil and reduce heat to medium. Add the 3 whole Carrots and 1 whole Yellow Onion, cooking for 5-6 minutes until the vegetables begin to soften and develop light golden edges.
This step creates a sweet, savory bed for the roast to braise in. Stir occasionally to prevent burning, but let the veggies caramelize slightly for depth. The onions should turn translucent with browned bits clinging to the bottom—that’s where the magic happens.
Step 3: Deglaze and Braise
Pour in the 0.5 cup Red Wine and scrape up all those browned bits from the bottom of the pot with a wooden spoon. Let it simmer for 2 minutes until reduced by half. This deglazing step lifts all the concentrated flavor into the liquid.
Add the 2 cups Beef Broth and 2 pieces Bay Leaves, then return the roast to the pot. The liquid should come about halfway up the roast. Bring to a gentle simmer, then reduce heat to low, cover, and cook for 2 to 2.5 hours until the meat is fork-tender.
Step 4: Rest and Serve
Once the roast easily pulls apart with a fork, transfer it to a cutting board. Let it rest for 15 minutes before slicing—this allows the juices to redistribute so every bite stays moist. The roast should be fall-apart tender with a rich, savory broth.
Slice the roast against the grain into thick pieces. Spoon the cooking liquid and vegetables over the top, then garnish with the 0.25 cup Fresh Parsley. The parsley adds a bright, fresh contrast to the deep, hearty flavors. Serve immediately while hot.
Pro Tips For Making Eye Of Round Roast Recipe Stove Top
- Sear Hot and Fast: Get your pan screaming hot before adding the roast—about 2 minutes on medium-high with the olive oil. I learned this the hard way after too many pale, sad-looking sears.
- Pound the Thickness: Eye of round is lean, so flatten it slightly to an even 1-1.5 inches for consistent cooking. Sounds weird, but it works: no more dry edges while waiting for the center.
- Skip the Overcrowding: If your pan isn’t big enough, sear in batches. Resist the urge to cram it all in—steam is the enemy of that crispy crust.
- Rest Under Foil: After cooking, tent it loosely with foil and let it rest 10-15 minutes. My grandmother swore by this, and she was right: the juices redistribute, and it stays moist.
Troubleshooting This Recipe
Roast Won’t Brown
If your sear isn’t developing that deep brown crust, your pan isn’t hot enough. I always heat my Dutch oven for 5 minutes before adding oil. Also, pat the roast very dry—any moisture creates steam instead of a sear. 🔥
Tough Meat After Cooking
This usually means it didn’t cook long enough. The 2-2.5 hour simmer is non-negotiable for eye of round. Check tenderness at 2 hours—if it resists a fork, keep cooking. The connective tissue needs time to break down.
Dry Roast
Overcooking is often the culprit, but under-searing can too. That initial crust locks in juices. Also, don’t skip resting 15 minutes before slicing. I learned this the hard way during my early Boston apartment cooking days.
Bland Flavor
Season aggressively—2 tsp Kosher Salt isn’t too much for 2 lbs. Don’t fear the salt. Also, use dry red wine (like Cabernet) for deglazing. Sweet wines make the sauce taste flat. The wine’s acidity brightens all flavors.
Broth Reduces Too Fast
Keep heat at a gentle simmer, not a boil. If liquid drops below halfway up the roast, add ½ cup hot water. A tight-fitting lid helps maintain moisture. My Le Creuset Dutch oven works perfectly for this.
Vegetables Mushy
Add carrots and onions after searing but before deglazing. They’ll soften just enough during the 2-hour braise. For firmer veg, add them 1 hour into cooking. This is one of those forgiving adjustments I love about this recipe.
Nutrition Facts
Frequently Asked Questions
What’s the best pan for this method?
A heavy Dutch oven with a tight lid works best. It distributes heat evenly and retains moisture for the 2-2.5 hour braise.
Can I use a different cut of beef?
Yes, but choose tough cuts that benefit from slow cooking like chuck or bottom round. Avoid tender cuts like sirloin as they’ll turn mushy during the long simmer.
How do I know when it’s done?
The roast is ready when it pulls apart easily with a fork. Check at 2 hours—if it resists, cook longer. The internal temp should reach 195-200°F.
Can I make this ahead of time?
The flavor improves overnight. Store in an airtight container for up to 5 days in the fridge. Reheat gently on the stove with a splash of water.

Trained in classic French technique but raised on slow-cooked ribs and spicy rubs, she blends culinary skill with smoke and soul.
- Recipe for Pan Fried: Golden Crust with Savory Depth - October 3, 2026
- Recipe For Fried Chicken In A Pressure Cooker: Crispy Golden Bites in Half the Time - October 3, 2026
- Recipe For Leftover Fried Fish: Crunchy Leftovers Transformed - October 3, 2026