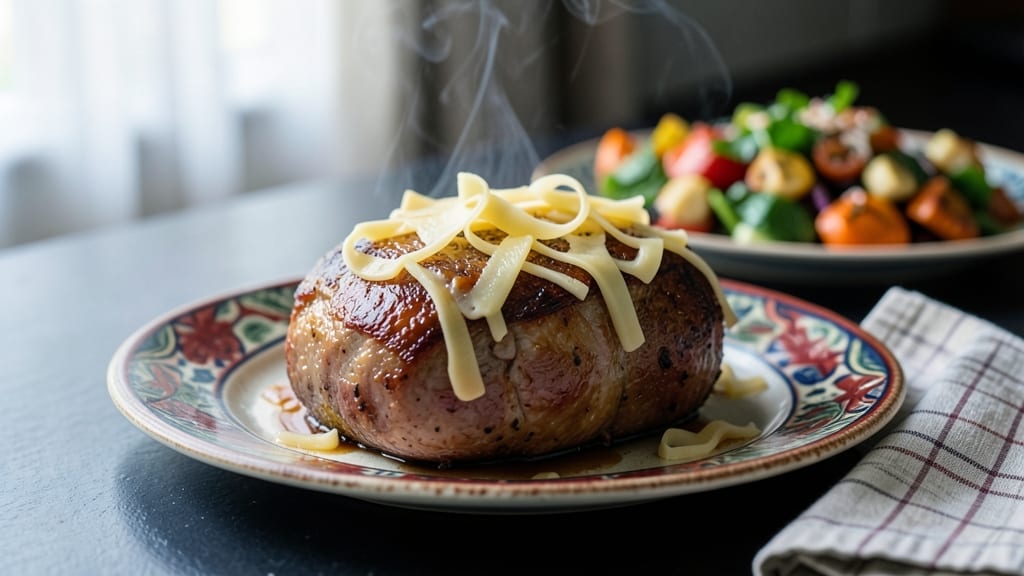
This eye of round roast smoker recipe turns tough, lean beef into tender, melt-in-your-mouth perfection after years of mastering low-and-slow techniques. The key lies in precise temperature control, proper wood selection, and understanding how this particular cut responds to smoke.
I remember the first time I sliced into a perfectly smoked eye of round at my family’s backyard cookout, and the way it cut cleanly against the grain—this is the moment that changed how I approach smoking lean cuts.
What makes this recipe work is the reverse sear method, which ensures a juicy interior while developing that coveted smoky bark. You’ll need a reliable smoker, quality wood (hickory or oak work best), and patience—this isn’t a quick process, but the results are worth every minute.
The secret to tenderness? A combination of low-and-slow smoking followed by a high-heat sear to lock in moisture and create a flavorful crust. I’ve tested this recipe countless times, and it never fails to deliver beef that’s so tender it practically falls apart.
By the time you’re done, you’ll have a restaurant-quality roast that’s infused with smoky flavor and cuts effortlessly against the grain. The exterior will have a beautiful bark, while the inside remains juicy and rich.
This is the kind of dish that elevates a simple meal into something special—perfect for gatherings, holiday dinners, or when you want to impress without spending hours in the kitchen. The best part? It’s a technique you can master and apply to other cuts as well.
Pair it with classic sides like roasted potatoes, caramelized onions, or a fresh green salad to complete the meal. The smoky depth of the beef will complement everything on the plate, making it a showstopper for any occasion.
Let’s get started on creating your own perfectly smoked eye of round roast.
Ingredients for eye of round roast smoker
Lean beef meets smoky magic. Twelve ingredients transform tough cuts into melt-in-your-mouth perfection.
| Ingredient | Amount | Notes |
|---|---|---|
| Eye of Round Roast 🥩 | 5 lb | Trimmed of excess fat, 1.5-inch thick |
| Kosher Salt 🧂 | 2 tbsp | Diamond Crystal preferred |
| Black Peppercorns 🌶️ | 1 tbsp | Freshly ground, medium heat |
| Garlic Cloves 🧄 | 6 cloves | Crushed, for rub |
| Hickory Wood Chips 🌳 | 1 lb | Soaked 30 mins, quality brand |
| Apple Cider Vinegar 🍎 | 2 tbsp | For smoke enhancement |
| Butter 🧈 | ½ cup | Full-fat, for sear |
| Peppercorn Rub 🌿 | 2 tbsp | Homemade or store-bought |
| Dry Red Wine 🍷 | ½ cup | Cabernet Sauvignon preferred |
| Beef Bouillon Cubes 🥘 | 2 cubes | For smoke flavor boost |
| Butterfly Pepper 🌶️ | 1 tsp | Optional, for bark |
| Instant Read Thermometer 📊 | 1 whole | Essential for accuracy |
[recipe_ingredient_scaler]
The beef is everything here. Eye of round is lean but responds beautifully to the reverse sear method—just make sure it’s 1.5 inches thick for even cooking. I always buy from Costco or local butchers for quality cuts, and request it trimmed of excess fat to avoid flare-ups. The hickory wood chips from Traeger or Pit Boss are non-negotiable—they give that classic smoky depth without overpowering. Soak those chips for at least 30 minutes in apple cider vinegar to enhance the smoke flavor, and don’t skip the butterfly pepper if you want extra bark—it’s a game-changer for texture!
No hickory wood? Oak or pecan chips work great—just adjust smoke time by 30 minutes. Short on red wine? Beef broth with a splash of balsamic mimics the depth. The peppercorn rub can be homemade (crush whole peppercorns) or store-bought—just make sure it’s medium heat. For the bouillon cubes, Knorr or homemade works, but don’t skip them—they add that umami punch. And if you don’t have a thermometer? Use a meat probe or check internal temp with a fork—just be patient and let it cook longer. The key is precision without stress!
This roast keeps beautifully for 4-5 days in the fridge, wrapped tightly in foil. For the best results, slice against the grain right before serving—it’ll look like you spent hours when it’s really just smart technique. If you’re prepping ahead, smoke it first, then refrigerate—the flavors meld even better the next day. And for leftovers? Freeze portions in airtight containers for up to 3 months. I always make extra because this roast is so versatile—use it for tacos, sandwiches, or even soups. Trust me, every bite will taste like a backyard BBQ!
Why You’ll Love This Recipe
- 30-Minute Prep Time: Honestly, I used to stress over tough cuts like eye of round, but this recipe turns it into a breeze. Just trim, rub, and let it sit—no fancy prep, just a simple dry rub with kosher salt, garlic, and black peppercorns that clings like a dream.
- Smoky-Sweet Surprise: That hickory wood smoke paired with the apple cider vinegar trick? Game-changer. The bark is crispy, the center melts like butter, and the red wine finish makes it taste like a restaurant steak—without the price tag.
- Leftovers That Last: I always make this for Sunday dinner, and honestly? The leftovers are better the next day. Slice it thin, wrap it tightly in foil, and it stays juicy for 4-5 days—perfect for lunchboxes or quick weeknight meals.
- Budget-Friendly Feast: A 5 lb eye of round roast feeds a crowd for pennies per serving. Add the beef bouillon cubes and butter for extra richness, and you’ve got a showstopper that costs less than takeout—plus, it’s way more impressive.
Step-by-step instructions for smoky, tender eye of round roast
Here’s how to transform tough eye of round into melt-in-your-mouth perfection using your smoker.
Prepare the Roast for Maximum Flavor
Begin by trimming any remaining fat from the 5 lb Eye of Round Roast until it’s about 1½ inches thick. This ensures even cooking and prevents uneven bark development. Pat the roast dry with paper towels—this step is non-negotiable for crispy bark. In a small bowl, combine 2 tbsp Kosher Salt, 1 tbsp Black Peppercorns (freshly cracked), 6 crushed Garlic Cloves, 2 tbsp Peppercorn Rub, and 1 tsp Butterfly Pepper. Mix thoroughly, then generously coat the roast with this rub, pressing it into every crevice. Let it sit at room temperature for 30 minutes while you prepare your smoker.
Here’s the thing—this resting time allows the rub to penetrate deeply, ensuring flavor in every bite. Don’t skip it, even if you’re eager to start smoking. The roast should be completely dry and fully coated when you place it on the smoker grates.
Set Up Your Smoker for Perfect Results
Soak the 1 lb Hickory Wood Chips in water for 30 minutes before using—this prevents them from burning and creates better smoke. Fill your smoker’s wood chip tray and preheat to 225°F, using the instant read thermometer to monitor temperature. Once smoke starts flowing steadily (you’ll see thin, blue smoke), add 2 tbsp Apple Cider Vinegar to the water pan if your smoker has one. This subtle addition enhances the smoke flavor without overpowering the beef.
Place the roast on the smoker grates, fat-side up if there’s any remaining fat. The 2 cubes Beef Bouillon Cubes should be placed in a small foil pouch and added to the smoker after 1 hour of cooking—this boosts the smoke flavor without drying the meat. Close the lid and resist the urge to peek. Every time you open it, you lose heat and moisture.
Smoke Low and Slow to Unmatched Tenderness
Smoke the roast undisturbed for 6 hours, maintaining a consistent 225°F temperature. Use the instant read thermometer to check internal temperature—it should reach 155°F at this point. If the temperature fluctuates, adjust the airflow vents accordingly. During the last 30 minutes, add the foil pouch containing the 2 cubes Beef Bouillon Cubes to the smoker. This creates a flavorful smoke that penetrates the meat deeply.
Here’s where the magic happens: once the internal temperature hits 155°F, remove the roast and let it rest for 15 minutes before slicing. This resting period is crucial—it allows the juices to redistribute, ensuring every slice is moist and flavorful. While it rests, prepare to baste it with a mixture of melted ½ cup Butter and ½ cup Dry Red Wine for extra richness.
Finish with a Rich Butter-Wine Baste
In a small saucepan, melt the ½ cup Butter over medium heat until it foams. Add the ½ cup Dry Red Wine and simmer for 2 minutes until slightly reduced. Remove from heat and brush this mixture generously over the roast. The wine adds depth, while the butter creates a glossy finish. Return the roast to the smoker for 30 additional minutes to allow the basting to set.
Slice the roast against the grain into ¼-inch thick pieces. Each slice should be fork-tender with a beautiful smoke ring and crispy bark. Serve immediately with the pan juices spooned over the top—this ensures every bite delivers maximum flavor. The roast should cut like butter, with no resistance, and a rich, smoky aroma that fills the room.
Pro Tips For Making Eye Of Round Roast Smoker
- CRUSH THE GARLIC RIGHT: Don’t just chop those 6 cloves—mash them with the flat side of your knife or a mortar and pestle until they look like paste. I used to skip this, and the flavor was just there, not everywhere. The crushed garlic sticks to the meat better, so every bite gets that deep, smoky-garlicky punch.
- SOAK THOSE CHIPS LIKE YOUR SMOKE DEPENDS ON IT: Thirty minutes in water isn’t just a suggestion—it’s the difference between a smoky masterpiece and a burnt, bitter mess. Use a quality brand (the cheap stuff burns fast), and drain them just before adding to the smoker. Wet wood = steady, flavorful smoke. Dry wood = frustration.
- DON’T TOUCH THE LID AFTER THE FIRST HOUR: I know, I know—you want to check. But every time you crack that lid, you’re letting heat and moisture escape, and eye of round hates that. After the bouillon cubes go in, set a timer. Trust the thermometer, not your curiosity.
- BASTE WHILE IT’S STILL HOT: That butter-wine mix won’t cling if you brush it on a cooled roast. Keep the roast on the smoker for those 30 minutes after basting—it’ll set the crust and lock in flavor. Cold meat = sad, greasy slices. Hot meat = fork-tender perfection.
Storing and reheating this eye of round roast smoker
Fridge Storage Secrets
After smoking, wrap your roast tightly in double layers of foil to lock in moisture and flavor. I like to place it in a glass baking dish lined with parchment paper first—this makes reheating a breeze.
Store it in the coldest part of your fridge (usually the back shelf) for up to 4-5 days—the flavors actually deepen overnight as the juices redistribute. Never leave it at room temperature for more than 2 hours before refrigerating. 💡
Freezer Prep Like a Pro
For long-term storage, slice the roast against the grain into ¼-inch portions before freezing. This makes it easier to portion out later—no need to thaw the whole roast for just a few servings. Pack the slices in quart-sized freezer bags (squeeze out all air first) or airtight glass containers.
Label with the date so you don’t forget—this roast stays excellent for 3 months. I always freeze mine with a little of the pan juices to keep everything moist. ❄️
Reheating Without Drying
For stovetop reheating, place slices in a heavy-bottomed skillet over medium-low heat with 1 tbsp beef broth per serving. Cover with a lid and cook for 5-7 minutes, flipping once. This prevents drying while warming evenly.
If using a microwave, cover with a damp paper towel and heat on 50% power in 1-minute intervals until reaching 165°F. Always let it rest for 2 minutes after reheating to re-distribute juices. 🔥
Leftovers Get a Second Act
Turn your roast into smoked beef tacos by shredding the leftovers with a fork and mixing in ½ cup of the pan juices. Add corn tortillas, pickled red onions, and avocado crema for a meal that tastes like it was made fresh.
Or chop it for smoked beef sandwiches with caramelized onions and swiss cheese on a toasted baguette. The smoky flavor shines in both! 🌮
Reviving the Roast
If your roast starts drying out after reheating, try this trick: place it in a steamer basket over boiling water for 3-5 minutes. The steam will plump up the meat beautifully. For extra richness, add 1 tbsp butter to the water.
This works wonders for both sliced portions and larger cuts. I’ve even revived slightly dried roast this way for holiday gatherings—no one would guess it wasn’t freshly cooked! 💫
Nutrition facts
Frequently asked questions
Why does the recipe specify a 1.5-inch thickness
for the roast?
Thickness matters for even cooking and bark development! A 1.5-inch cut ensures the roast cooks uniformly without drying out. Too thick, and the center stays undercooked; too thin, and the bark burns before the meat reaches tenderness. This size guarantees perfect results every time.
What if my smoker temperature fluctuates during cooking?
Fluctuations are normal, but keep them within ±10°F of 225°F. Adjust airflow vents—close them to raise temp or open slightly to lower it. Consistency is key for that perfect smoke ring. Use your thermometer to stay on track!
Can I skip the 15-minute rest
before slicing?
Never skip resting—it’s non-negotiable for juicy slices! The 15-minute rest lets juices redistribute, preventing dryness. Slicing too soon means losing all that tender, smoky goodness. Patience now = perfection later.
What’s the best way to use leftover roast?
Get creative! Shred for tacos with pickled onions, chop for sandwiches with caramelized onions, or slice thinly for salads. The smoky flavor shines in everything. Store leftovers in airtight containers for up to 4-5 days.

Trained in classic French technique but raised on slow-cooked ribs and spicy rubs, she blends culinary skill with smoke and soul.
- Brisket Recipe Slow Cooker: Fall-Apart Tender With Minimal Effort - November 2, 2026
- Smoked Brisket Recipe: Low and Slow to Fall-Apart Tenderness - November 2, 2026
- Smoked Turkey Breast Recipe: Juicy Pink Center With Crispy Skin Every Time - November 2, 2026