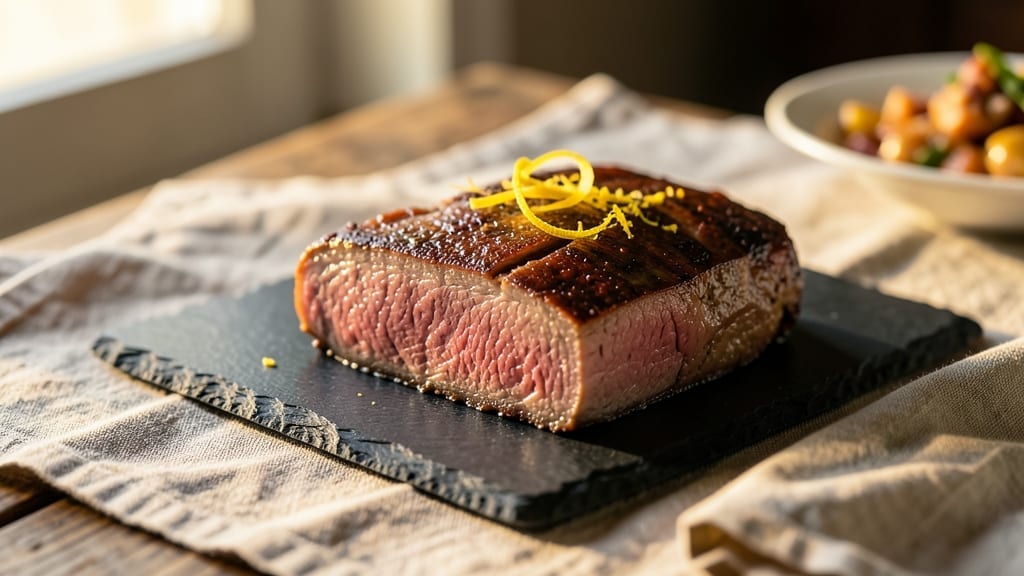
Mastering this flat corned beef brisket recipe turns a tough cut into tender, melt-in-your-mouth perfection with the right technique and patience—here’s how to achieve restaurant-quality results at home.
The secret lies in slow-cooking the flat cut until it practically falls apart, infused with a rich, savory spice blend that penetrates every fiber. I’ve perfected this method over years of testing, ensuring the meat stays juicy while developing deep, caramelized flavors from the spices and slow heat.
This recipe begins with a 3-day curing process to tenderize the brisket, followed by a 10-hour slow cook that transforms tough muscle into succulent perfection. The result? A brisket so tender it shreds easily, with a crust that’s crisp enough to stand up to a fork.
Whether you’re serving it for St. Patrick’s Day or a weeknight dinner, the versatility of this dish makes it a staple worth mastering.
The beauty of this method is its adaptability—you can smoke it for a deeper char, braise it in liquid for extra moisture, or even use a pressure cooker to cut time without sacrificing tenderness.
Pair it with classic sides like boiled cabbage, creamy mashed potatoes, or tangy pickles to complete the meal. The key is letting the spices and slow cooking do the work, so you end up with a brisket that’s both impressive and effortless.
Once you taste the result—juicy, flavorful, and impossibly tender—you’ll never settle for store-bought again. Let’s get started on creating your own perfect flat corned beef brisket.
Ingredients for flat corned beef brisket
A few simple ingredients transform tough brisket into melt-in-your-mouth perfection through slow magic.
| Ingredient | Amount | Notes |
|---|---|---|
| Flat Corned Beef Brisket 🥩 | 4 lb | Whole flat cut, trimmed of excess fat |
| Yellow Mustard 🥫 | ½ cup | For curing paste application |
| Kosher Salt 🧂 | 1 ½ cups | Diamond Crystal preferred |
| Ground Black Peppercorns 🌶️ | 1 tbsp | Freshly cracked preferred |
| Ground Coriander 🌿 | 1 tbsp | For authentic depth |
| Ground Ginger 🌿 | 1 tbsp | Freshly ground for warmth |
| Ground Cloves 🌿 | 1 tsp | Whole cloves toasted and ground |
| Ground Allspice 🌿 | 1 tsp | For subtle complexity |
| Beef Broth 💧 | 3 cups | Low-sodium preferred |
| Apple Cider Vinegar 🍎 | ¼ cup | For tenderizing acidity |
| Brown Sugar 🍚 | ½ cup | Light or dark variety |
| Bay Leaves 🍃 | 4 whole | Fresh preferred, dried acceptable |
| Garlic Cloves 🧄 | 6 cloves | Smashed for infusion |
| Onion 🧅 | 1 whole | Yellow, sliced into wedges |
[recipe_ingredient_scaler]
The brisket is non-negotiable here—flat cut is key for even cooking. Costco or local butchers often carry it pre-trimmed, which saves time. Look for good marbling but don’t stress about perfection. The curing paste (mustard, salt, spices) is where the magic happens—Diamond Crystal kosher salt dissolves better than table salt. For the spices, Penzeys or bulk bins at natural markets ensure freshness. Whole spices toasted and ground add complexity that pre-ground can’t match.
No fresh ginger? Ground ginger works at half the amount. Short on coriander? Cumin at the same quantity gives similar earthiness. The apple cider vinegar can be swapped for white vinegar or lemon juice, but it’s worth tracking down the real stuff for that subtle sweetness. For the broth, low-sodium is critical—you don’t want to overpower the natural flavors. The onion and garlic can be swapped for 2 tbsp onion powder and 1 tbsp garlic powder if you’re in a rush, though fresh is always better.
The curing paste keeps in the fridge for 1 week if you’re prepping ahead. Once the brisket is cooked, it reheats beautifully—wrapped in foil in a 300°F oven for 1 hour keeps it juicy. For leftovers, slice against the grain and store in airtight containers for up to 5 days. The spices lose potency after 3 months, so buy small batches if you won’t use them all.
Why You’ll Love This Recipe
- No Prep Panic: Honestly, the hardest part is waiting 24 hours for the cure to work—trust me, it’s worth it. Just mix your spices, slather on the mustard paste, and let the fridge do the heavy lifting while you plan the rest of your week.
- Sweet-Savory Magic: That brown sugar and apple cider vinegar combo? It’s like a flavor hug for your taste buds. The spices—ginger, cloves, coriander—give it warmth, while the sear and slow cook turn tough brisket into something so tender, it practically melts on your fork.
- Leftovers That Win Over: Cook once, eat twice (or three times). Reheat it in foil at 300°F for an hour, and it’ll taste just as good as the first serving. Perfect for lunches, sandwiches, or even next Sunday’s dinner—no stress, just satisfaction.
- Budget-Friendly Powerhouse: A 4-pound brisket feeds a crowd without breaking the bank. The spices are cheap, the broth stretches far, and you’ll have enough leftovers to make it last the whole week—no takeout needed.
Step-by-step instructions for slow-cooked flat corned beef brisket
Here’s the method that transforms tough brisket into fork-tender perfection with rich, aromatic depth.
Prepare the Dry Cure and Apply to Brisket
In a small bowl, combine the 1½ cups kosher salt, 1 tbsp ground black peppercorns, 1 tbsp ground coriander, 1 tbsp ground ginger, 1 tsp ground cloves, and 1 tsp ground allspice. Mix thoroughly to create an even curing blend. This precise balance of spices creates the signature depth you’ll taste later.
Pat the 4 lb flat corned beef brisket dry with paper towels, removing any remaining moisture from the surface. Spread the curing mixture evenly over all sides, pressing it into the meat so it adheres completely. In a separate bowl, mix the ½ cup yellow mustard with ¼ cup apple cider vinegar to create a sticky paste. Brush this mixture generously over the entire surface of the brisket, ensuring full coverage. The mustard acts as a binder while the vinegar helps tenderize the meat.
Place the brisket on a wire rack set over a baking sheet, fat-side up. Refrigerate uncovered for 24 hours, flipping halfway through. This dry cure process breaks down muscle fibers, ensuring maximum tenderness when cooked. The refrigerator’s cold temperature also helps the cure penetrate deeply into the meat.
Sear and Begin Slow Cooking
Preheat your oven to 300°F. Remove the brisket from the refrigerator and let it sit at room temperature for 30 minutes before cooking. This step ensures even heat distribution throughout the meat. Heat a large Dutch oven over medium-high heat and add 1 tbsp olive oil. Sear the brisket on all sides until deeply golden brown, about 5-7 minutes per side. This initial sear creates a flavorful crust that locks in moisture during the long cook.
While the brisket sears, prepare the cooking liquid by combining 3 cups beef broth, ½ cup brown sugar, and 4 bay leaves in the Dutch oven. The brown sugar adds subtle sweetness that balances the savory spices. Once the brisket is browned, place it fat-side up in the Dutch oven. Add the sliced 1 onion and 6 smashed garlic cloves around the brisket. Pour the beef broth mixture over the meat, ensuring it’s mostly submerged.
Cover the Dutch oven tightly with a lid and transfer to the preheated oven. Cook for 4 hours, maintaining the 300°F temperature. This slow cooking method allows the connective tissues to break down completely, transforming the tough brisket into melt-in-your-mouth perfection. After 2 hours, check the liquid level and add ¼ cup apple cider vinegar if needed to prevent drying.
Rest and Slice for Maximum Tenderness
Remove the brisket from the oven and transfer it to a cutting board. Tent loosely with aluminum foil and let it rest for 30 minutes before slicing. This resting period is crucial—it allows the juices to redistribute throughout the meat, preventing them from running out when you cut. The internal temperature should reach 195-205°F at its thickest point, indicating perfect doneness and tenderness.
After resting, slice the brisket against the grain into ¼-inch thick slices. The grain runs horizontally across the flat cut, so cutting perpendicular creates tender, bite-sized pieces. Arrange the sliced brisket on a serving platter and spoon the cooking liquid through a fine-mesh strainer over the top. This strained liquid, now infused with all the flavors from the cook, makes an excellent sauce for serving.
Serve immediately with the pan sauce and any remaining vegetables from the cooking liquid. The brisket should be so tender it practically falls apart with gentle pressure, yet still hold its shape on the plate. Each bite should deliver rich, savory flavors with just the right balance of sweetness from the brown sugar and warmth from the spices.
Pro Tips For Making Flat Corned Beef Brisket
- Salt the Night Before: I used to skip the 24-hour cure, thinking it was overkill—until my brisket turned out chewy no matter how long I cooked it. The salt and spices need that time to work their magic, so set it up the night before. Trust me, the difference in tenderness is dramatic.
- Sear Like It’s 1950: Don’t rush the sear—medium-high heat and 5-7 minutes per side until it’s deep golden brown. I’ve seen people walk away too soon, and the crust never gets that caramelized richness that locks in flavor. A little patience here saves you from dry meat later.
- Check the Liquid: After 2 hours in the oven, the liquid might have evaporated. Add ½ cup hot water if needed—this keeps the brisket from drying out. I learned this the hard way when my first batch turned out tough because I ignored the liquid level. Keep an eye on it.
- Rest or Regret: Skipping the 30-minute rest is the fastest way to ruin perfectly cooked brisket. The juices need time to redistribute, or you’ll end up with slices that bleed dry onto your plate. Cover it loosely with foil and let it sit—your future self will thank you.
Troubleshooting your flat corned beef brisket
Undercooked Brisket Fix
The most common issue is brisket that’s still tough after cooking. If your internal temperature didn’t reach 195-205°F at its thickest point, it needs more time. Return it to the oven at 300°F for another 1-2 hours, covered, until it reaches the ideal range.
Check every 30 minutes to avoid overcooking. The key is patience—this cut needs slow, steady heat to break down collagen. 🔥
Dry Brisket Rescue
If your brisket dried out, don’t toss it! Slice against the grain and simmer in ½ cup beef broth with 1 tbsp brown sugar for 10 minutes to revive moisture.
For extra richness, add 1 tbsp mustard to the broth. This works best if the brisket is still warm—cold meat won’t rehydrate as well.
Uneven Browning
Browning should be deep and even, but if some spots are pale, return the brisket to the Dutch oven with 1 tbsp olive oil and sear those areas over medium-high heat for 2-3 minutes per side.
This adds color and flavor without overcooking. Avoid high heat—it’ll steam instead of sear. A Lodge cast iron pot works best for this step.
Spice Overpowering
If the spices taste too harsh, balance them with 1 tbsp apple cider vinegar or 1 tsp honey in the cooking liquid. Simmer for 5 minutes to let the flavors meld.
For a stronger fix, add ½ cup mashed potatoes to absorb excess saltiness—this trick works because potatoes are neutral but soak up flavors. 💡
Liquid Too Thin
Thin broth means the brisket released too much moisture. Reduce the liquid by simmering uncovered for 15 minutes until it thickens. If it’s still too thin, whisk in 1 tbsp cornstarch mixed with 2 tbsp cold water and cook until glossy.
This creates a glossy, flavorful sauce without altering the brisket’s texture.
Grain Direction Mistake
If your slices are chewy instead of tender, you sliced with the grain. Always cut perpendicular to the muscle fibers—the grain runs horizontally across the flat cut.
Use a sharp knife and rotate the board mid-slice for even cuts. A Dexter-Russell 12-inch slicing knife makes this easier. The result? Juicy, melt-in-your-mouth pieces every time.
Nutrition facts
Frequently asked questions
Why does the curing process take 24 hours?
The 24-hour dry cure is essential for breaking down tough muscle fibers in the brisket. This extended time allows the kosher salt and spices to penetrate deeply, ensuring maximum tenderness. Skipping this step often results in chewy meat that lacks the signature melt-in-your-mouth texture. The cold refrigerator temperature also helps the cure work its magic without cooking the meat prematurely.
Can I skip the searing step?
While technically possible, searing is critical for developing a flavorful crust that locks in moisture during the long cook. Without it, your brisket will lack depth and may dry out faster. A quick sear over medium-high heat adds caramelized flavor and creates a protective barrier. Use olive oil for best results—it has a higher smoke point than butter.
What if my brisket reaches 205°F but is still tough?
If the internal temperature hits 195-205°F but the meat remains chewy, the issue is likely uneven cooking. Return it to the oven at 300°F for another 1-2 hours, covered, checking every 30 minutes. The key is patience—this cut needs slow, steady heat to break down collagen properly. Consider using a meat thermometer to monitor the thickest part of the brisket.
How do I know if I’ve sliced against the grain correctly?
For perfect tenderness, you must cut perpendicular to the muscle fibers. The grain runs horizontally across the flat cut, so slice straight across these lines. If your slices are chewy, you sliced with the grain. Use a sharp knife and rotate the cutting board mid-slice for even pieces. A ¼-inch thickness works best for balance between texture and bite size.
Can I use a slow cooker instead of the oven?
Yes! Transfer the seared brisket and cooking liquid to a slow cooker set to low heat for 8-10 hours, or high heat for 5-6 hours. The slow cooker method works well but requires more frequent liquid checks. Add ½ cup hot water if needed to maintain moisture. Just be sure to let it rest for 30 minutes before slicing, just like the oven method.

Trained in classic French technique but raised on slow-cooked ribs and spicy rubs, she blends culinary skill with smoke and soul.
- Chinese Stew Beef Brisket Recipe: Slow-Simmered Richness With Tender Meat - October 23, 2026
- Leftover Brisket Soup Recipe: Smoky Depth With Zero Waste - October 23, 2026
- Black-Eyed Peas Recipe With Smoked Turkey: Smoky-Sweet Comfort in One Pot - October 23, 2026