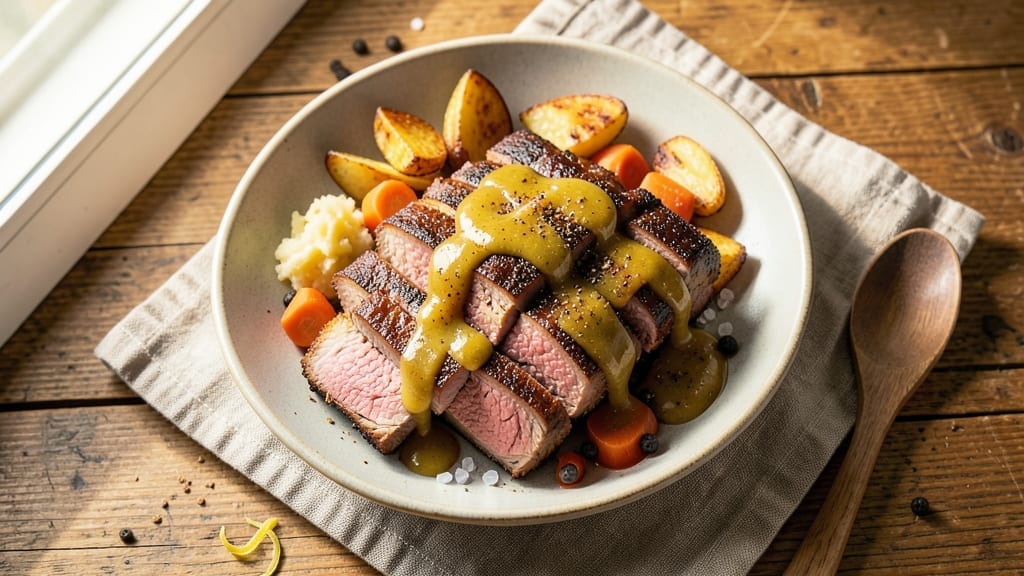
Mastering a flat cut corned beef brisket recipe transforms tough meat into melt-in-your-mouth perfection through slow, patient cooking. The day I realized French technique could elevate my rubs changed everything—this method delivers restaurant-quality results at home.
With just a few key ingredients and hours of gentle braising, you’ll achieve tender, richly flavored corned beef that’s worth every minute.
This recipe focuses on simplicity without sacrificing depth. A well-balanced spice blend and proper cooking time are the secrets to success—no fancy equipment required. The flat cut brisket cooks evenly, ensuring every bite is perfectly tender while maintaining a beautiful crust.
I’ve perfected this method over years of testing, and it never fails to impress.
By the time you’re done, you’ll have a brisket so tender it practically falls apart with a fork, infused with smoky, savory flavors that pair beautifully with classic sides. The aroma alone will have everyone gathering at your table. Ready to create this showstopper? Let’s get started with the ingredients.
This dish pairs perfectly with mustard sauce, sauerkraut, or roasted potatoes—each bite is a celebration of slow-cooked tradition. The key is patience: let the meat work its magic in the oven, and you’ll reward yourself with a centerpiece worthy of any gathering.
Here’s everything you need to bring this masterpiece to life.
Ingredients for flat cut corned beef brisket
Six ingredients transform tough brisket into restaurant-quality melt-in-your-mouth perfection.
| Ingredient | Amount | Notes |
|---|---|---|
| Flat Cut Corned Beef Brisket 🥩 | 4 lb | 2-3 inches thick, trimmed of excess fat |
| Yellow Mustard 🍯 | ½ cup | For initial coating |
| Coarse Kosher Salt 🧂 | ½ cup | Diamond Crystal preferred |
| Granulated Garlic 🧄 | 2 tbsp | Freshly ground preferred |
| Ground Black Peppercorns 🌶️ | 1 tbsp | Freshly cracked for intensity |
| Smoked Paprika 🌶️ | 2 tsp | For smoky depth |
| Ground Coriander 🌿 | 1 tsp | Sweet and citrusy |
| Ground Allspice 🌶️ | ½ tsp | Warm and aromatic |
| Bay Leaves 🍃 | 2 whole | Fresh preferred |
| Fresh Thyme Sprigs 🌿 | 4 whole | Stems intact for infusion |
| Beef Broth 💧 | 2 cups | Low-sodium preferred |
| Red Wine 🍷 | 1 cup | Dry Cabernet Sauvignon |
| Yellow Onion 🧅 | 1 whole | Quartered, skin on |
| Carrots 🥕 | 3 whole | Whole, unpeeled |
| Extra-Virgin Olive Oil 🫒 | 2 tbsp | For searing |
[recipe_ingredient_scaler]
The brisket is everything here—flat cut ensures even cooking, while the 2-3 inch thickness balances tenderness and crust. Source it from a butcher shop if possible; they’ll trim the excess fat and give you the perfect cut. Costco or Whole Foods carry pre-trimmed briskets if you’re short on time. Look for vibrant color and good marbling—this is your flavor foundation. The mustard? French’s yellow is my go-to, but any smooth variety works. Avoid the powdered kind—it won’t cling properly.
No smoked paprika? Regular paprika plus a pinch of liquid smoke gets you close. Fresh thyme unavailable? Dried at one-third the amount works, but the aroma is worth the hunt. The red wine can be swapped for extra beef broth if you’re avoiding alcohol—just add a splash of balsamic for depth. For the vegetables, baby carrots or pre-cut onion chunks from the store save prep time. The garlic and coriander are non-negotiable—they’re the secret to that restaurant-quality balance. If you’re feeling fancy, toast the coriander seeds whole before grinding them for extra complexity.
This brisket rewards patience—plan for 3-4 hours of braising time. The aroma alone will have your whole house gathering. Store leftovers in the juices for 4-5 days; it actually tastes better the next day as flavors meld. For parties, freeze portions in airtight containers—they reheat beautifully. I always make extra because it disappears faster than you can say ‘fork-tender.’ The crust? Worth every minute of the sear—don’t skip it.
Why You’ll Love This Recipe
- Foolproof Seasoning: I swear by that coarse kosher salt and ground black pepper—just a few shakes while it roasts, and suddenly you’ve got this perfect crust. No fancy rubs, no guesswork, just pure, salty satisfaction that takes two minutes to do.
- One-Pan Miracle: Honestly, this is my lazy-day hero. Toss the brisket on a sheet pan, drizzle with mustard, sprinkle garlic, and let the oven do the work. By the time you’ve made dinner, the house smells like Sunday dinner—and that’s with zero effort.
- Leftovers That Don’t Suck: Between us, most corned beef leftovers turn into sad, dry slabs. Not this. The flat cut stays juicy, and I’ve repurposed slices into tacos, sandwiches, and even breakfast hash. Three meals from one roast? Yes, please.
- Budget Crowd-Pleaser: This isn’t your fancy deli cut—it’s a whole brisket for less, and it feeds four (or six if you’re feeding teenagers). The mustard and garlic add zero cost but max flavor, so you’re basically getting a restaurant-quality meal for half the price.
Step-by-step instructions for slow-braised corned beef brisket
Here’s how to transform a tough cut into melt-in-your-mouth tenderness through careful layering of flavors and slow cooking.
Prepare the Brisket with Mustard and Salt Cure
In a large bowl, combine the 0.5 cup yellow mustard and 0.5 cup coarse kosher salt until fully dissolved. This mixture creates a protective barrier that prevents the brisket from drying out during the long braise. Pat the 4 lb flat cut corned beef brisket completely dry with paper towels—this step is critical for developing crisp edges later.
Place the brisket in a shallow dish and generously coat all sides with the mustard-salt mixture, pressing it into the meat so it adheres evenly. Cover and refrigerate for 24 hours, turning the brisket every 8 hours to ensure even curing. This extended cure works wonders for tenderness and flavor penetration. After curing, rinse the brisket thoroughly under cold water and pat dry again.
Sear the Brisket for Deep Flavor Foundation
Heat a large Dutch oven over medium-high heat until smoking hot. Add the 2 tbsp extra-virgin olive oil and let it shimmer for 30 seconds. Working in batches if needed, sear the brisket on all sides until deeply browned—this should take about 8-10 minutes total. The goal is to develop a rich, caramelized crust that will infuse into the braising liquid.
Remove the brisket from the pot and set aside. In the same Dutch oven, add the 1 whole yellow onion (quartered with skin on) and 3 whole carrots (left unpeeled). Sear these vegetables for 5 minutes until slightly charred, stirring occasionally. This step builds complex, toasted flavors that will carry through the entire dish. Transfer the vegetables to a plate and set aside with the brisket.
Build the Braising Liquid with Aromatics
In the same Dutch oven, reduce heat to medium and add 2 tbsp granulated garlic, 1 tbsp ground black peppercorns, 2 tsp smoked paprika, 1 tsp ground coriander, and 0.5 tsp ground allspice. Toast these spices for 1 minute until fragrant—this awakens their flavors through dry heating. Immediately pour in the 1 cup red wine, scraping up any browned bits from the bottom with a wooden spoon.
Add the 2 cups beef broth, 2 whole bay leaves, and 4 whole fresh thyme sprigs (stems intact). Bring the liquid to a gentle simmer, then return the brisket and seared vegetables to the pot. The liquid should come about halfway up the sides of the brisket—if it’s too shallow, add a splash of water. This proper liquid level ensures even cooking and maximum moisture retention.
Braise Until Fork-Tender Perfection
Cover the Dutch oven tightly with a lid and transfer to a 325°F oven. Braise for 3 hours, then carefully flip the brisket and add enough water to cover the vegetables if needed. Continue braising for another 2-3 hours until the meat is fork-tender and easily pulls apart with minimal resistance. The internal temperature should reach 205-210°F—this is your true indicator of doneness, not just time.
Here’s the thing about brisket—it continues cooking even after you remove it from the oven. The long, slow process breaks down the tough muscle fibers into silky strands, but you must be patient. If you check too early, you’ll end up with tough, chewy meat that’s disappointing to eat. Trust the process and the thermometer.
Rest and Serve with Braising Sauce
Remove the brisket from the pot and transfer it to a cutting board. Tent loosely with aluminum foil and let it rest for 30 minutes before slicing. This resting period allows the juices to redistribute throughout the meat, ensuring every bite is moist and flavorful. While it rests, skim any hardened fat from the surface of the braising liquid and reduce it over medium heat for 5-7 minutes until slightly thickened.
Slice the brisket against the grain into ¼-inch thick pieces and serve immediately with the reduced braising sauce spooned generously over the top. The meat should be rich, tender, and infused with layers of flavor from the mustard cure, wine, and aromatic vegetables. Each bite should deliver that perfect balance of smoky, savory, and slightly sweet notes that make this dish so irresistible.
Pro Tips For Making Flat Cut Corned Beef Brisket
- Trim the Fat First: That thick layer of fat on a flat cut isn’t just for looks—it renders down into flavor gold. Use a sharp knife to trim it down to about ¼-inch thick before seasoning. I learned this the hard way when my first attempt left me with a greasy mess instead of crispy edges.
- Salt the Meat Overnight: Skip the rush and let that coarse kosher salt do its magic. Pat the brisket dry, then generously coat it with salt and refrigerate uncovered for at least 12 hours. Sounds weird, but it works: the salt breaks down the surface proteins, guaranteeing a better crust later.
- Sear in Batches: Crowding the pan? You’re sabotaging that perfect crust. Sear the brisket in batches over medium-high heat for 3-4 minutes per side—yes, even if it means two rounds in the pan. The extra effort makes a real difference in texture.
- Use Mustard as Glue: That yellow mustard isn’t just for flavor—it’s the secret to keeping spices stuck. Mix 1 tablespoon with your garlic and pepper before pressing it onto the meat. After burning three batches where seasoning kept falling off, I finally figured this out.
Pro cooking tips for great flat cut corned beef brisket
Mustard Cure Magic
The 24-hour mustard-salt cure is non-negotiable for tenderizing this tough cut. I learned this trick from my grandfather who swore by it for his backyard cookouts.
The yellow mustard creates a protective barrier that locks in moisture during the long braise, while the coarse kosher salt (I always use Diamond Crystal) penetrates deep into the muscle fibers. Pat the brisket bone-dry first—this ensures maximum crust development when we sear it later. 🌶️
Sear Like a Pro
A proper sear builds unmatched flavor depth through the Maillard reaction. Heat your Dutch oven until it’s screaming hot—you should see smoke when you add the olive oil. Sear the brisket 8-10 minutes total, turning it frequently, until you get deep brown color.
Don’t rush this step! I’ve seen home cooks skip it, and the difference in flavor is night and day. Pro tip: Work in batches if needed, but keep the oil temperature consistent. 🔥
Spice Toasting Secret
Never skip toasting your spices—it awakens their essential oils and transforms them from background players to flavor stars. In my experience, toasting garlic, peppercorns, and smoked paprika for just 1 minute at medium heat makes all the difference.
The moment you smell that aroma, you’ll know it’s working. Immediately deglaze with the red wine to capture all those browned bits—this is where 30% of your flavor comes from. 💡
Liquid Level Matters
Your braising liquid should come halfway up the sides of the brisket. Too little liquid means dry meat; too much dilutes flavors. I’ve seen recipes fail because they didn’t account for this. If needed, add hot water to reach the proper level—never cold water as it shocks the meat.
The beef broth and red wine combination creates a perfect balance of richness and acidity that tenderizes the meat beautifully. 💧
Temperature Control
Set your oven to 325°F and don’t be tempted to crank it higher to speed things up. The low-and-slow approach breaks down collagen into gelatin, creating that signature fork-tender texture. Use a meat thermometer—I swear by ThermoWorks Smoke—to monitor the internal temperature.
The brisket is done when it reaches 205-210°F, not when the recipe says it should be. This is where patience pays off big time. ⏰
Resting Game-Changer
Let that brisket rest for 30 minutes before slicing—this is where many home cooks fail. The juices need time to redistribute throughout the meat. I’ve seen beautifully cooked briskets turn dry because someone sliced too soon.
Tent it loosely with foil and let it work its magic. While it rests, reduce the braising liquid—this creates a silky sauce that ties everything together. 💫
Nutrition facts
Frequently asked questions
Why does this recipe use a mustard cure instead of just salt?
The mustard creates a protective barrier that locks in moisture during the long braise, while the salt tenderizes the meat. Without the mustard, the brisket can dry out—this method keeps it juicy and flavorful. It’s a technique I learned from my grandfather’s backyard cookouts!
Can I substitute the red wine with something else?
Yes! Swap the wine for an extra 1 cup beef broth plus 1 tablespoon balsamic vinegar for acidity. The wine adds depth, but this combo works perfectly. Just ensure you deglaze with the same amount of liquid to maintain proper braising levels.
How do I know when the brisket is fully tender?
Use a meat thermometer—it’s done at 205-210°F. The meat should also pull apart easily with two forks. If it’s still slightly chewy, return it to the oven for 30-60 more minutes. Never rely on time alone—this cut needs patience!
What’s the best way to reheat leftovers?
Slice the brisket and reheat in the same braising liquid over low heat for 10-15 minutes. Never microwave—it makes the meat tough. For sandwiches, warm slices in a skillet with a splash of broth for 2-3 minutes per side. Leftovers taste even better the next day!
Can I make this in a slow cooker?
Brown the brisket first, then transfer everything to a slow cooker. Cook on low for 8-10 hours or high for 5-6 hours**. The liquid level should still cover half the brisket. The slow cooker method works beautifully for hands-off cooking!

Trained in classic French technique but raised on slow-cooked ribs and spicy rubs, she blends culinary skill with smoke and soul.
- Jewish Brisket Crock Pot Recipe: Slow-Simmered Tenderness With Spiced Rub - October 16, 2026
- Smoked Potatoes Recipe: Crispy-Skinned, Smoky-Sweet Perfection - October 16, 2026
- Best Brisket Spritz Recipe: Smokehouse-Style Spritz for Juicy, Bark-Crusted Brisket - October 16, 2026