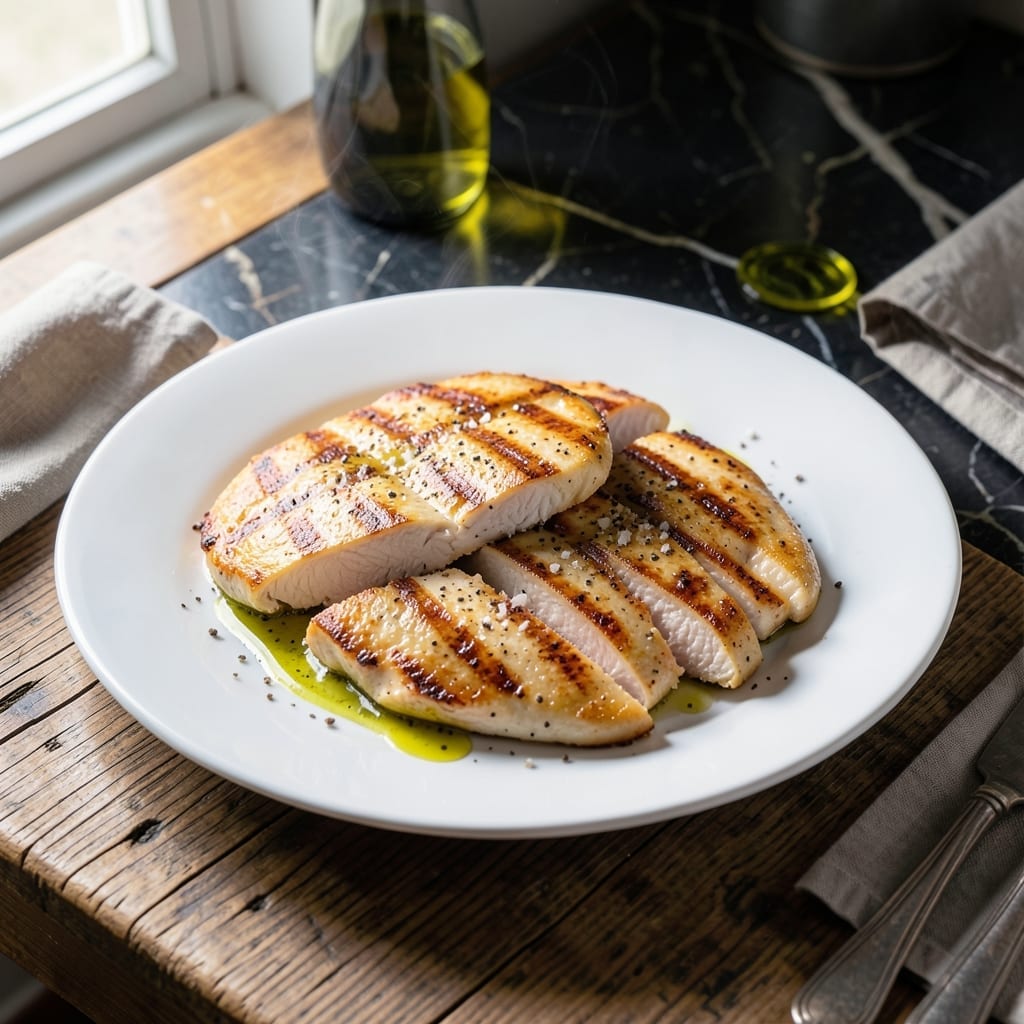
Achieving evenly cooked chicken breast starts with proper preparation and technique. This method ensures juicy, tender meat every time without the dryness that plagues so many home-cooked versions.
Flattening the breast creates uniform thickness, allowing for consistent cooking from edge to edge. The process takes just minutes and makes a noticeable difference in both texture and flavor.
With this approach, you’ll transform standard chicken into a restaurant-quality main course. The technique works for grilling, pan-searing, or baking with equally impressive results.
Serve with your favorite sides for a complete meal that highlights the chicken’s natural flavor and perfect doneness.
Ingredients for Flatten Chicken Breast
Professional technique meets quality ingredients for perfectly even cooking every time.
| Ingredient | Amount | Notes |
|---|---|---|
| Boneless Skinless Chicken Breasts 🍗 | 2 lb | Pounded to even thickness |
| Kosher Salt 🧂 | 1 ½ tsp | Diamond Crystal preferred |
| Freshly Ground Black Pepper 🌶️ | ½ tsp | Coarse grind recommended |
| Olive Oil 🫒 | 2 tbsp | Divided for cooking and finishing |
| Garlic Powder 🧄 | 1 tsp | Not garlic salt |
| Onion Powder 🧅 | 1 tsp | Freshly opened for potency |
| Smoked Paprika 🌶️ | ½ tsp | Sweet or hot variety |
| Dried Thyme 🍃 | ½ tsp | Crushed between fingers |
| Dried Rosemary 🌿 | ½ tsp | Finely crushed for even distribution |
| Unsalted Butter 🧈 | 2 tbsp | For basting while cooking |
| Fresh Lemon Juice 🍋 | 1 tbsp | For finishing brightness |
| Fresh Parsley 🌿 | 2 tbsp | Finely chopped for garnish |
[recipe_ingredient_scaler]
The chicken quality is paramount. Air-chilled breasts from Whole Foods or Costco have superior texture and moisture retention compared to water-chilled varieties. Look for uniform size (6-8 oz each) to ensure even cooking. The seasoning blend uses Diamond Crystal kosher salt for its clean flavor and perfect texture—avoid iodized table salt as it can taste metallic.
Substitutions are minimal but effective. Chicken thighs can replace breasts for more forgiveness (adjust cooking time). For a smokier profile, swap paprika for chipotle powder. Fresh herbs can replace dried at a 3:1 ratio. The butter can be olive oil for a dairy-free version, though you’ll lose some richness. Always pat the chicken completely dry before seasoning for optimal browning.
Store raw chicken in its original packaging on the bottom shelf of the fridge for up to 2 days. Cooked chicken keeps 3-4 days refrigerated or 3 months frozen. The seasoning blend can be pre-mixed and stored in an airtight container for up to 6 months.
Why You’ll Love This Recipe
- One Pan Wonder: I love that I only need a skillet, some olive oil, and those simple seasonings to get this going.
- Garlic Kissed: Honestly, that garlic powder mixed with the pepper gives the chicken a warmth that’s just right.
- Meal Prep Hero: It’s my go-to for Sunday prep—cook a batch and you’ve got protein ready for salads or wraps all week.
- Budget Stretcher: A few chicken breasts go a long way, and the seasonings are already in my pantry.
Step-by-Step Instructions for Flatten Chicken Breast
This method ensures uniform thickness for consistent cooking and maximum tenderness every time.
Step 1: Prepare and Pound the Chicken Breasts
Place the boneless skinless chicken breasts between two sheets of plastic wrap on a stable work surface. Using a meat mallet or rolling pin, gently pound each breast to an even ½-inch thickness, working from the center outward.
This step is crucial for even cooking—thicker portions take longer to cook, leading to dry, overdone meat. I focus on the thicker end of each breast, applying firm, even pressure until the entire piece is uniform. The plastic wrap prevents tearing while allowing you to exert enough force to flatten the meat properly.
Step 2: Season the Chicken Thoroughly
Pat the pounded chicken breasts dry with paper towels to ensure the seasoning adheres properly. In a small bowl, combine the 1.5 tsp kosher salt, 0.5 tsp freshly ground black pepper, 1 tsp garlic powder, 1 tsp onion powder, 0.5 tsp smoked paprika, 0.5 tsp dried thyme, and 0.5 tsp dried rosemary.
Rub this spice blend evenly over all surfaces of the chicken, pressing gently to ensure it sticks. I crush the dried thyme and rosemary between my fingers as I sprinkle to release their aromatic oils. Season both sides generously—this creates a flavorful crust and enhances the natural taste of the chicken.
Step 3: Sear the Chicken to Golden Perfection
Heat 1 tbsp olive oil in a large skillet over medium-high heat until it shimmers but does not smoke. Add the seasoned chicken breasts and cook undisturbed for 5-6 minutes until the underside develops a deep golden-brown crust.
Flip the chicken and add the remaining 1 tbsp olive oil and 2 tbsp unsalted butter to the pan. As the butter melts, spoon it over the chicken repeatedly to baste. Cook for another 4-5 minutes until the internal temperature reaches 165°F and the chicken is cooked through with no pink remaining.
Step 4: Rest and Finish with Fresh Herbs
Transfer the chicken to a clean cutting board or warm plate and let it rest for 5-10 minutes. This allows the juices to redistribute throughout the meat, ensuring each bite remains moist and flavorful. Tent loosely with foil to keep it warm.
Just before serving, drizzle the chicken with 1 tbsp fresh lemon juice and sprinkle with 2 tbsp finely chopped fresh parsley. The lemon juice adds a bright, acidic note that cuts through the richness, while the parsley provides a fresh, herby finish. Slice against the grain and serve immediately.
Pro Tips For Making Flatten Chicken Breast
- Pound Evenly: Use a meat mallet or rolling pin to pound the chicken to an even ½-inch thickness—I learned this the hard way after too many dry, uneven pieces.
- Salt the Raw Meat: Sprinkle kosher salt on both sides at least 15 minutes before cooking; it actually changes the outcome by helping the chicken retain moisture.
- Skip the Cold Pan: Heat the olive oil in the pan until it shimmers before adding the chicken—after burning three batches, I finally figured out this prevents sticking and ensures a golden crust.
- Rest Before Serving: Give the chicken a solid 5 minutes under foil after cooking; it looks like wasted time, but it guarantees juicy meat every single time.
Pro Cooking Tips for Perfect Results
Proper Pounding Technique
Use a meat mallet or rolling pin between two sheets of plastic wrap to pound breasts to an even ½-inch thickness. Work from the center outward, focusing on the thicker end. I’ve found a flat mallet works better than a textured one for this task. 🔥
Temperature Control
Heat your skillet over medium-high heat until the oil shimmers but doesn’t smoke. A cast iron skillet retains heat beautifully for even cooking. I always let my pan preheat for 3-4 minutes to ensure proper temperature.
The Baste Method
After flipping, add 2 tbsp butter and spoon the melted butter over the chicken repeatedly. This basting technique adds flavor and helps achieve that perfect golden crust. I use a long-handled spoon to avoid burning my fingers.
Resting is Key
Always let your chicken rest for 5-10 minutes after cooking. This allows juices to redistribute. I tent mine loosely with foil to keep it warm. Skipping this step means dry chicken, no matter how perfectly you cooked it. 💡
Internal Temp Check
Use an instant-read thermometer to check for 165°F in the thickest part. I recommend the ThermoWorks ThermoPop for its accuracy and speed. Don’t rely on color alone—temperature is the only sure way to know it’s done.
Even Seasoning
Crush dried herbs between your fingers as you sprinkle to release their oils. Press the seasoning into the meat to create a flavorful crust. I always season both sides generously—this isn’t the time to be shy with your spices.
Nutrition Facts
Frequently Asked Questions
What thickness should I pound the chicken to?
Aim for an even ½-inch thickness throughout. This ensures even cooking without dry spots. Use a ruler to check if needed.
Can I skip the plastic wrap when pounding?
No, it creates a barrier that prevents tearing and keeps juices contained. It also makes cleanup much easier after pounding.
Why rest the chicken after cooking?
Resting for 5-10 minutes lets juices redistribute. Cutting too soon causes dry meat as the juices escape.
What if my chicken is already thin?
Check for uniform thickness. If some spots are thinner than ½-inch, fold the thin edge under before cooking to even it out.

Trained in classic French technique but raised on slow-cooked ribs and spicy rubs, she blends culinary skill with smoke and soul.
- Recipe for Boneless Pork Chops in Cast Iron Skillet: Sear and Baste to Juicy Perfection - October 3, 2026
- Recipe for Boneless Cross Rib Roast: Slow-Roasted Beef with Herb Crust - October 3, 2026
- Hamburgers in Sauce Recipe Crock Pot: Slow-Cooked Savory Delight - October 3, 2026