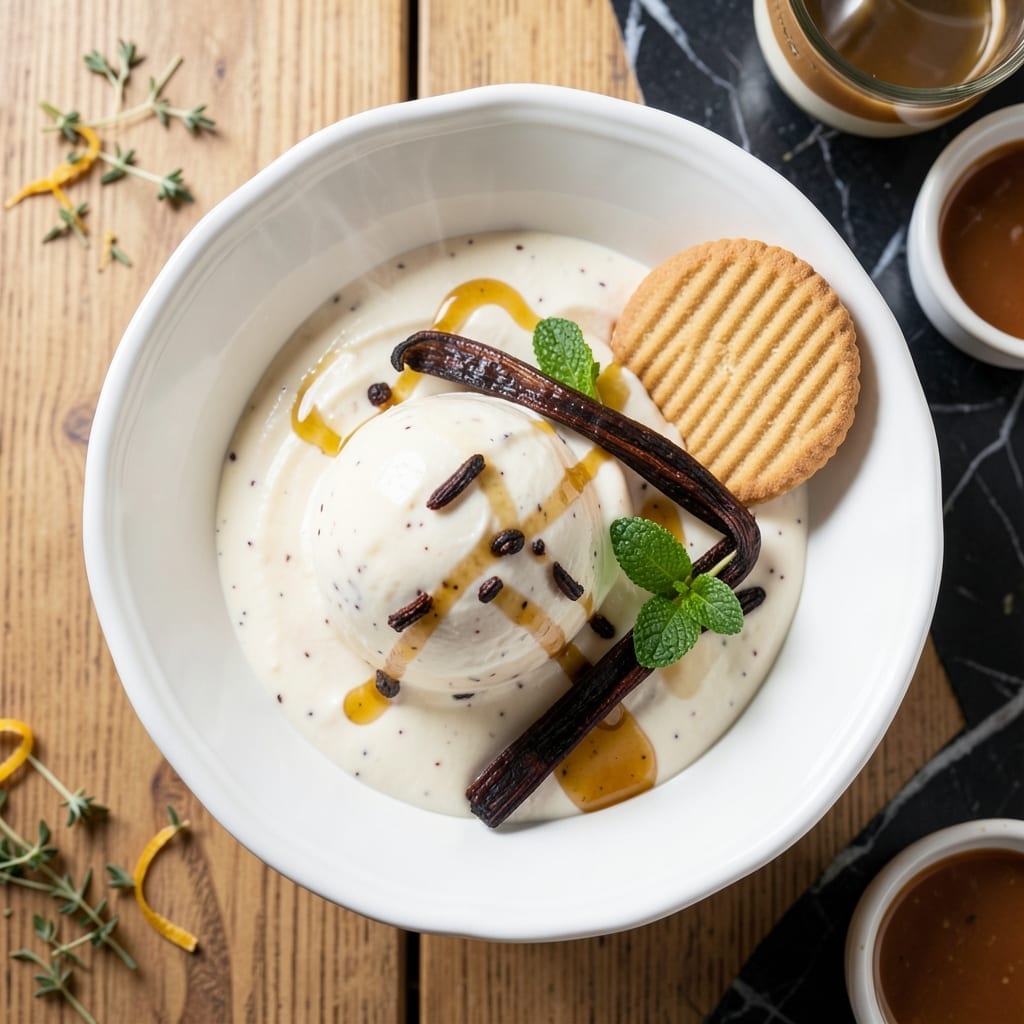
There’s a reason French vanilla remains the gold standard of ice cream flavors—its rich, custard-like base with real vanilla bean flecks creates unmatched depth. I’ve perfected this classic recipe using my KitchenAid mixer’s attachment to achieve that signature velvety texture.
This method relies on a simple custard base, chilled thoroughly before churning. The KitchenAid’s ice cream attachment handles the work, transforming the liquid into creamy perfection in about 20 minutes. No fancy techniques, just precise execution.
What emerges is ice cream with a luxurious mouthfeel and balanced sweetness, speckled with tiny vanilla seeds. The flavor is pure and elegant, exactly as a classic French vanilla should be.
Serve immediately for soft-serve consistency or freeze for firmer scoops. The results speak for themselves.
Ingredients for French Vanilla Ice Cream Recipe Kitchenaid
A rich custard base with real vanilla bean flecks and cream. Nothing less than perfection here.
| Ingredient | Amount | Notes |
|---|---|---|
| Whole Milk 🥛 | 2 cups | Full-fat for creaminess |
| Heavy Cream 🥛 | 2 cups | Cold, at least 36% fat |
| Granulated Sugar 🍚 | ¾ cup | Fine grain for smooth texture |
| Vanilla Bean 🌿 | 1 whole | Split and scraped |
| Large Egg Yolks 🥚 | 6 whole | Room temperature preferred |
| Pure Vanilla Extract 💧 | 2 tsp | For additional depth |
| Sea Salt 🧂 | ¼ tsp | Fine grain for even distribution |
| Vanilla Bean Paste 🌿 | 1 tbsp | Optional for extra flecks |
[recipe_ingredient_scaler]
The dairy quality is non-negotiable. Whole Foods or organic brands provide the best milk and cream—avoid ultra-pasteurized if possible, as it affects texture. The vanilla bean should be plump and fragrant; Nielsen-Massey is a trusted brand. Egg yolks from pasture-raised eggs yield a deeper yellow custard. For the heavy cream, look for at least 36% milkfat for that signature French vanilla richness.
No vanilla bean? Use 2 tbsp vanilla bean paste instead. In a pinch, high-quality pure vanilla extract works, but the flecks will be missing. For a lighter version, swap whole milk for half-and-half (though texture won’t be as luxurious). The sugar can be replaced with superfine sugar for an even smoother result—just ensure it’s fully dissolved.
The custard base keeps in the fridge for 24 hours before churning, allowing flavors to meld. Churned ice cream is best eaten within 1 week for optimal texture. Freeze in an airtight container with parchment paper pressed directly on the surface to prevent ice crystals.
Why You’ll Love This Recipe
- One-Bowl Mix: Honestly, I just dump the milk, cream, sugar, and egg yolks in my KitchenAid, let it do the work, and the custard comes together like magic.
- Vanilla Bean Magic: Scraping the real vanilla bean into the base gives it that deep, floral sweetness that store-bought can’t touch.
- Makes Extra: I always double the batch because leftovers keep beautifully in the freezer, ready for spontaneous sundaes or midnight cravings.
Step-by-Step Instructions for French Vanilla Ice Cream
Achieve velvety smooth custard with this classic technique for your stand mixer’s ice cream attachment.
Step 1: Infuse Cream and Milk with Vanilla
In a medium saucepan, combine the 2 cups Whole Milk, 2 cups Heavy Cream, and 0.75 cup Granulated Sugar. Heat over medium heat until small bubbles form at the edges—this should reach about 170°F.
Split the 1 whole Vanilla Bean lengthwise and scrape the seeds into the warm milk mixture, then add the pod as well. Remove from heat, cover, and let steep for 30 minutes to allow the vanilla to fully infuse the dairy. This waiting period builds deep, aromatic flavor into your base.
Step 2: Temper Egg Yolks for Silky Custard
In a separate bowl, whisk the 6 whole Large Egg Yolks until slightly pale and thickened. Slowly ladle about one cup of the warm cream mixture into the eggs while whisking constantly—this tempering process prevents the eggs from scrambling.
Once the egg mixture is tempered, pour it back into the saucepan with the remaining cream. Return to low heat and cook, stirring constantly with a wooden spoon, until the mixture thickens enough to coat the back of the spoon (about 5-7 minutes). The custard should register 170-175°F on an instant-read thermometer.
Step 3: Strain, Cool, and Flavor the Base
Immediately strain the custard through a fine-mesh sieve into a clean bowl to remove the vanilla pod and any cooked egg bits. Stir in the 2 tsp Pure Vanilla Extract, 0.25 tsp Sea Salt, and 1 tbsp Vanilla Bean Paste for additional vanilla depth and visual specks.
Press plastic wrap directly onto the surface of the custard to prevent a skin from forming. Refrigerate for at least 4 hours, preferably overnight. This chilling step is crucial—the base must be completely cold before churning to achieve the creamiest texture.
Step 4: Churn to Perfect Consistency
Pour the chilled custard into your KitchenAid ice cream maker‘s frozen bowl and churn according to the manufacturer’s instructions, typically 20-25 minutes. The mixture should thicken to the consistency of soft-serve ice cream.
Watch for the moment when the custard pulls away from the sides of the bowl and holds its shape when a spoon is inserted. At this point, the ice cream is ready to be transferred to an airtight container.
Step 5: Freeze Until Firm
Transfer the churned ice cream to a freezer-safe container and press parchment paper directly against the surface to minimize ice crystals. Freeze for at least 4 hours until firm enough to scoop.
The final texture should be smooth, rich, and densely creamy with a subtle vanilla speckling throughout. For best results, let the ice cream sit at room temperature for 5-10 minutes before serving to achieve the perfect scoopable consistency.
Pro Tips For Making French Vanilla Ice Cream Recipe Kitchenaid
- Temper the Yolks: Slowly whisk about 1/2 cup of the hot milk mixture into the egg yolks before combining fully—I learned this the hard way after scrambling eggs in my first batch.
- Scrape the Bean: Split the vanilla bean lengthwise and scrape every last speck of seeds into the cream; those tiny black flecks carry most of the flavor.
- Watch the Simmer: Keep the custard at a gentle 170-175°F—any hotter and you risk curdling, and I’ve ruined two batches by walking away for “just a minute.”
- Chill Overnight: After churning, let the ice cream set in the freezer for at least 4 hours or overnight; it’s softer and creamier than if you dig in right away (yes, even if you’re impatient like me).
Storing and Reheating This Recipe
Freezer Storage
Transfer churned ice cream to an airtight container with parchment paper pressed against the surface. This prevents ice crystals and freezer burn. David and I always use Le Creuset containers—they’re sturdy and seal perfectly. Store at 0°F or below for up to 2 weeks for best texture. ❄️
Short-Term Refrigeration
If you can’t freeze immediately, the custard base keeps in the fridge for 24 hours before churning. Just ensure it’s completely chilled to 40°F first. I’ve found this waiting period actually enhances the vanilla flavor.
Soft-Serve Consistency
For immediate enjoyment, serve straight from the KitchenAid—it’ll have a soft-serve texture that’s absolutely divine. Emma loves it this way with fresh berries. If it’s too soft, pop it in the freezer for 30-60 minutes to firm up slightly.
Reheating Not Needed
Unlike other desserts, ice cream doesn’t need reheating. For easier scooping, let it sit at room temperature for 5-10 minutes before serving. This brings out the creamy texture without compromising quality.
Preventing Ice Crystals
If storing longer than a week, add 1 tbsp vodka to the base before churning—it lowers the freezing point. Press parchment directly on the surface, then seal with plastic wrap and the container lid. This triple-layer protection works wonders in our Austin heat. 💡
Reviving Freezer-Burned Ice Cream
If ice crystals form, let the ice cream soften slightly, then re-churn in the KitchenAid for 5-10 minutes. It won’t be perfect, but it’ll restore some creaminess. I’ve saved many a batch this way after a power outage.
Nutrition Facts
Frequently Asked Questions
Do I need a special attachment for my KitchenAid?
Yes, you’ll need the ice cream maker attachment. It includes a frozen bowl that must be pre-chilled for 12-15 hours before use. The attachment fits most KitchenAid stand mixers.
Can I use vanilla extract instead of a bean?
You can, but the flavor won’t be as rich. Use 2 tbsp of high-quality extract and add 1 tsp of vanilla bean paste for flecks. Real beans provide the best depth.
Why did my custard curdle?
Curdling usually happens if the eggs are added too quickly to the hot milk or cooked at too high a temperature. Always temper slowly and keep heat at low-medium.
How do I know when it’s done churning?
The mixture will look like soft-serve and pull away from the bowl sides, typically after 20-25 minutes. It should hold its shape when scooped but still be slightly soft.

Trained in classic French technique but raised on slow-cooked ribs and spicy rubs, she blends culinary skill with smoke and soul.
- Recipe for Crock Pot Lasagna Using Ravioli: No-Boil Cheese Layers - October 3, 2026
- Recipe for Cut Up Chicken: One-Pan Crispy Bites - October 3, 2026
- Recipe For Oven Baked Haddock: Buttery Crumbs With Zesty Lemon Topping - October 3, 2026