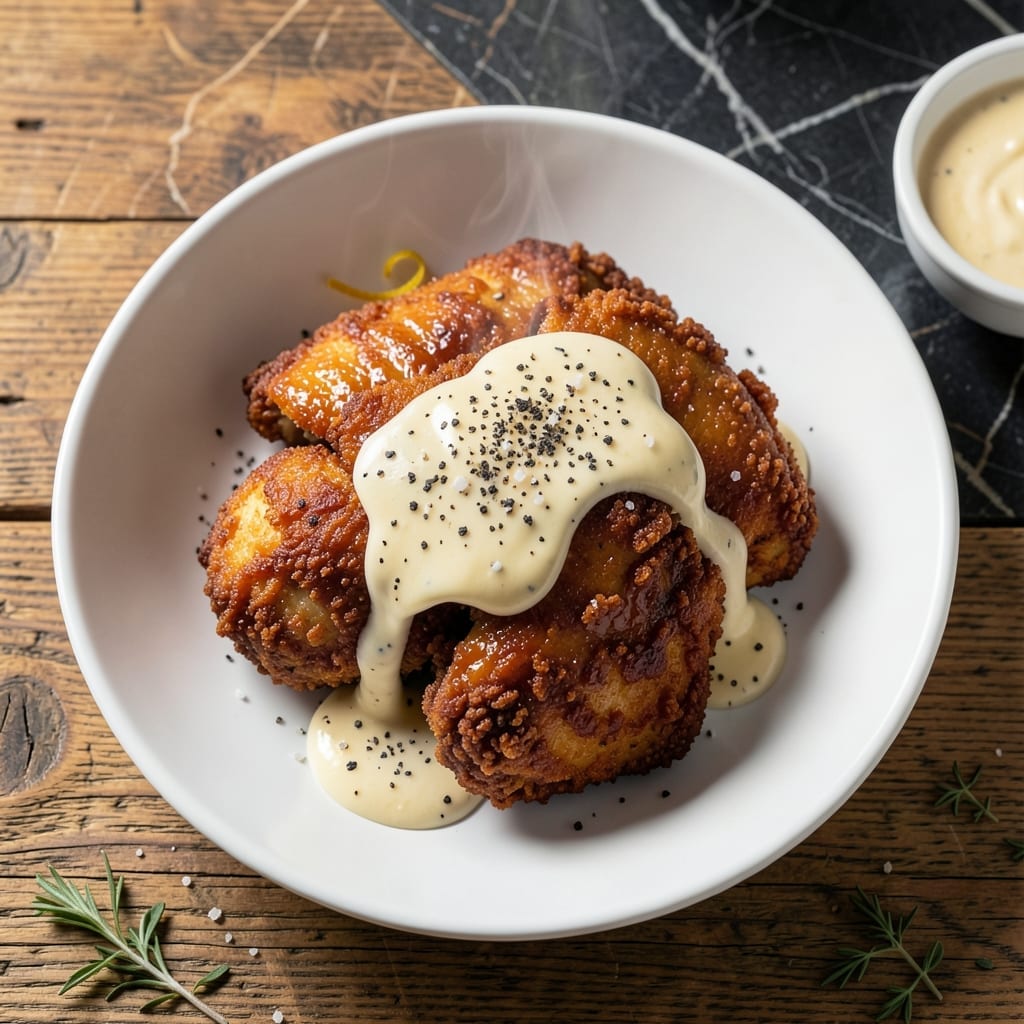
This no-egg fried chicken breast delivers crispy, golden results using simple pantry staples. I developed this method after realizing many home cooks lack eggs on hand.
The secret is using buttermilk or mayonnaise as a binder, which also adds extra flavor and tenderness. Each piece emerges with a shatteringly crunchy coating that stays put through frying.
With just 15 minutes of prep and 10 minutes of frying, you’ll have juicy chicken encased in a perfectly seasoned crust. The technique works every time, even for beginners.
Serve hot for maximum crunch, or keep warm in the oven while frying batches. The coating remains crispy without turning soggy.
Ingredients for Fried Chicken Breast Recipe No Egg
Pantry staples create a shatteringly crisp coating without a single egg in sight.
| Ingredient | Amount | Notes |
|---|---|---|
| Boneless Skinless Chicken Breast 🍗 | 1 ½ lb | Pounded to even thickness |
| All-Purpose Flour 🌾 | 2 cups | For dredging and coating |
| Buttermilk 🥛 | 1 cup | As egg substitute binder |
| Mayonnaise 🥪 | ¼ cup | Alternative binder option |
| Salt 🧂 | 1 ½ tsp | Diamond Crystal kosher preferred |
| Black Pepper 🌶️ | 1 tsp | Freshly ground for best flavor |
| Paprika 🌶️ | 1 tbsp | Sweet or smoked variety |
| Garlic Powder 🧄 | 1 tsp | Not garlic salt substitute |
| Onion Powder 🧅 | 1 tsp | Enhances savory depth |
| Cayenne Pepper 🔥 | ¼ tsp | Adjust for spice preference |
| Vegetable Oil 🫒 | 3 cups | For deep frying, high smoke point |
| Cornstarch 🌾 | ¼ cup | For extra crispiness |
[recipe_ingredient_scaler]
The chicken quality matters most. Boneless, skinless breasts from Costco or Whole Foods offer consistent thickness and good marbling. Pound them to an even 1/2-inch thickness—this ensures even cooking and maximum crunch. For the buttermilk, whole milk version provides the best richness and binding power. If using mayonnaise, Duke’s or Hellmann’s deliver superior results due to their higher fat content.
No buttermilk? Mix 1 cup milk with 1 tbsp vinegar or lemon juice, let sit for 5 minutes. Swap mayonnaise for Greek yogurt at a 1:1 ratio. The flour can be half all-purpose, half cornstarch for extra crispiness. For spice variations, swap paprika for Cajun seasoning or add a pinch of dried thyme. Always use freshly ground black pepper—pre-ground lacks the necessary punch.
Fry in batches to avoid crowding the pan (which lowers oil temperature). Drain on a wire rack, not paper towels, to maintain crispiness. Best served immediately, but holds well in a 200°F oven for 20-30 minutes. Leftovers keep 3-4 days refrigerated—reheat in the oven or air fryer to revive the crunch.
Why You’ll Love This Recipe
- No Egg Needed: I love that I can skip the egg without sacrificing crispiness—the mayo in the buttermilk mix binds everything perfectly.
- Crispy Outside, Juicy Inside: The flour coating fries up golden, while the chicken stays tender thanks to the buttermilk soak.
- Meal Prep Hero: I make a batch on Sunday and pack leftovers for lunches all week—they reheat surprisingly well.
- Budget Friendly: Boneless skinless chicken breast is affordable, and I already have flour, salt, and mayo in my pantry.
Step-by-Step Instructions for Fried Chicken Breast No Egg
Master the technique for achieving a perfectly crispy exterior with tender, juicy meat inside.
Step 1: Prepare and Season the Chicken Breast
Begin by pounding the 1.5 lb boneless skinless chicken breast to an even ½-inch thickness using a meat mallet. This ensures uniform cooking and prevents dry spots. Place the pounded pieces between sheets of plastic wrap to avoid tearing.
Season both sides liberally with the 1.5 tsp salt, 1 tsp black pepper, 1 tbsp paprika, 1 tsp garlic powder, 1 tsp onion powder, and 0.25 tsp cayenne pepper. Rub the spices into the meat thoroughly for maximum flavor penetration. Let the seasoned chicken rest for 10 minutes at room temperature.
Step 2: Create the Wet and Dry Coating Stations
In a shallow bowl, whisk together the 1 cup buttermilk and 0.25 cup mayonnaise until smooth. This mixture acts as your egg-free binder, ensuring the coating adheres properly. In a separate large bowl, combine the 2 cups all-purpose flour and 0.25 cup cornstarch.
The cornstarch is crucial—it creates micro-crispness in the final coating that flour alone can’t achieve. Whisk the dry ingredients thoroughly to eliminate any lumps. Your dredging station should have the wet mixture on one side and the dry mixture on the other for efficient coating.
Step 3: Coat the Chicken for Maximum Crunch
Dip each seasoned chicken piece into the buttermilk-mayonnaise mixture, turning to coat completely. Allow excess to drip off for 5 seconds—this prevents a gummy coating. Immediately transfer to the flour-cornstarch mixture, pressing firmly to ensure full coverage.
For extra crispiness, I use the “double-dip” method: after the first coating, return the piece to the wet mixture, then back to the dry mixture. Shake off any excess flour gently. The coating should look slightly shaggy but uniform. Place coated pieces on a wire rack set over a baking sheet.
Step 4: Fry to Golden Perfection
Heat the 3 cups vegetable oil in a deep, heavy-bottomed pot or Dutch oven to 350°F. Use a deep-fry thermometer for accuracy—oil that’s too cool will create greasy chicken, while oil that’s too hot will burn the exterior before the interior cooks.
Carefully lower 2-3 pieces of chicken into the hot oil, being careful not to overcrowd the pot. Fry for 6-8 minutes per side until the coating is deep golden brown and the internal temperature reaches 165°F. The oil temperature will drop when you add the chicken—maintain it between 325-350°F throughout cooking.
Step 5: Drain and Rest Before Serving
Transfer fried chicken to a wire rack set over a baking sheet or a plate lined with paper towels. The wire rack is superior to paper towels alone as it allows air circulation on all sides, preventing the coating from becoming soggy from trapped steam.
Let the chicken rest for 5-10 minutes before serving. This allows the juices to redistribute within the meat, ensuring each bite is moist and flavorful. The coating should remain crispy for up to 30 minutes if kept uncovered and in a single layer. Serve immediately while hot and at peak texture.
Pro Tips For Making Fried Chicken Breast Recipe No Egg
- Pound the Breasts: Use a meat mallet or rolling pin to even out the thickness to ½ inch—this guarantees even cooking and stops the thin edges from drying out before the center’s done.
- Marinate Longer: I learned this the hard way—soak the chicken in buttermilk for at least 4 hours (overnight if you can) so the mayo-flour coating really clings and the meat stays juicy.
- Skip the Overcrowding: Fry in batches with space between each piece, or the oil temp drops and you’ll end up with greasy, soggy breading instead of that crisp crust.
- Double-Dredge Works: Sounds weird, but it works: dip the chicken in flour, then buttermilk-mayo mix, then flour again for a thicker, crunchier coating that actually stays put.
Storing and Reheating This Recipe
Refrigerator Storage
Let your chicken cool completely before storing—this prevents condensation that makes the coating soggy. I use glass containers from New Seasons Market with tight lids. Store at 40°F or below for up to 4 days. 💡
Freezer Storage
Freeze on a baking sheet first for 1 hour to prevent sticking, then transfer to freezer bags. Squeeze out all air to prevent freezer burn. It keeps well for 3 months without losing much crispness when reheated properly.
Label with the date—I learned this the hard way after losing track of last year’s apple butter batches!
Oven Reheating
Preheat your oven to 400°F and place chicken on a wire rack over a baking sheet. Heat for 10-12 minutes until the internal temperature reaches 165°F. This method restores most of the original crunch.
Air Fryer Method
Arrange pieces in a single layer in your air fryer basket. Reheat at 375°F for 6-8 minutes, shaking halfway through. The circulating air works wonders for reviving that just-fried texture. ✨
Stovetop Reheating
For a quick option, use a skillet with 1 tbsp vegetable oil over medium heat. Cook for 3-4 minutes per side until crispy and heated through. This works best for small batches.
Nutrition Facts
Frequently Asked Questions
What can I use instead of buttermilk?
Mix 1 cup milk with 1 tbsp vinegar or lemon juice, then let sit for 5 minutes. This creates a tangy substitute that works just as well for binding.
How do I keep the coating from falling off?
Press firmly when dredging and let excess drip off before frying. Using the double-dip method also helps the coating adhere better. Maintain oil at 350°F to prevent premature browning.
Can I bake this instead of frying?
Yes! Bake at 400°F for 20-25 minutes on a wire rack. Spray with oil first for extra crispiness. The texture won’t be identical but still delicious.
Why is my chicken dry inside?
Overcooking is the main culprit. Use a meat thermometer and pull at 165°F. Pounding to even thickness ensures even cooking. Resting for 5-10 minutes also helps retain juices.

Trained in classic French technique but raised on slow-cooked ribs and spicy rubs, she blends culinary skill with smoke and soul.
- Recipe for Boneless Pork Chops in Cast Iron Skillet: Sear and Baste to Juicy Perfection - October 3, 2026
- Recipe for Boneless Cross Rib Roast: Slow-Roasted Beef with Herb Crust - October 3, 2026
- Hamburgers in Sauce Recipe Crock Pot: Slow-Cooked Savory Delight - October 3, 2026