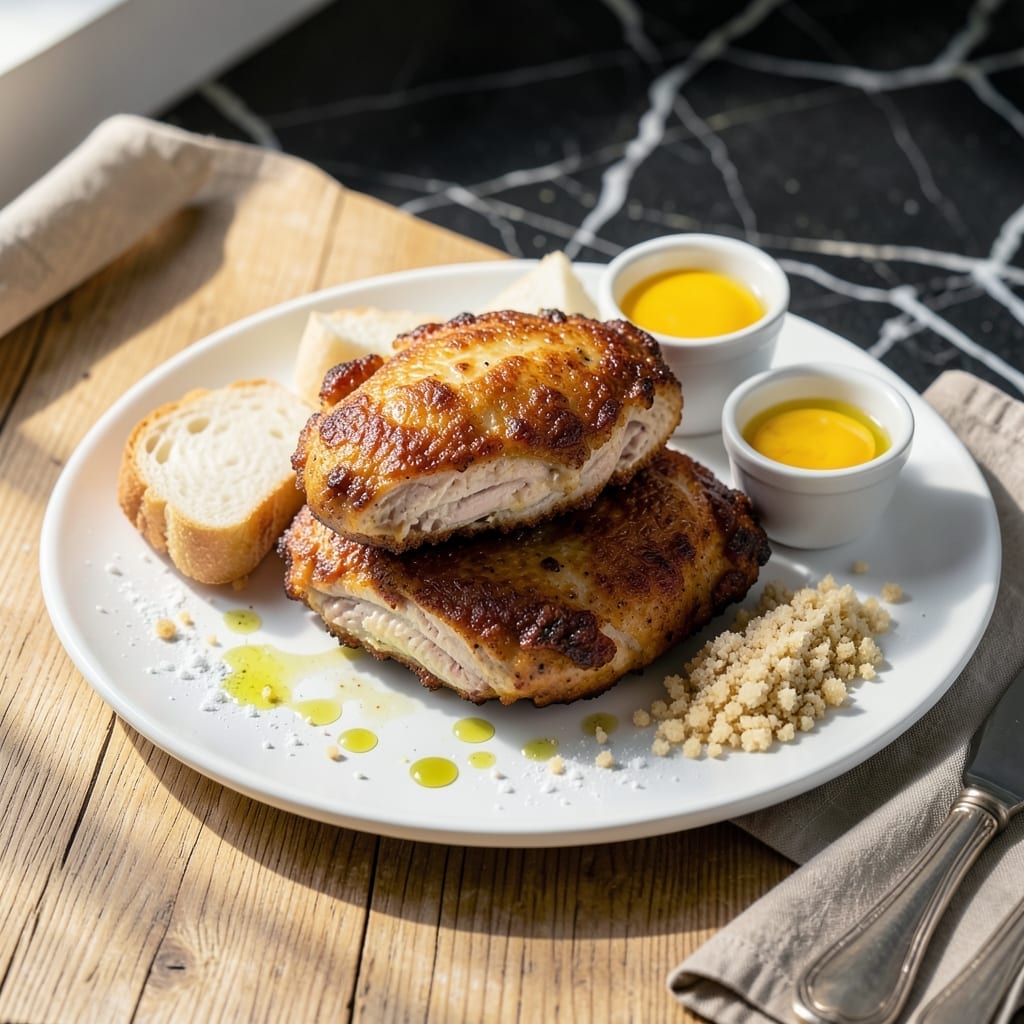
This method delivers crispy exterior and moist interior every time. I learned from my grandmother that the egg wash is the game-changer for coating adhesion.
The secret is dipping each piece in beaten egg before the final breading. This creates a seal that locks in juices while ensuring the coating stays put during frying.
You’ll achieve golden-brown chicken with a shatteringly crispy crust and tender meat inside. The egg makes all the difference in texture and flavor.
This technique works with any breading—from simple flour to elaborate spice mixes. The results are consistently perfect.
Ingredients for Fried Chicken Breast Recipe with Egg
Pantry staples plus a quick stop at the dairy aisle for buttermilk.
| Ingredient | Amount | Notes |
|---|---|---|
| Boneless Skinless Chicken Breasts 🍗 | 1 ½ lb | Pounded to even thickness |
| All-Purpose Flour 🌾 | 1 ½ cups | For initial dredging coat |
| Large Eggs 🥚 | 2 whole | Beaten for egg wash |
| Panko Breadcrumbs 🍞 | 2 cups | For extra crispy coating |
| Buttermilk 🥛 | 1 cup | For tenderizing chicken |
| Vegetable Oil 🫒 | 4 cups | For deep frying |
| Kosher Salt 🧂 | 1 ½ tsp | Diamond Crystal preferred |
| Black Pepper 🌶️ | 1 tsp | Freshly ground preferred |
| Garlic Powder 🧄 | 1 tsp | For seasoning flour |
| Onion Powder 🧅 | 1 tsp | For seasoning flour |
| Paprika 🌶️ | 1 tsp | Sweet or smoked variety |
| Cayenne Pepper 🔥 | ¼ tsp | Adjust for heat preference |
[recipe_ingredient_scaler]
The chicken is the star here. Boneless, skinless breasts work best—pound them to even thickness so they cook through without drying out. I grab mine from Costco for bulk savings, but any supermarket will do. The buttermilk is non-negotiable (trust me on this)—whole milk in a pinch, but the tang makes a difference.
No buttermilk? Milk plus a tablespoon of vinegar works in a snap. Panko can be swapped for regular breadcrumbs, but you’ll lose that shatter. Want more kick? Add a pinch of cayenne to the flour. The egg wash is what makes grandma’s trick work—don’t skip it. Fresh herbs in the coating? Go for it (I like thyme).
Fry in batches—don’t crowd the pan. Leftovers keep 3-4 days in the fridge, but they’re best fresh. Reheat in the oven to 375°F to crisp back up. Freeze uncooked breaded pieces for 2 months.
Why You’ll Love This Recipe
- One Bowl Wonder: I love that I only need a single bowl for mixing the flour, egg, and buttermilk before dredging the chicken.
- Crispy Outside, Juicy Inside: The panko and egg combo gives that golden crunch, while the buttermilk keeps the chicken breast ridiculously tender.
- Feeds the Fam: Between us, this is my go-to for picky eaters—everyone cleans their plate.
- Budget Stretch: A pack of chicken breasts and pantry staples means I’m feeding four for under $10.
Step-by-Step Instructions for Fried Chicken Breast
Here’s the method that guarantees crispy coating and juicy meat without fail.
Step 1: Prep and Season the Chicken
Start by pounding the boneless skinless chicken breasts to an even ½-inch thickness between plastic wrap. This ensures even cooking so the meat stays moist. I use a rolling pin if I don’t have a mallet handy.
Season both sides with 1.5 tsp kosher salt, 1 tsp black pepper, 1 tsp garlic powder, 1 tsp onion powder, 1 tsp paprika, and 0.25 tsp cayenne pepper. The seasoning should look generous—don’t be shy. Then place the chicken in the buttermilk and let it soak for 20 minutes to tenderize.
Step 2: Set Up the Breading Station
In a shallow dish, combine the 1.5 cups all-purpose flour with ½ tsp of the same seasoning blend from the chicken. This layers the flavor. In another dish, beat the 2 large eggs until fully combined. Place the 2 cups panko breadcrumbs in a third dish.
Real talk: the panko is what makes this coating extra crispy. Its coarse texture creates more surface area for that perfect crunch. Arrange the dishes in this order: flour, eggs, panko. This assembly line approach keeps the process smooth and mess-free.
Step 3: Bread the Chicken with Precision
Remove a piece of chicken from the buttermilk, letting the excess drip off briefly. Dredge it in the seasoned flour, pressing gently to adhere. Shake off any excess—too much flour creates a gummy coating.
Next, dip it in the beaten eggs, ensuring full coverage. Finally, press it into the panko breadcrumbs, turning to coat all sides completely. The breadcrumbs should cling thickly. Place the breaded chicken on a wire rack to rest for 5 minutes—this helps the coating set before frying.
Step 4: Fry to Golden Perfection
Heat the 4 cups vegetable oil in a deep, heavy pot to 350°F. Use a deep-fry thermometer for accuracy—this temperature ensures the outside crisps while the inside cooks through without drying out. I test the oil by dropping in a pinch of panko; it should sizzle immediately.
Carefully lower the breaded chicken into the hot oil—don’t overcrowd the pot. Fry for 6-8 minutes per side until the coating is deep golden brown and the internal temperature reaches 165°F. The chicken should float as it cooks. Transfer to a wire rack to drain, not paper towels, to keep it crispy.
Step 5: Rest and Serve Immediately
Let the chicken rest for 5 minutes before serving. This brief rest allows the juices to redistribute, ensuring that promised moist interior. The coating should stay audibly crispy when you cut into it.
Serve hot with your favorite dipping sauce. The contrast between the shatteringly crisp panko crust and the tender, juicy chicken inside is what makes this dish unforgettable. If you need to keep it warm, place it on a wire rack in a 200°F oven for up to 15 minutes.
Pro Tips For Making Fried Chicken Breast Recipe With Egg
- Pound the Breasts: Use a meat mallet to pound the chicken breasts to an even ½-inch thickness—this guarantees even cooking and prevents dry, overdone edges while the center catches up.
- Ditch Cold Buttermilk: I learned this the hard way—take the buttermilk out of the fridge 15 minutes before using it. Cold liquid causes the coating to clump and slide right off the chicken.
- Double Dredge: After the egg dip, roll the chicken in flour again before the panko. Sounds like extra work, but it creates a crunch that actually stays put.
- Rest Before Frying: Let the breaded chicken rest for 5 minutes before hitting the oil—this gives the coating time to set so it doesn’t flake off into the pan.
Common Mistakes When Making This Dish
Skipping the Egg Wash
The egg wash is non-negotiable—it’s what makes the coating cling to the chicken. Without it, your breading will slide right off during frying. I learned this the hard way when my first attempt ended up as naked chicken with a sad pile of panko at the bottom of the pan. 💪
Overcrowding the Pan
Frying too many pieces at once drops the oil temperature, leading to greasy, soggy chicken. I fry in batches, giving each piece 2-3 inches of space. This ensures even cooking and that perfect 350°F oil temperature throughout the process.
Rushing the Rest
Cutting into the chicken immediately after frying causes juices to escape, leaving you with dry meat. I always rest mine for 5 minutes on a wire rack. This lets the juices redistribute while keeping the crust crispy.
Inconsistent Thickness
Uneven chicken breasts cook inconsistently, leading to dry or undercooked spots. I pound mine to ½-inch thickness between plastic wrap. This simple step guarantees even cooking and a moist interior every time.
Use a rolling pin if you don’t have a mallet—it works just as well.
Wrong Oil Temperature
If your oil isn’t hot enough, the chicken absorbs too much grease. Too hot, and the outside burns before the inside cooks. I use a thermometer to maintain 350°F. A pinch of panko dropped in should sizzle immediately. 🌡️
Skipping the Buttermilk Soak
The buttermilk tenderizes the chicken and adds flavor. Skipping it results in tougher meat. I soak mine for 20 minutes—just enough time to prep the breading station. No buttermilk? Milk plus a tablespoon of vinegar works in a pinch.
Nutrition Facts
Frequently Asked Questions
Why is the egg wash important in breading?
The egg wash acts like glue, helping the breading stick to the chicken. Without it, your coating may slide off during frying, leaving you with bare meat and a sad pile of breadcrumbs.
Can I use a different type of breading?
Swap panko for crushed cornflakes or regular breadcrumbs. For extra crunch, try mixing in 1/4 cup of crushed crackers. Just maintain the egg wash step for adhesion.
How do I keep the coating crispy?
Drain on a wire rack, not paper towels, to prevent steam from softening the crust. Keep finished pieces warm in a 200°F oven while frying the rest.
Can I bake instead of fry?
Yes, but the texture will differ. Bake at 400°F for 20-25 minutes, flipping halfway. For extra crispiness, spray with oil before baking. The egg wash still ensures the coating stays put.

Trained in classic French technique but raised on slow-cooked ribs and spicy rubs, she blends culinary skill with smoke and soul.
- Recipe for Boneless Pork Chops in Cast Iron Skillet: Sear and Baste to Juicy Perfection - October 3, 2026
- Recipe for Boneless Cross Rib Roast: Slow-Roasted Beef with Herb Crust - October 3, 2026
- Hamburgers in Sauce Recipe Crock Pot: Slow-Cooked Savory Delight - October 3, 2026