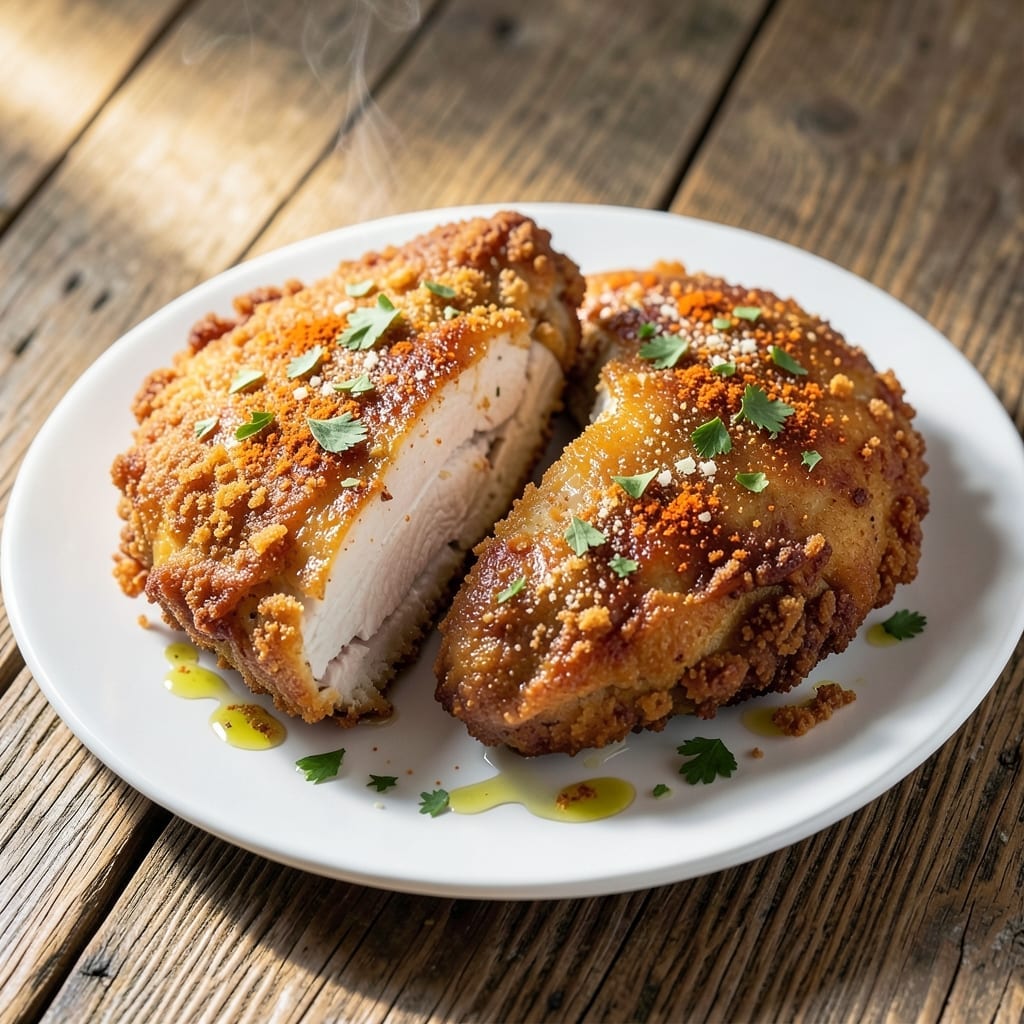
I’ve perfected a method for achieving crispy, golden fried chicken without relying on buttermilk. This approach uses simple, pantry-friendly swaps that work just as effectively to tenderize and flavor the meat.
The key is a well-seasoned flour coating and a hot oil technique that guarantees a shatteringly crispy crust. Each piece stays juicy inside while developing that signature crunch we all love.
With just a few adjustments, this recipe delivers the same satisfying results as traditional versions. The process is straightforward, requiring no special equipment or hard-to-find ingredients.
Serve it hot for the best texture, paired with your favorite sides. This method proves that great fried chicken doesn’t need buttermilk to shine.
Ingredients for Fried Chicken Breast Recipe Without Buttermilk
Simple pantry staples create that shatteringly crispy crust everyone loves so much.
| Ingredient | Amount | Notes |
|---|---|---|
| Chicken Breast 🍗 | 1 ½ lb | Boneless, skinless, pounded to even thickness |
| All-Purpose Flour 🌾 | 2 cups | Divided for dredging and coating |
| Cornstarch 🌽 | ¼ cup | For extra crispiness |
| Baking Powder 🧂 | 1 tsp | Helps coating puff and crisp |
| Paprika 🌶️ | 1 tbsp | Sweet or smoked for color |
| Garlic Powder 🧄 | 1 tsp | Freshly ground preferred |
| Onion Powder 🧅 | 1 tsp | Balances seasoning blend |
| Salt 🧂 | 1 ½ tsp | Diamond Crystal kosher preferred |
| Black Pepper 🌶️ | 1 tsp | Freshly ground for best flavor |
| Cayenne Pepper 🔥 | ¼ tsp | Adjust for heat preference |
| Large Eggs 🥚 | 2 whole | Beaten, for binding coating |
| Water 💧 | ¼ cup | For egg wash consistency |
| Vegetable Oil 🫒 | 4 cups | For frying, high smoke point |
[recipe_ingredient_scaler]
The chicken breast quality is paramount here. Boneless, skinless breasts from a trusted butcher or Whole Foods ensure tenderness. Pounding to even thickness (about 1/2-inch) guarantees uniform cooking. For the flour, King Arthur all-purpose is my go-to—consistent protein content for reliable crispiness. The cornstarch is non-negotiable; it’s what gives that extra crunch (trust me on this one).
No cornstarch? Arrowroot powder at equal amount works in a pinch. Egg-free? Buttermilk substitute isn’t needed—the egg and water bind perfectly. Out of paprika? Substitute with extra cayenne for heat or omit entirely. The baking powder is the secret weapon—don’t skip it—it creates micro-bubbles in the coating for maximum crunch. Vegetable oil can be swapped for peanut or canola (same smoke point).
Fry immediately after coating for best results. Leftovers keep 2-3 days in the fridge—reheat in a 375°F oven for 10-15 minutes to revive crispiness. The raw chicken can marinate in the fridge for up to 24 hours before cooking (worth the extra minute).
Why You’ll Love This Recipe
- No Buttermilk Needed: I love that I can skip the grocery run—no buttermilk required, just pantry staples like flour and cornstarch.
- Crispy Perfection: That paprika-kissed crust stays shatteringly crisp thanks to the cornstarch and baking powder combo.
- Meal Prep Hero: Cold or room temp, it’s just as good in sandwiches or salads the next day.
- Budget Friendly: Chicken breast plus basics from my cupboard means I’m not breaking the bank for a crave-worthy meal.
Step-by-Step Instructions for Fried Chicken Breast Without Buttermilk
This method delivers consistently crispy results with a simple egg and water binding technique.
Step 1: Prepare and Season the Chicken Breast
Begin by pounding the 1.5 lb Chicken Breast to an even ½-inch thickness using a meat mallet. This ensures uniform cooking and prevents dry spots in thicker areas. Place the pounded breasts between layers of paper towels to absorb excess moisture—this is critical for proper coating adhesion.
Season both sides generously with 1.5 tsp Salt, 1 tsp Black Pepper, 1 tsp Garlic Powder, 1 tsp Onion Powder, and 0.25 tsp Cayenne Pepper. I press the seasoning into the meat to create a flavorful foundation that enhances the coating.
Step 2: Create the Crispy Coating Mixture
In a large bowl, whisk together 2 cups All-Purpose Flour, 0.25 cup Cornstarch, 1 tsp Baking Powder, and 1 tbsp Paprika until fully combined. The cornstarch adds extra crunch, while the baking powder helps the coating puff slightly during frying for a lighter texture.
Divide this mixture in half—you’ll use one portion for the initial dredge and the other for the final coating. This two-step process creates superior adhesion and a thicker, crunchier crust. The paprika adds a subtle smokiness and that classic golden color to the finished product.
Step 3: Dredge and Coat the Chicken
In a shallow dish, beat the 2 whole Large Eggs with 0.25 cup Water until fully combined. This egg wash replaces buttermilk, providing the necessary moisture to bind the coating while keeping the crust light and airy.
Dredge each seasoned breast in the first portion of flour mixture, pressing firmly to adhere. Shake off excess, then dip into the egg wash, allowing any excess to drip off. Finally, coat in the remaining flour mixture, pressing again to create a thick, even layer. Place on a wire rack and let rest for 10 minutes to set the coating.
Step 4: Fry to Golden Perfection
Heat 4 cups Vegetable Oil in a deep, heavy-bottomed pot to 350°F. Use a deep-fry thermometer for accuracy—maintaining the correct temperature is essential for even cooking and a crispy exterior without greasiness.
Carefully lower 1-2 pieces of chicken into the hot oil (don’t overcrowd). Fry for 6-8 minutes per side until the coating is deep golden brown and the internal temperature reaches 165°F. The chicken should float freely when fully cooked. Transfer to a wire rack set over a baking sheet to drain excess oil while keeping the crust crisp.
Step 5: Rest and Serve Immediately
Let the fried chicken rest for 5 minutes before serving. This brief rest allows the juices to redistribute, ensuring moist meat beneath the crispy coating. The coating should audibly crackle when bitten into, with a shatteringly crisp texture that gives way to tender, juicy chicken.
Serve hot, as the coating loses crispness as it cools. This method consistently produces restaurant-quality fried chicken with a perfectly seasoned, extra-crunchy crust without the need for buttermilk.
Pro Tips For Making Fried Chicken Breast Recipe Without Buttermilk
- Pound the Breasts: Use a rolling pin or meat mallet to even out the thickness to ½ inch—this guarantees even cooking and prevents dry, overdone edges while the center finishes.
- Rest 10 Minutes: Let the breaded chicken sit on a wire rack for 10 minutes before frying; the cornstarch and flour absorb moisture and create a shatter-crisp crust.
- Skip the Crowding: Fry in batches with at least an inch between pieces—overcrowding drops the oil temp and gives you greasy, soggy chicken instead of that golden crunch.
- Boost with Baking Powder: Add 1 teaspoon of baking powder to your flour mix; it raises the pH just enough to tenderize the meat and help the coating brown faster without buttermilk.
Storing and Reheating Leftovers
Refrigerator Storage
Let your fried chicken cool for no more than 2 hours before transferring to airtight containers. Store at 40°F or below for up to 3 days. The flavors actually deepen as the seasoning continues to meld with the meat. ❄️
Freezer Storage
For longer storage, freeze in single layers on a baking sheet first, then transfer to freezer-safe bags with parchment between pieces. This prevents sticking and maintains the coating’s integrity for up to 1 month.
Oven Reheating
Preheat your oven to 375°F and place chicken on a wire rack over a baking sheet. Heat for 10-15 minutes until the internal temperature reaches 165°F. This method revives the crispiness better than any other. 🔥
Air Fryer Reheating
Arrange pieces in a single layer in your air fryer basket. Set to 350°F for 5-6 minutes, shaking halfway. The circulating air restores that signature crunch without adding oil.
Microwave Alternative
Place chicken on a microwave-safe plate with a damp paper towel over it. Heat on 50% power for 1-2 minutes, checking frequently. While not as crispy, this works in a pinch.
Nutrition Facts
Frequently Asked Questions
What can I use instead of buttermilk for the coating?
The recipe uses beaten eggs with water as a perfect substitute. This creates a light, airy binder that helps the flour coating adhere beautifully while keeping the crust crispy.
How do I prevent the coating from falling off?
Press the flour mixture firmly into the chicken during both dredging steps. Letting it rest for 10 minutes after coating also helps the crust set properly before frying.
Why is my chicken dry inside?
Overcooking is the most likely cause. Use a meat thermometer and remove the chicken when it reaches 165°F internally. Pounding the breasts to even thickness also prevents dry spots.
Can I bake this instead of frying?
Yes, bake at 400°F for 20-25 minutes on a wire rack. The texture won’t be as crispy as frying, but it’s a healthier alternative that still tastes great.

Trained in classic French technique but raised on slow-cooked ribs and spicy rubs, she blends culinary skill with smoke and soul.
- Recipe for Boneless Pork Chops in Cast Iron Skillet: Sear and Baste to Juicy Perfection - October 3, 2026
- Recipe for Boneless Cross Rib Roast: Slow-Roasted Beef with Herb Crust - October 3, 2026
- Hamburgers in Sauce Recipe Crock Pot: Slow-Cooked Savory Delight - October 3, 2026