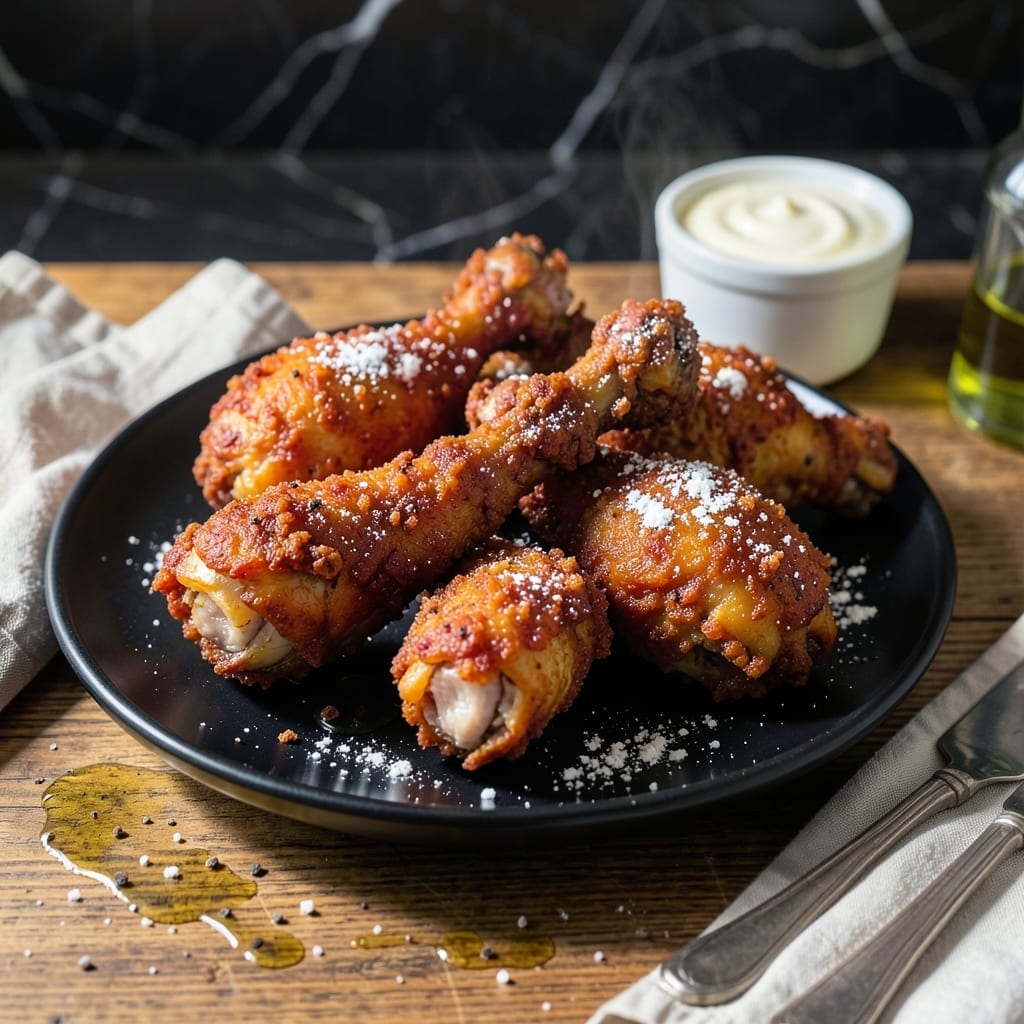
This recipe proves you don’t need buttermilk for crispy, golden fried chicken legs. I developed it after one too many grocery runs without that key ingredient, and the results rival any traditional version.
The secret lies in a well-seasoned flour coating and a simple pantry swap—plain yogurt or even water works to tenderize the meat while keeping the skin shatteringly crispy.
Each bite delivers juicy, flavorful chicken with a perfectly seasoned crust that stays crunchy long after frying. The method is straightforward, with no special equipment required—just a pot, some oil, and about 25 minutes.
Serve hot for the best texture, or pack for picnics—it holds up surprisingly well. Here’s how to make it.
Ingredients for Fried Chicken Legs Recipe Without Buttermilk
A short list of pantry staples delivers restaurant-quality crispy fried chicken legs without buttermilk.
| Ingredient | Amount | Notes |
|---|---|---|
| Chicken Legs 🍗 | 8 pieces | Skin-on, drumsticks and thighs |
| All-Purpose Flour 🌾 | 2 cups | For crispy coating |
| Plain Yogurt 🥛 | 1 cup | Buttermilk substitute, full-fat preferred |
| Kosher Salt 🧂 | 2 tbsp | Diamond Crystal preferred |
| Ground Black Pepper 🌶️ | 1 tbsp | Freshly cracked for best flavor |
| Paprika 🌶️ | 1 tbsp | Sweet or smoked variety |
| Garlic Powder 🧄 | 1 tbsp | Not garlic salt |
| Onion Powder 🧅 | 1 tbsp | Balances seasoning blend |
| Cayenne Pepper 🔥 | ½ tsp | Adjust for heat preference |
| Vegetable Oil 🫒 | 4 cups | For frying, high smoke point |
| Cornstarch 🌽 | ¼ cup | For extra crispiness |
| Dried Thyme 🍃 | 1 tsp | Optional but recommended |
[recipe_ingredient_scaler]
The chicken is the foundation here. Skin-on legs (thighs and drumsticks) crisp up better than boneless cuts. Costco or Sam’s Club offer the best value for bulk purchases, but any supermarket will do—just ensure the skin is intact and not torn. The yogurt tenderizes while keeping the coating clingy; Greek yogurt works too but may thicken the batter slightly.
No yogurt? Water or even club soda (for extra crispiness) works in a pinch. The flour can be swapped for self-rising if you’re out of all-purpose, but omit the salt. For heat lovers, add 1 tsp of crushed red pepper flakes. The oil must have a high smoke point—peanut or canola oil are solid alternatives to vegetable oil.
Leftovers keep surprisingly well. Store in an airtight container in the fridge for up to 4 days, though they’re best eaten fresh. Reheat in a 350°F oven for 10-15 minutes to revive crispiness. Never microwave—it’ll turn the crust soggy.
Why You’ll Love This Recipe
- No Buttermilk Needed: I love that plain yogurt does the same tenderizing trick without a last-minute grocery run.
- Crispy Outside, Juicy Inside: The flour coating fries up golden while the yogurt keeps the meat impossibly moist.
- Weeknight Hero: Honestly, it’s my go-to for busy evenings when I need dinner fast.
- Budget Friendly: Chicken legs are cheap, and a cup of yogurt stretches to coat a whole batch.
Step-by-Step Instructions for Fried Chicken Legs Without Buttermilk
Here’s the method. Straightforward, tested, works every time.
Step 1: Marinate Chicken Legs in Yogurt
Pat the 8 pieces chicken legs completely dry with paper towels. This removes excess moisture that could prevent the coating from adhering properly.
In a large bowl, combine the 1 cup plain yogurt with 1 tbsp kosher salt, 1 tsp dried thyme, 0.5 tsp cayenne pepper, 1 tbsp garlic powder, and 1 tbsp onion powder. The yogurt’s acidity tenderizes the meat while the spices infuse flavor deep into the chicken.
Add the chicken legs to the yogurt mixture, ensuring each piece is fully coated. Cover and refrigerate for at least 4 hours, or preferably overnight. This extended marination guarantees maximum tenderness and flavor penetration.
Step 2: Prepare the Crispy Coating
In a large shallow dish, whisk together the 2 cups all-purpose flour, 0.25 cup cornstarch, 1 tbsp kosher salt, 1 tbsp ground black pepper, 1 tbsp paprika, and 1 tbsp onion powder. The cornstarch is the secret to achieving that ultra-crispy texture we’re after.
This seasoned flour mixture creates a well-balanced crust with just the right amount of spice. The paprika adds a subtle smokiness while the black pepper provides a gentle heat that complements the cayenne from the marinade.
Step 3: Coat and Rest the Chicken
Remove the chicken from the yogurt marinade, allowing excess to drip off. Dredge each piece thoroughly in the flour mixture, pressing gently to ensure the coating adheres completely. Place the coated chicken on a wire rack set over a baking sheet.
Let the coated chicken rest for 15-20 minutes at room temperature. This resting period allows the coating to set and adhere better to the chicken, preventing it from falling off during frying. The rack ensures air circulation on all sides, maintaining the coating’s integrity.
Step 4: Fry to Golden Perfection
In a large, heavy-bottomed pot or Dutch oven, heat the 4 cups vegetable oil to 350°F. Use a deep-fry thermometer for accuracy—maintaining the correct temperature is crucial for even cooking and crispiness.
Carefully lower 3-4 pieces of chicken into the hot oil, being careful not to overcrowd the pot. Fry for 12-15 minutes, turning occasionally, until the chicken is golden brown and the internal temperature reaches 165°F. The oil temperature may drop when you add the chicken, so monitor it and adjust the heat as needed to maintain 325-350°F.
Transfer the fried chicken to a wire rack or paper towel-lined plate to drain. The rack prevents the chicken from sitting in its own oil, which would make the coating soggy. Repeat with the remaining chicken pieces.
Pro Tips For Making Fried Chicken Legs Recipe Without Buttermilk
- Double Dredge: Dip the chicken in yogurt, then flour, then back in yogurt and flour again—I learned this the hard way after my first batch had a sad, patchy crust.
- Hot Oil Test: Drop a pinch of flour in the oil first; if it sizzles immediately, it’s ready. After burning three batches, I finally figured out that guessing the temperature just doesn’t cut it.
- Pat Dry First: Blot the chicken legs with a paper towel before dredging—my grandmother swore by this, and she was right: excess moisture ruins the coating.
- Rest Before Frying: Let the dredged legs sit for 10 minutes before frying. Sounds weird, but it works: the coating sticks better and fries up crispier.
Pro Cooking Tips for This Dish
Oil Temperature Control
Use a deep-fry thermometer to maintain 350°F oil temperature. I keep my Taylor Classic thermometer clipped to the pot edge for constant monitoring. If the oil drops below 325°F, the chicken absorbs grease and turns soggy instead of crispy. 🌡️
Double Dredge Trick
For extra-crispy coating, dredge the chicken in flour, dip it back in yogurt, then dredge again. This creates thicker, more textured crust. I learned this from my Nonna’s kitchen—her gnocchi taught me that layers create texture.
Let the second coating rest for 10 minutes before frying to prevent clumping.
Fry in Batches
Never overcrowd your pot—fry 3-4 pieces at a time in a 5-6 quart Dutch oven. Overcrowding lowers oil temp and leads to uneven cooking. I use my Lodge enameled cast iron for perfect heat distribution.
Rest Before Serving
Drain fried chicken on a wire rack for 5 minutes before serving. This lets excess oil drip off while keeping the crust crispy. Paper towels work but can steam the bottom layer.
Crispiness Test
Listen for a sizzle when chicken hits the oil—that’s your audio cue for proper temperature. The crust should bubble vigorously. If it doesn’t, your oil isn’t hot enough. 🔥
Seasoning Boost
Sprinkle finished chicken with ½ tsp flaky sea salt and ¼ tsp smoked paprika while hot. This final touch amps up flavor and adds visual appeal.
Nutrition Facts
Frequently Asked Questions
Can I use milk instead of yogurt?
Yes, whole milk works as a substitute. The fat content helps tenderize the meat. For best results, add 1 tsp vinegar or lemon juice to 1 cup milk to mimic buttermilk’s acidity.
Why does the coating fall off during frying?
This usually happens if the chicken wasn’t dried properly or didn’t rest after coating. Pat legs completely dry and let coated pieces rest for 15-20 minutes before frying.
Can I bake instead of frying?
Yes, bake at 400°F for 35-40 minutes on a wire rack. Spray with oil for crispiness. The texture won’t be identical, but it’s a healthier option.

Trained in classic French technique but raised on slow-cooked ribs and spicy rubs, she blends culinary skill with smoke and soul.
- Recipe for Boneless Pork Chops in Cast Iron Skillet: Sear and Baste to Juicy Perfection - October 3, 2026
- Recipe for Boneless Cross Rib Roast: Slow-Roasted Beef with Herb Crust - October 3, 2026
- Hamburgers in Sauce Recipe Crock Pot: Slow-Cooked Savory Delight - October 3, 2026