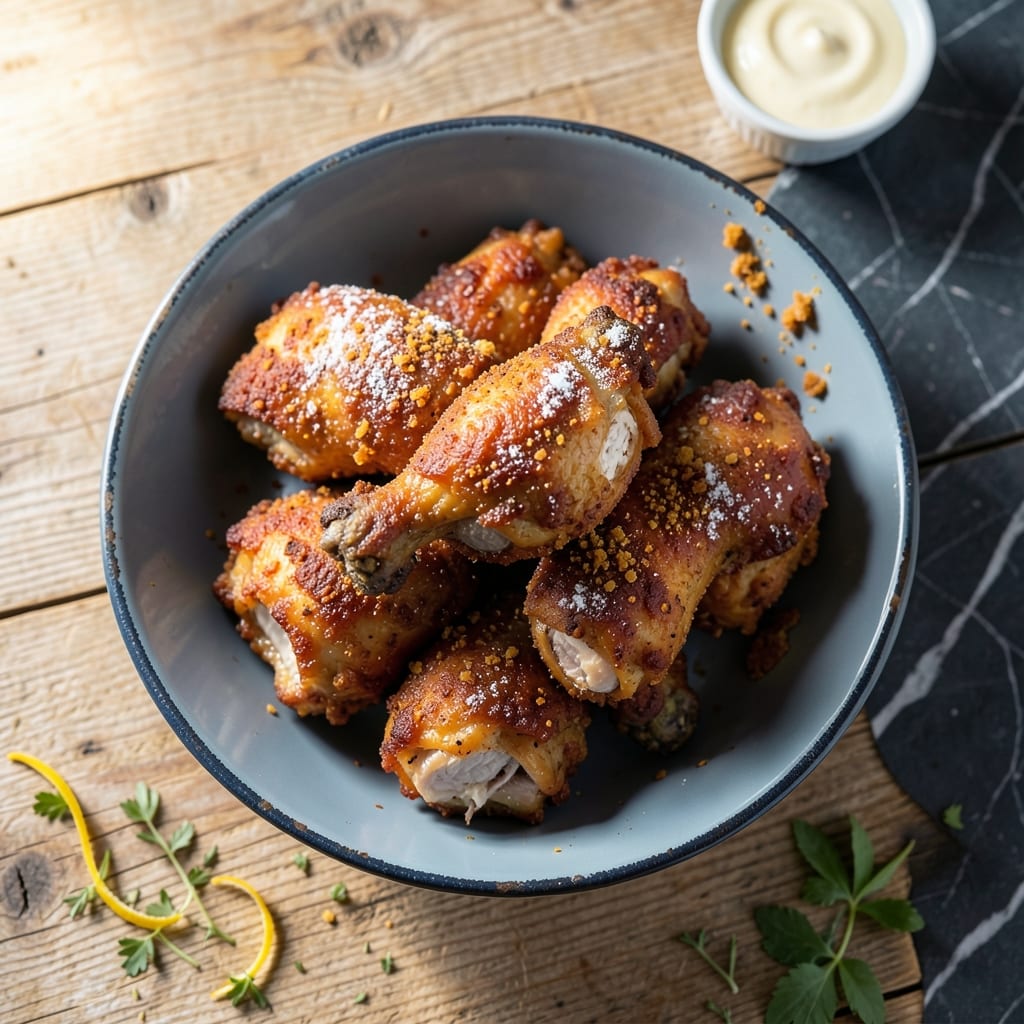
There’s a reason Southern fried chicken has stood the test of time—its crispy exterior and juicy interior are unmatched. This version stays true to tradition with a secret spice blend that elevates every bite without complicating the process.
I’ve refined this method to ensure perfectly golden results every time, using a simple but precise approach. The key is patience: letting the chicken rest after seasoning and maintaining the right oil temperature for even cooking.
What you’ll get is chicken with a shatteringly crispy crust and tender meat inside, seasoned with a blend that’s bold yet balanced. It’s the kind of dish that turns an ordinary meal into something memorable.
Serve it hot for the best texture, and watch it disappear. Here’s how to make it right.
Ingredients for Fried Chicken Recipe from the Help
Classic Southern ingredients deliver that signature crispy exterior and juicy interior everyone craves.
| Ingredient | Amount | Notes |
|---|---|---|
| Chicken Thighs and Drumsticks 🍗 | 3 ½ lb | Bone-in, skin-on for crispiness |
| Buttermilk 🥛 | 2 cups | Full-fat for tenderness |
| All-Purpose Flour 🌾 | 2 ½ cups | Divided for dredging |
| Cornstarch 🌽 | ½ cup | For extra crispiness |
| Paprika 🌶️ | 2 tbsp | Sweet or smoked variety |
| Garlic Powder 🧄 | 2 tsp | Freshly ground preferred |
| Onion Powder 🧅 | 2 tsp | Adds depth to seasoning |
| Dried Thyme 🍃 | 1 tsp | Crushed between fingers |
| Dried Oregano 🍃 | 1 tsp | Mediterranean or Mexican |
| Cayenne Pepper 🔥 | ½ tsp | Adjust for heat preference |
| Salt 🧂 | 2 tsp | Diamond Crystal kosher preferred |
| Black Pepper 🌶️ | 1 ½ tsp | Freshly ground for best flavor |
| Vegetable Shortening 🫒 | 4 cups | For deep frying, Crisco brand |
| Large Eggs 🥚 | 2 whole | Beaten into buttermilk wash |
| Hot Sauce 🌶️ | 1 tbsp | Crystal or Tabasco brand |
[recipe_ingredient_scaler]
The chicken is the foundation here. Bone-in, skin-on thighs and drumsticks deliver the juiciest results with that shatteringly crisp crust. Source them from local butchers or Whole Foods for the best quality—look for pieces with even sizing to ensure consistent cooking. The buttermilk should be full-fat; it’s the tenderizing secret that’s been trusted for generations in Southern kitchens.
No buttermilk on hand? Whole milk with a tablespoon of vinegar or lemon juice works in a pinch. For the flour, swap half with cornmeal for extra crunch. If you’re avoiding deep-frying, an air fryer at 375°F gets you close (though the texture won’t be identical). The spice blend is flexible—add smoked paprika for depth or a pinch of MSG for that classic diner taste.
The dredged chicken can rest in the fridge for up to 2 hours before frying. Leftovers? They’ll keep for 3-4 days in the fridge, but reheat in the oven at 350°F to revive the crispiness. Never microwave—it’ll turn the crust soggy.
Why You’ll Love This Recipe
- One Bowl Wonder: I toss everything in a single bowl—flour, cornstarch, paprika—then dip and fry. No fancy prep, just straightforward cooking.
- Buttermilk Magic: The buttermilk soak makes the chicken so tender it practically falls off the bone, while the crust stays crispy.
- Crowd Pleaser: I’ve served this at picnics, Sunday suppers, and even a last-minute weeknight dinner. Always disappears fast.
- Budget Friendly: Thighs and drumsticks are cheap, and a little flour and cornstarch go a long way. Feeds my family without breaking the bank.
Step-by-Step Instructions for Southern Fried Chicken
Master the technique that delivers crisp, golden results with every batch you make.
Step 1: Marinate the Chicken in Buttermilk Wash
In a large bowl, whisk together the 2 cups buttermilk, 2 whole large eggs, and 1 tbsp hot sauce until fully combined. The buttermilk’s acidity tenderizes the meat while the eggs help the coating adhere. Submerge all 3.5 lb chicken thighs and drumsticks in the mixture, ensuring each piece is fully coated.
Cover and refrigerate for at least 4 hours, or ideally overnight. This extended marination time allows the flavors to penetrate deeply and the salt in the buttermilk to season the meat from within. The result will be noticeably more tender and flavorful chicken.
Step 2: Prepare the Seasoned Dredging Mixture
In a shallow dish, combine the 2.5 cups all-purpose flour, 0.5 cup cornstarch, 2 tbsp paprika, 2 tsp garlic powder, 2 tsp onion powder, 1 tsp dried thyme, 1 tsp dried oregano, 0.5 tsp cayenne pepper, 2 tsp salt, and 1.5 tsp black pepper. Whisk thoroughly to distribute all spices evenly throughout the dry mix.
The cornstarch is the secret to extra crispiness, creating a lighter, more delicate crust than flour alone. The combination of paprika, garlic, and onion powders gives that classic Southern flavor profile, while the thyme and oregano add subtle complexity to the seasoning blend.
Step 3: Dredge and Rest the Chicken
Remove each piece of chicken from the buttermilk mixture, allowing the excess to drip off for a moment before dredging. Press firmly into the seasoned flour mixture, turning to coat completely and shaking off any excess. The coating should adhere evenly with a slight crust forming on the surface.
Place the dredged chicken on a wire rack set over a baking sheet. Let it rest for 15-20 minutes at room temperature. This resting period allows the coating to set slightly, which prevents it from falling off during frying and helps create that coveted crunch when it hits the hot oil.
Step 4: Deep Fry to Golden Perfection
In a deep, heavy pot or Dutch oven, heat the 4 cups vegetable shortening to 350°F over medium-high heat. Use a deep-fry thermometer to monitor the temperature accurately, as maintaining the correct temperature is crucial for even cooking and proper crust development.
Working in batches to avoid overcrowding, carefully lower the chicken into the hot oil. Fry for 12-15 minutes, turning occasionally, until the chicken is golden brown and the internal temperature reaches 165°F. The crust should be deep amber and audibly crisp when the piece is removed from the oil.
Drain on a wire rack or paper towels. The chicken should have a thick, craggy crust that crackles when bitten into, with juicy, tender meat underneath. Allow the oil to return to 350°F between batches to ensure consistent results.
Pro Tips For Making Fried Chicken Recipe From The Help
- Brine Overnight: Soak the chicken in buttermilk for at least 12 hours—I learned this the hard way when my first batch turned out dry and bland. The longer soak guarantees juicy, flavorful meat every time.
- Double Dredge: Dip the chicken back in the buttermilk after the first flour coating, then dredge again in the flour-cornstarch mix. Sounds tedious, but it creates that extra-crispy crust the recipe is known for.
- Skip Cold Oil: Make sure your oil is hot (350°F) before adding the chicken—after burning three batches, I finally figured out that cold oil makes for greasy, soggy breading.
- Rest Before Serving: Let the fried chicken rest on a wire rack for 5-10 minutes after frying. My grandmother swore by this, and she was right: it keeps the crust crispy while the juices redistribute.
Essential Equipment for This Recipe
Deep Fryer Setup
For this recipe, I recommend a heavy Dutch oven or enamel-coated cast iron pot—my Le Creuset 5.5-quart works perfectly. The heavy base distributes heat evenly and prevents hot spots that can burn the coating. Ensure it’s deep enough to hold 4 cups vegetable shortening with room for the chicken to submerged without overflowing.
Temperature Control
A deep-fry thermometer is non-negotiable for maintaining that 350°F sweet spot. I use the Taylor Classic model with a clip that attaches to the pot. Without precise temperature control, you risk either raw chicken or burnt crust. 🌡️
Draining Station
Set up a wire rack over a baking sheet for draining—I prefer the OXO Good Grips cooling rack because it’s sturdy and easy to clean. This setup allows air circulation on all sides, keeping the crust crisp rather than steamy. Line the baking sheet with parchment paper for easy cleanup.
Tongs for Frying
Invest in 12-inch locking tongs with a silicone coating for safe handling. I like the OXO brand because they stay cool and provide a firm grip. Long tongs keep your hands safely away from the hot oil while allowing you to turn pieces easily.
Never use metal utensils that could scratch your pot or create sparks. 💡
Splatter Guard
A stainless steel splatter screen is a game-changer for containing oil splatters. I place mine over the pot between batches to prevent grease from coating my stovetop. It’s a small investment that saves hours of cleaning.
Nutrition Facts
Frequently Asked Questions
Why use buttermilk in the marinade?
Buttermilk tenderizes the chicken with its acidity and helps the coating adhere better. Its tang also balances the rich flavors in the spice blend beautifully.
Can I use chicken breasts instead of thighs?
Yes, but bone-in, skin-on pieces work best for juiciness. If using breasts, reduce frying time to 10-12 minutes to prevent dryness. The crust may not be as crisp without the skin.
How do I keep the chicken crispy after frying?
Drain on a wire rack, not paper towels, to prevent steam from softening the crust. Keep in a 200°F oven for up to 30 minutes if serving later.
What if my oil temperature drops too low?
Let it return to 350°F between batches. Too-low oil makes greasy chicken. If it dips below 325°F, pause and wait for it to recover.

Trained in classic French technique but raised on slow-cooked ribs and spicy rubs, she blends culinary skill with smoke and soul.
- Recipe for Boneless Pork Chops in Cast Iron Skillet: Sear and Baste to Juicy Perfection - October 3, 2026
- Recipe for Boneless Cross Rib Roast: Slow-Roasted Beef with Herb Crust - October 3, 2026
- Hamburgers in Sauce Recipe Crock Pot: Slow-Cooked Savory Delight - October 3, 2026