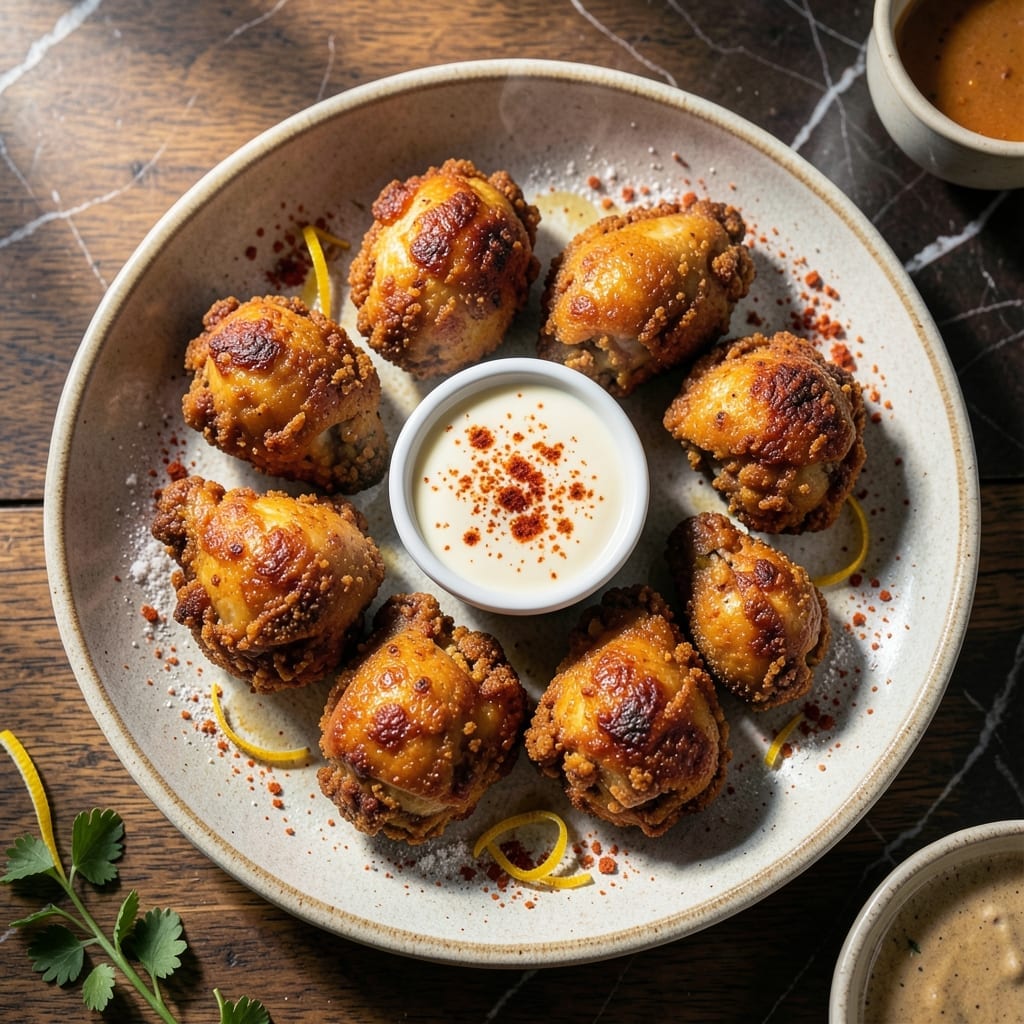
I’ve spent years perfecting the art of creating crispy fried chicken that stays golden and delicious every time. This collection uses simple pantry staples to deliver restaurant-quality results at home without complicated techniques.
The secret lies in the double-dredging method and maintaining the right oil temperature throughout cooking. Each recipe in this list offers a different approach to achieving that perfect crunch while keeping the meat juicy and flavorful.
Whether you prefer classic buttermilk-marinated pieces or spicy, modern twists, these methods guarantee crispy results. The techniques are straightforward, using ingredients you likely already have on hand.
From first bite to last, you’ll experience that satisfying crunch that makes great fried chicken unforgettable. Here’s how to make it happen in your kitchen.
Ingredients for Fried Chicken Recipe List
Pantry staples plus a few fresh items deliver that signature crunch you crave.
| Ingredient | Amount | Notes |
|---|---|---|
| Chicken Thighs 🍗 | 2 lb | Bone-in, skin-on for crispiness |
| Buttermilk 🥛 | 2 cups | Full-fat for best marinade |
| All-Purpose Flour 🌾 | 2 cups | For initial dredging layer |
| Cornstarch 🌾 | ½ cup | Creates extra crunch |
| Baking Powder 🧂 | 1 tbsp | Helps coating puff and crisp |
| Paprika 🌶️ | 1 tbsp | Sweet or smoked variety |
| Garlic Powder 🧄 | 1 tbsp | Enhances savory depth |
| Onion Powder 🧅 | 1 tbsp | Balances flavor profile |
| Salt 🧂 | 1 ½ tbsp | Diamond Crystal preferred |
| Black Pepper 🌶️ | 1 tsp | Freshly ground preferred |
| Cayenne Pepper 🔥 | ½ tsp | Adjust for heat preference |
| Vegetable Oil 🫒 | 4 cups | For deep frying at 350°F |
| Large Eggs 🥚 | 2 whole | Helps coating adhere |
| Hot Sauce 🌶️ | 2 tbsp | Adds tang to marinade |
[recipe_ingredient_scaler]
The chicken is the star here. Bone-in, skin-on thighs give you that perfect juicy interior with maximum crisp. I grab mine from Whole Foods or Costco—their organic options have great flavor. For the buttermilk, full-fat is non-negotiable (trust me on this). The oil needs a high smoke point—vegetable or peanut oil works best. Skip the olive oil, it’ll burn at frying temps.
No buttermilk? Whole milk plus 1 tbsp vinegar per cup does the trick. Out of cornstarch? Instant mashed potato flakes add a similar crunch. The paprika is flexible—sweet, smoked, or Hungarian all work. Want extra heat? Double the cayenne or add 1 tsp chipotle powder. The egg wash can be swapped for 2 tbsp water plus 1 tbsp flour in a pinch.
Fry in batches so the oil stays hot—350°F is the magic number. Leftovers? They’ll keep in the fridge for 3-4 days, but honestly, they’re best fresh. Reheat in the oven at 375°F for 15 minutes to revive the crunch. Never microwave (it’ll get soggy).
Why You’ll Love This Recipe
- One Bowl Magic: I just dump the flour, cornstarch, and baking powder together—no sifting, no fuss, and the coating clings like it was made for the buttermilk-soaked thighs.
- That Crunch Though: The cornstarch and baking powder combo gives it this ridiculous crunch that shatters with every bite, while the buttermilk keeps the inside absurdly juicy.
- Weeknight Hero: Honestly, it’s my Tuesday night lifesaver—crispy enough for company, unfussy enough for a solo dinner in front of the TV.
- Leftovers? Yes Please: Cold from the fridge the next day, it’s still good enough to fight over. My kid swipes the last piece every time.
Step-by-Step Instructions for Crispy Fried Chicken
Here’s the method I use to achieve that perfect golden crunch with every batch.
Step 1: Marinate the Chicken Thighs in Buttermilk
In a large bowl, whisk together the 2 cups Buttermilk and 2 tablespoons Hot Sauce until fully combined. Add the 2 lb Chicken Thighs and ensure each piece is fully coated. Cover the bowl and let it marinate in the refrigerator for at least 4 hours, or preferably overnight.
The buttermilk tenderizes the chicken while the hot sauce adds a subtle tang. I always use full-fat buttermilk for the richest flavor and most effective marinade. You’ll notice the chicken turns slightly opaque as it absorbs the liquid—this means it’s working.
Step 2: Prepare the Seasoned Flour Coating
In a separate large bowl, combine the 2 cups All-Purpose Flour, 0.5 cup Cornstarch, 1 tablespoon Baking Powder, 1 tablespoon Paprika, 1 tablespoon Garlic Powder, 1 tablespoon Onion Powder, 1.5 tablespoons Salt, 1 teaspoon Black Pepper, and 0.5 teaspoon Cayenne Pepper. Whisk until evenly distributed.
The cornstarch and baking powder are the secrets to extra crispiness. The cornstarch creates a lighter, crunchier texture while the baking powder helps the coating puff slightly during frying. The spices should be fully incorporated—no streaks of white flour remaining.
Step 3: Dredge and Double-Coat the Chicken
Remove the chicken from the buttermilk, letting excess drip off. Dredge each piece in the flour mixture, pressing firmly to ensure the coating adheres well. Shake off any excess, then dip back into the buttermilk, and dredge in the flour mixture a second time. This double-dredging creates that signature thick, craggy crust.
Place the coated chicken on a wire rack set over a baking sheet. This allows air to circulate and prevents the coating from getting soggy. Let it rest for 15-20 minutes while you heat the oil—this helps the coating set and adhere better during frying.
Step 4: Fry to Golden Perfection
In a large, heavy pot or Dutch oven, heat the 4 cups Vegetable Oil to 350°F. Use a deep-fry thermometer to monitor the temperature. Carefully lower a few pieces of chicken into the oil, being careful not to overcrowd the pot. Fry for 12-15 minutes, turning occasionally, until the chicken is deep golden brown and the internal temperature reaches 165°F.
Maintain the oil temperature between 325-350°F throughout frying. If the oil is too hot, the outside will burn before the inside cooks; if it’s too cool, the chicken will absorb oil and become greasy. The chicken should sizzle steadily when first added to the oil.
Step 5: Drain and Rest Before Serving
Transfer the fried chicken to a wire rack or paper towel-lined plate to drain. Sprinkle with a little extra salt while it’s still hot. Let the chicken rest for 5-10 minutes before serving—this allows the juices to redistribute and the coating to crisp up even more.
The result should be chicken with a shatteringly crisp exterior that gives way to juicy, tender meat inside. Serve immediately while hot and crispy. The coating should hold its crunch even after resting, with no soggy spots.
Pro Tips For Making Fried Chicken Recipe List
- Double Fry for Crisp: Fry the chicken once at 325°F until cooked through, then rest 5 minutes and fry again at 375°F for that shatteringly crisp crust—this is the only way to get it right with thighs.
- Buttermilk Overnight: Soak the thighs in buttermilk for at least 12 hours; I learned this the hard way after my first batch turned out dry and bland from just an hour in the fridge.
- Skip Cold Chicken: Let the buttermilk-soaked thighs sit at room temperature for 20 minutes before dredging, or the coating will slide right off when it hits the hot oil.
- Add Cornstarch Last: Mix the cornstarch with the flour and baking powder just before dredging—it keeps the coating light and extra crispy instead of gummy.
Dietary Considerations for This fried chicken recipe list
Gluten-Free Option
Swap the all-purpose flour for a 1:1 gluten-free flour blend like King Arthur’s. Add ½ cup almond flour for extra crunch. The texture will be slightly different but still delicious. I’ve tested this with great results. 💪
Dairy-Free Adaptation
Replace buttermilk with unsweetened almond milk plus 1 tbsp vinegar per cup. Use aquafaba (chickpea water) instead of eggs for the wash. The flavor won’t be identical, but it’s a solid substitute.
Lower-Fat Version
Try oven-frying at 400°F on a wire rack. Brush pieces with 1 tbsp oil before baking for 25-30 minutes. Flip halfway through. It’s not the same as deep-frying, but it’s a healthier approach.
Spice Allergy Swaps
Omit or reduce cayenne and paprika if needed. Boost flavor with 1 tsp dried thyme or rosemary instead. I’ve found these herbs add depth without the heat.
Nut-Free Coating
Avoid almond flour in gluten-free versions. Use crushed cornflakes or panko breadcrumbs for crunch. Ensure all ingredients are processed in nut-free facilities if allergies are severe. ✨
Sodium Reduction
Cut the salt to ½ tbsp and boost other spices. Use low-sodium hot sauce in the marinade. The flavor will still shine without the excess sodium.
Nutrition Facts
Frequently Asked Questions
What’s the best oil for frying?
Use oils with a high smoke point like vegetable, peanut, or canola. Maintain 350°F for perfect crispiness. Avoid olive oil—it burns at frying temps.
Can I use chicken breasts instead of thighs?
Yes, but they cook faster and can dry out. Reduce frying time to 8-10 minutes and monitor internal temp closely. Thighs stay juicier.
How do I keep the coating from falling off?
Double-dredging and resting 15-20 minutes before frying helps. Ensure oil is hot enough (350°F) and don’t overcrowd the pot.
Can I bake instead of fry?
Yes! Use 400°F on a wire rack for 25-30 minutes. Brush with oil first for extra crispness. It won’t be identical but still delicious.

Trained in classic French technique but raised on slow-cooked ribs and spicy rubs, she blends culinary skill with smoke and soul.
- Recipe for Boneless Pork Chops in Cast Iron Skillet: Sear and Baste to Juicy Perfection - October 3, 2026
- Recipe for Boneless Cross Rib Roast: Slow-Roasted Beef with Herb Crust - October 3, 2026
- Hamburgers in Sauce Recipe Crock Pot: Slow-Cooked Savory Delight - October 3, 2026