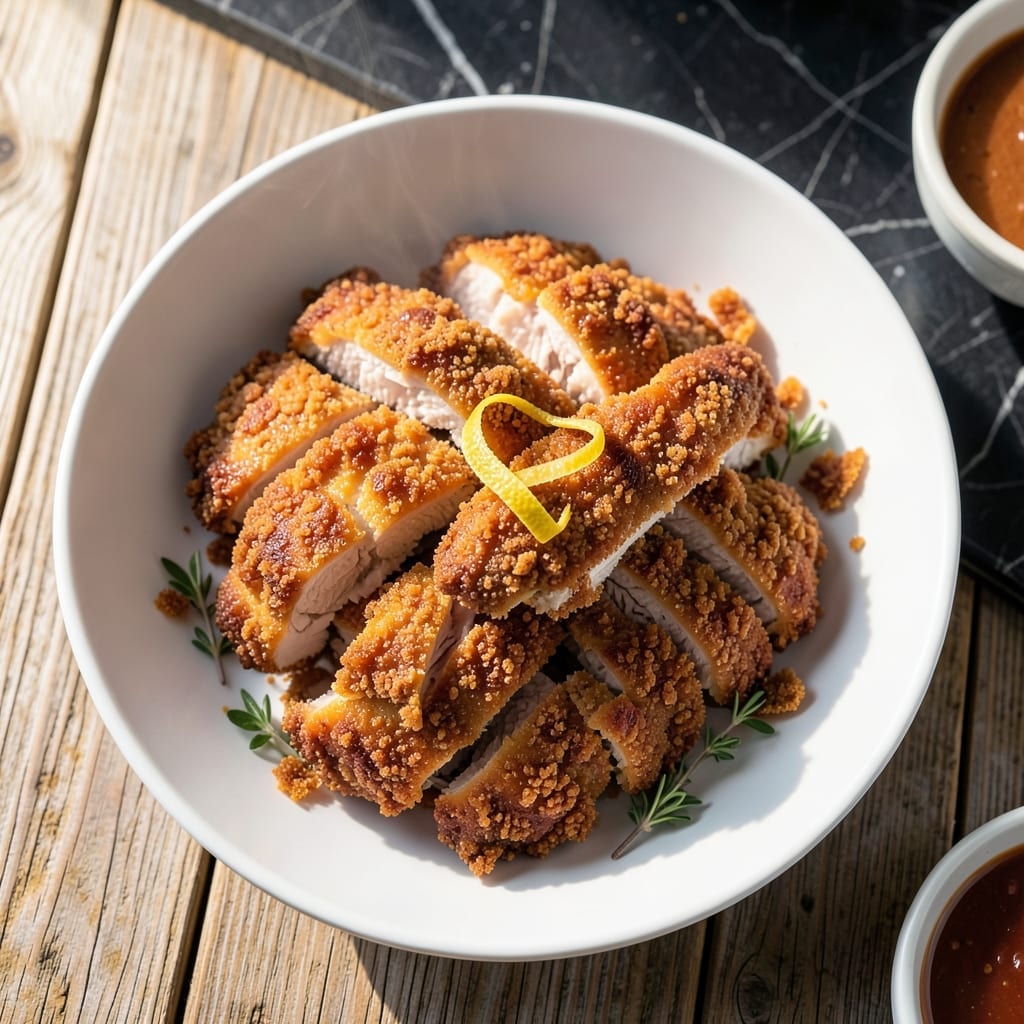
This copycat recipe brings the iconic KFC experience to your home kitchen with a crispy 11-herb crust. I developed this method after years of testing to match that signature flavor and texture.
The secret lies in a double-dredging process and specific spice blend ratios that create that unmistakable taste. The chicken stays juicy inside while developing a golden, shatteringly crispy exterior.
You will achieve restaurant-quality results with standard kitchen equipment and about 30 minutes of active cooking. The aroma alone will transport you to your favorite KFC location.
Serve hot for the best texture. This recipe scales perfectly for family dinners or game day gatherings.
Ingredients for Fried Chicken Breast Recipe Kfc
Eleven herbs, a double dredge, and standard pantry staples bring that signature crunch to life.
| Ingredient | Amount | Notes |
|---|---|---|
| Chicken Breasts 🍗 | 1 ½ lb | Boneless, skinless, pounded even |
| Buttermilk 🥛 | 2 cups | Full-fat for tenderness |
| All-Purpose Flour 🌾 | 2 cups | Divided for double dredge |
| Cornstarch 🌽 | ¼ cup | For extra crispiness |
| Salt 🧂 | 1 tbsp | Diamond Crystal kosher |
| Black Pepper 🌶️ | 1 tsp | Freshly ground preferred |
| Dried Thyme 🍃 | 1 tsp | Crushed between fingers |
| Dried Basil 🌿 | 1 tsp | Rubbed to release oils |
| Dried Oregano 🍃 | 1 tsp | Mediterranean variety |
| Celery Salt 🧂 | 1 tsp | Key to signature flavor |
| Dried Mustard 🌿 | 1 tsp | Powdered, not seeds |
| Garlic Powder 🧄 | 1 tsp | Not garlic salt |
| Paprika 🌶️ | 1 tsp | Sweet or smoked variety |
| Ground Ginger 🌿 | ½ tsp | Freshly ground if possible |
| White Pepper 🌶️ | ½ tsp | For authentic depth |
| Vegetable Oil 🫒 | 4 cups | For deep frying |
[recipe_ingredient_scaler]
The chicken is everything here. Boneless, skinless breasts stay juicy while getting that shatteringly crispy crust—pound them to even thickness so they cook uniformly. I get mine from Costco (great quality, great price). For the buttermilk, full-fat makes all the difference (trust me on this). The flour needs to be all-purpose—nothing fancy, just the standard stuff you probably already have in your cabinet.
No buttermilk? Whole milk plus 1 tbsp vinegar works in a pinch. Short on herbs? Penzeys has great quality dried spices if your grocery store selection is lackluster. The cornstarch is non-negotiable for that extra crunch—don’t skip it. For the oil, peanut oil is traditional, but vegetable or canola work just fine. Want more heat? Add a pinch of cayenne to the spice mix.
Fry in batches so the oil temp stays steady—this keeps the crust golden and crispy. Leftovers? Reheat in a 375°F oven for 10-15 minutes to revive the crunch. Best eaten fresh, but keeps for 2-3 days in the fridge (though the crust softens).
Why You’ll Love This Recipe
- One Bowl Wonder: I mix the buttermilk, flour, and cornstarch right in the same dish I’ll use for dredging—no extra bowls to wash.
- That KFC Crunch: The cornstarch in the coating gives it that signature crispy bite, while the buttermilk keeps the chicken juicy inside.
- Freezer Friendly: I double the batch and freeze half for nights I don’t feel like cooking—just reheat in the oven.
- Budget Stretcher: Chicken breasts on sale plus pantry staples mean I can feed four for under ten bucks. Honestly, it’s my wallet’s favorite meal.
Step-by-Step Instructions for Crispy Fried Chicken Breast
Here’s the method I’ve perfected to get that signature crunch and juicy interior every time.
Step 1: Marinate the Chicken for Maximum Tenderness
Begin by cutting the 1.5 lb Chicken Breasts into even strips or cutlets. Place them in a bowl and pour over the 2 cups Buttermilk. I press the chicken down to ensure it’s fully submerged—this buttermilk bath is what makes the meat incredibly tender and helps the coating cling.
Cover and refrigerate for at least 2 hours, though I prefer overnight for the most flavorful results. You’ll notice the buttermilk turns slightly thick as it works its magic on the chicken. This step is non-negotiable for that melt-in-your-mouth texture.
Step 2: Prepare the Signature Herb Seasoning Mix
In a large bowl, whisk together the 2 cups All-Purpose Flour with the 0.25 cup Cornstarch. The cornstarch is my secret for extra crispiness. Add the 1 tbsp Salt, 1 tsp Black Pepper, 1 tsp Dried Thyme, 1 tsp Dried Basil, and 1 tsp Dried Oregano.
Then mix in the 1 tsp Celery Salt, 1 tsp Dried Mustard, 1 tsp Garlic Powder, 1 tsp Paprika, 0.5 tsp Ground Ginger, and 0.5 tsp White Pepper. I crush the dried herbs between my fingers as I add them to release their oils and maximize flavor. This 11-herb blend is what gives the coating its signature depth.
Step 3: Double-Dredge for Extra-Crispy Coating
Remove the chicken from the buttermilk, letting any excess drip off. Dredge each piece thoroughly in the seasoned flour mixture, pressing firmly to adhere. Then, dip it back into the buttermilk for a second coating before dredging in the flour mixture once more. This double-dredge creates a thicker, crunchier crust.
Place the coated chicken on a wire rack set over a baking sheet. Let it rest for 10 minutes—this helps the coating set and prevents it from falling off during frying. You’ll see the coating turn from wet to slightly dry, which means it’s ready for the oil.
Step 4: Deep-Fry to Golden Perfection
Heat the 4 cups Vegetable Oil in a deep, heavy pot to 350°F. Use a thermometer for precision—this temperature ensures even cooking without burning the coating. Carefully lower the chicken into the oil in batches to avoid overcrowding, which would drop the oil temperature.
Fry for 8-10 minutes, turning occasionally, until the coating is deep golden brown and the internal temperature reaches 165°F. The chicken should float toward the surface when it’s nearly done. Drain on a wire rack or paper towels to keep it crispy, not soggy. Serve immediately while hot and crunchy.
Pro Tips For Making Fried Chicken Breast Recipe Kfc
- Use Cold Buttermilk: Soak the chicken breasts in ice-cold buttermilk for at least 4 hours—overnight if you can. I learned this the hard way: warm buttermilk doesn’t tenderize as well, and the coating just doesn’t stick right.
- Double Dredge Properly: Dip the buttermilk-soaked chicken in flour, then back in buttermilk, then flour again. The first coat should be light; press the second coat on hard so it clumps a little—that’s what gives you that KFC-style crust.
- Skip the Overcrowding: Fry in batches with at least an inch between pieces. After ruining two batches with soggy, steamed chicken, I finally accepted that patience here actually changes the outcome.
- Rest Before Frying: Let the dredged chicken rest 10 minutes before hitting the oil. Sounds weird, but it works: the coating sets, so it doesn’t flake off or absorb too much grease when frying.
Essential Equipment for This Recipe
Deep Fryer Setup
For authentic results, I use my Cuisinart CDF-200 deep fryer—it maintains 350°F perfectly and has a 1.5-gallon capacity. A heavy Dutch oven like Le Creuset works too if you’re frying on the stovetop. Just ensure it’s deep enough to submerge the chicken safely. 🔥
Thermometer Essentials
A candy thermometer is non-negotiable for precision. I clip my Taylor Classic to the pot edge to monitor oil temp constantly. The difference between 340°F and 360°F can mean soggy versus crispy chicken.
Dredging Station
Set up a 3-bowl system: one for buttermilk, one for seasoned flour, and one for resting. I use stainless steel mixing bowls from New Seasons Market—they’re durable and nest for storage. The wire rack for resting is key to prevent soggy bottoms.
Oil Management
I buy peanut oil in 48 oz bottles from Costco for large batches. For smaller amounts, vegetable or canola oil works fine. Use a fine-mesh skimmer to remove bits between batches—this extends oil life and prevents burning.
Safety Gear
Always use heat-resistant gloves and keep a fire extinguisher nearby. I keep my OXO silicone tongs dedicated to frying. Never leave hot oil unattended—safety first when working with 350°F temperatures.
Cooling Equipment
A wire cooling rack over a baking sheet lets air circulate all around, keeping the crust crisp. Paper towels work in a pinch but can make the bottoms steam. I transfer to the rack immediately after draining for that perfect crunch. ✨
Nutrition Facts
Frequently Asked Questions
Can I use chicken thighs instead of breasts?
Yes, but adjust cooking time. Thighs need 12-14 minutes at 350°F due to higher fat content. They stay juicier but may have less crispy coating.
Why is my coating falling off during frying?
Likely skipped the 10-minute rest after dredging. This lets the coating set. Also ensure oil is fully heated to 350°F before adding chicken.
Can I bake this instead of frying?
For oven method: 400°F for 20-25 minutes. Spray with oil and flip halfway. Won’t be as crispy but still flavorful.
How do I keep it crispy for a party?
Hold in a 200°F oven on a wire rack for up to 30 minutes. Avoid stacking—steam makes coating soggy. Serve immediately after.

Trained in classic French technique but raised on slow-cooked ribs and spicy rubs, she blends culinary skill with smoke and soul.
- Recipe for Boneless Pork Chops in Cast Iron Skillet: Sear and Baste to Juicy Perfection - October 3, 2026
- Recipe for Boneless Cross Rib Roast: Slow-Roasted Beef with Herb Crust - October 3, 2026
- Hamburgers in Sauce Recipe Crock Pot: Slow-Cooked Savory Delight - October 3, 2026