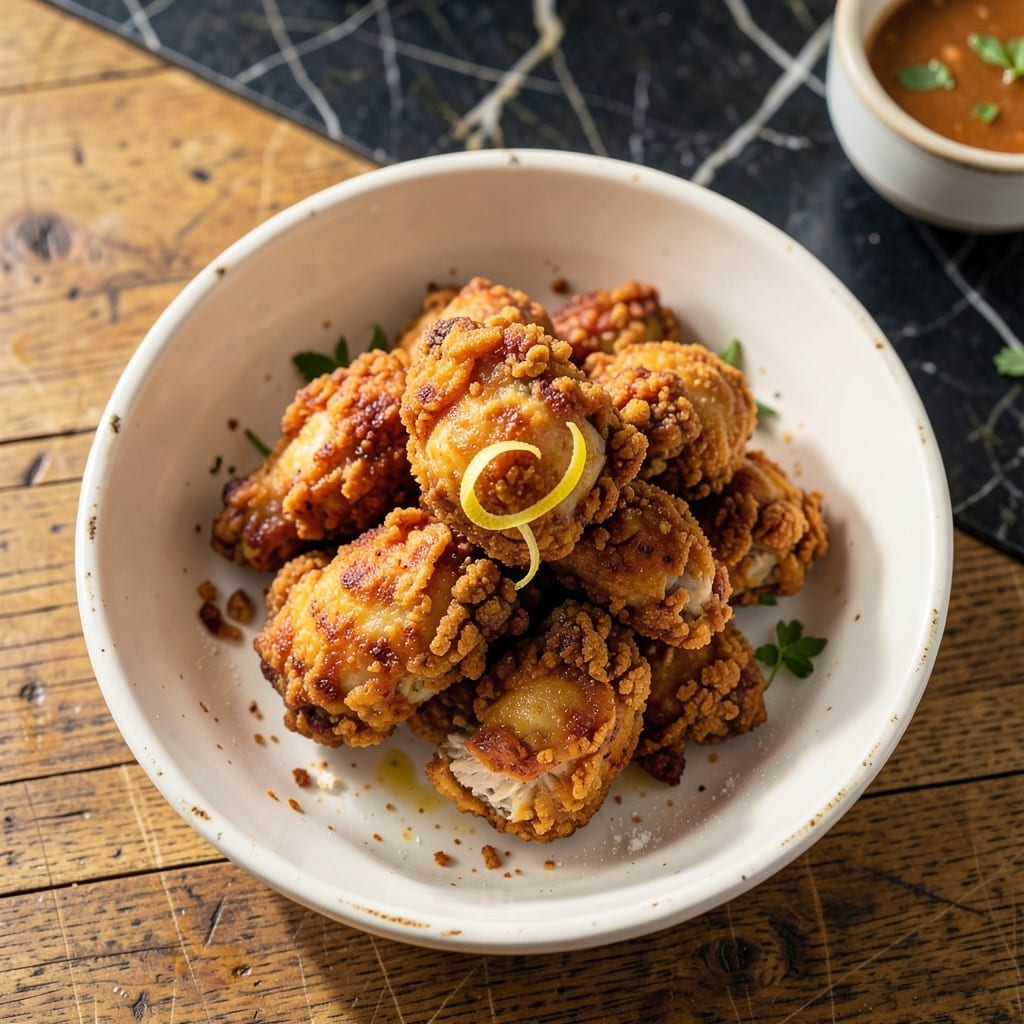
Southern fried chicken achieves its legendary status through one essential technique: a buttermilk soak that guarantees crispy perfection. This method transforms ordinary chicken into something extraordinary with each bite.
I’ve tested this process repeatedly in my small kitchen, refining the approach to ensure foolproof results. The buttermilk tenderizes while creating a base for the coating to adhere properly, resulting in that signature crunch.
The double-dredging method builds layers of flavor and texture, creating a shatteringly crispy coating that stays put. Each piece emerges golden and ready to impress, whether for Sunday dinner or a special occasion.
Serve hot for the ultimate experience. This technique never fails to deliver the promised texture and taste.
Ingredients for Fried Chicken Recipe Paula Deen Buttermilk
These classic ingredients transform ordinary chicken into legendary Southern crispy perfection.
| Ingredient | Amount | Notes |
|---|---|---|
| Chicken Pieces 🍗 | 3 lb | Mixed dark and white meat |
| Buttermilk 🥛 | 2 cups | Full-fat for best results |
| All-Purpose Flour 🌾 | 3 cups | Divided for dredging |
| Salt 🧂 | 2 tbsp | Diamond Crystal kosher preferred |
| Black Pepper 🌶️ | 1 tbsp | Freshly ground coarse |
| Paprika 🌶️ | 1 tbsp | Sweet or smoked variety |
| Garlic Powder 🧄 | 1 tbsp | Not garlic salt |
| Onion Powder 🧅 | 1 tbsp | Enhances savory depth |
| Cayenne Pepper 🔥 | ½ tsp | Adjust for heat preference |
| Vegetable Shortening 🫒 | 2 cups | For frying, Crisco brand |
| Large Eggs 🥚 | 2 whole | Beaten for coating adhesion |
| Hot Sauce 🌶️ | 1 tbsp | Optional for extra tang |
[recipe_ingredient_scaler]
The chicken selection matters here. Thighs and drumsticks yield the juiciest results, though breasts work if pounded thin. Costco or Sam’s Club offer family packs perfect for frying. Buttermilk quality is non-negotiable—full-fat from a reputable dairy provides the acidity needed for tenderization. For flour, White Lily is traditional in Southern kitchens (lower protein for extra crispiness).
No buttermilk? Whole milk plus 1 tbsp vinegar per cup works in a pinch. Short on spices? Seasoned salt at half the amount can substitute the salt/pepper blend. The cayenne is optional—skip it entirely for mild flavor. Vegetable shortening is traditional, but peanut oil or lard (if you’re not vegetarian) also work. The egg wash is key—don’t substitute water or milk here.
Marinated chicken keeps in the fridge for 24 hours before frying. Leftover fried chicken reheats best in a 350°F oven for 15-20 minutes to restore crispiness. Store cooked chicken in the fridge for up to 4 days—though it’s best eaten fresh.
Why You’ll Love This Recipe
- I’ll be real: it’s the only dish everyone in my house agrees on for Sunday dinner.
- No-Fuss Soak: Honestly, just tossing the chicken in buttermilk the night before does half the work for you.
- Crispy Outside, Juicy In: That buttermilk brine keeps it tender while the flour crust fries up golden and crunchy.
- Feeds the Whole Table: I’ll be real: it’s the only dish everyone in my house agrees on for Sunday dinner.
Step-by-Step Instructions for Buttermilk Fried Chicken
Master the technique for achieving that signature crispy coating with juicy meat every time.
Step 1: Marinate Chicken in Buttermilk Mixture
Combine the 2 cups Buttermilk, 2 whole Large Eggs, and 1 tbsp Hot Sauce in a large bowl. Whisk until fully blended and the mixture appears smooth and slightly frothy.
Add the 3 lb Chicken Pieces to the buttermilk mixture, ensuring each piece is fully submerged. Cover and refrigerate for at least 4 hours, or overnight for maximum tenderness. The buttermilk’s acidity tenderizes the meat while the eggs help the coating adhere.
Step 2: Prepare the Seasoned Flour Dredge
In a large shallow dish, combine 3 cups All-Purpose Flour, 2 tbsp Salt, 1 tbsp Black Pepper, 1 tbsp Paprika, 1 tbsp Garlic Powder, 1 tbsp Onion Powder, and 0.5 tsp Cayenne Pepper. Whisk thoroughly to distribute the spices evenly throughout the flour.
The paprika adds color while the garlic and onion powders create depth of flavor. The cayenne provides a subtle heat that balances the richness. This blend ensures every bite is well-seasoned from the first crispy crust to the juicy meat beneath.
Step 3: Heat Vegetable Shortening and Dredge Chicken
In a deep, heavy-bottomed skillet or Dutch oven, melt the 2 cups Vegetable Shortening over medium-high heat until it reaches 350°F. Use a deep-fry thermometer for accuracy—the temperature must stay consistent for even cooking.
While the shortening heats, remove the chicken from the marinade, allowing excess to drip off. Dredge each piece in the seasoned flour, pressing firmly to ensure the coating adheres completely. Shake off any excess flour. The coating should look thick and evenly distributed with no bare spots.
Step 4: Fry to Golden Perfection
Carefully place the dredged chicken pieces into the hot shortening, working in batches to avoid overcrowding the pan. Maintain the oil temperature at 325-350°F throughout frying. Cook the chicken for 12-15 minutes per side, depending on size, until the coating is deep golden brown and crispy.
Use tongs to turn the pieces only once during cooking to ensure even browning. The internal temperature of the chicken should reach 165°F in the thickest part. The crust should be shatteringly crisp when done, and the meat should pull away from the bone slightly when properly cooked.
Step 5: Drain and Rest Before Serving
Transfer the fried chicken to a wire rack set over a baking sheet or paper towels to drain excess fat. This allows air to circulate around the pieces, preserving the crispness of the coating rather than letting it steam and become soggy.
Let the chicken rest for 5-10 minutes before serving. This brief rest allows the juices to redistribute throughout the meat, ensuring each piece remains moist and flavorful. The coating will stay crisp longest when served immediately after draining.
Pro Tips For Making Fried Chicken Recipe Paula Deen Buttermilk
- Soak Overnight: Let the chicken pieces bathe in buttermilk for at least 8 hours—I learned this the hard way when my first batch turned out dry and bland.
- Pat Dry Thoroughly: After the buttermilk soak, pat the chicken pieces completely dry with paper towels. Any excess moisture will make the flour coating slide right off.
- Double Dredge: Dip the chicken back in the flour mixture after the first coat, then let it rest 10 minutes before frying. Sounds weird, but it works: the crust ends up twice as crunchy.
- Maintain Oil Temp: Keep the oil at a steady 350°F—after burning three batches, I finally figured out that fluctuating heat leads to greasy, unevenly cooked chicken.
Essential Equipment for This Dish
Deep Fryer or Dutch Oven
For the best results, use a heavy-bottomed Dutch oven or a dedicated deep fryer. I prefer my Lodge enameled cast iron Dutch oven—it maintains steady 350°F heat perfectly. A deep fryer with a basket makes draining easier, but a Dutch oven works just as well on the stovetop. 🔥
Candy Thermometer
A deep-fry thermometer is absolutely essential for monitoring oil temperature. I use a Taylor classic candy thermometer that clips to the pot side. Without accurate temperature control, your coating won’t crisp properly, and the chicken may cook unevenly.
Wire Rack Setup
Drain your chicken on a wire rack set over a baking sheet, not directly on paper towels. This setup allows air circulation underneath, preventing the coating from steaming and losing its crispness. I keep a dedicated rack just for frying projects.
Tongs for Turning
Use long-handled metal tongs for safe turning and removal. I recommend OXO 12-inch locking tongs—they give you control without getting too close to hot oil. Avoid wooden or plastic utensils that could melt or deteriorate.
They also help test doneness by pressing the chicken gently.
Paper Towels for Draining
Keep a stack of heavy-duty paper towels nearby for initial draining before transferring to the rack. Bounty or Viva brands hold up best to grease. This two-step draining process ensures maximum crispiness.
Splatter Screen
Frying creates inevitable splatters. A stainless steel splatter screen protects your stovetop and keeps your kitchen cleaner. I place mine over the Dutch oven between batches to catch any stray oil droplets.
Nutrition Facts
Frequently Asked Questions
How long should I marinate the chicken in buttermilk?
For best results, marinate for at least 4 hours, but overnight (up to 24 hours) yields the most tender, flavorful meat. The buttermilk’s acidity works over time to break down proteins while keeping the chicken juicy.
What oil temperature is ideal for frying?
Maintain oil at 350°F for even cooking and a crispy crust. Use a thermometer to monitor, as temperature drops when chicken is added. If it falls below 325°F, the coating may absorb oil and turn greasy.
Can I use a substitute for buttermilk?
Yes! Mix 1 tablespoon vinegar or lemon juice with 1 cup whole milk and let sit for 5 minutes to curdle. This mimics buttermilk’s tang and tenderizing properties. Avoid skim milk—fat content matters.

Trained in classic French technique but raised on slow-cooked ribs and spicy rubs, she blends culinary skill with smoke and soul.
- Recipe for Boneless Pork Chops in Cast Iron Skillet: Sear and Baste to Juicy Perfection - October 3, 2026
- Recipe for Boneless Cross Rib Roast: Slow-Roasted Beef with Herb Crust - October 3, 2026
- Hamburgers in Sauce Recipe Crock Pot: Slow-Cooked Savory Delight - October 3, 2026