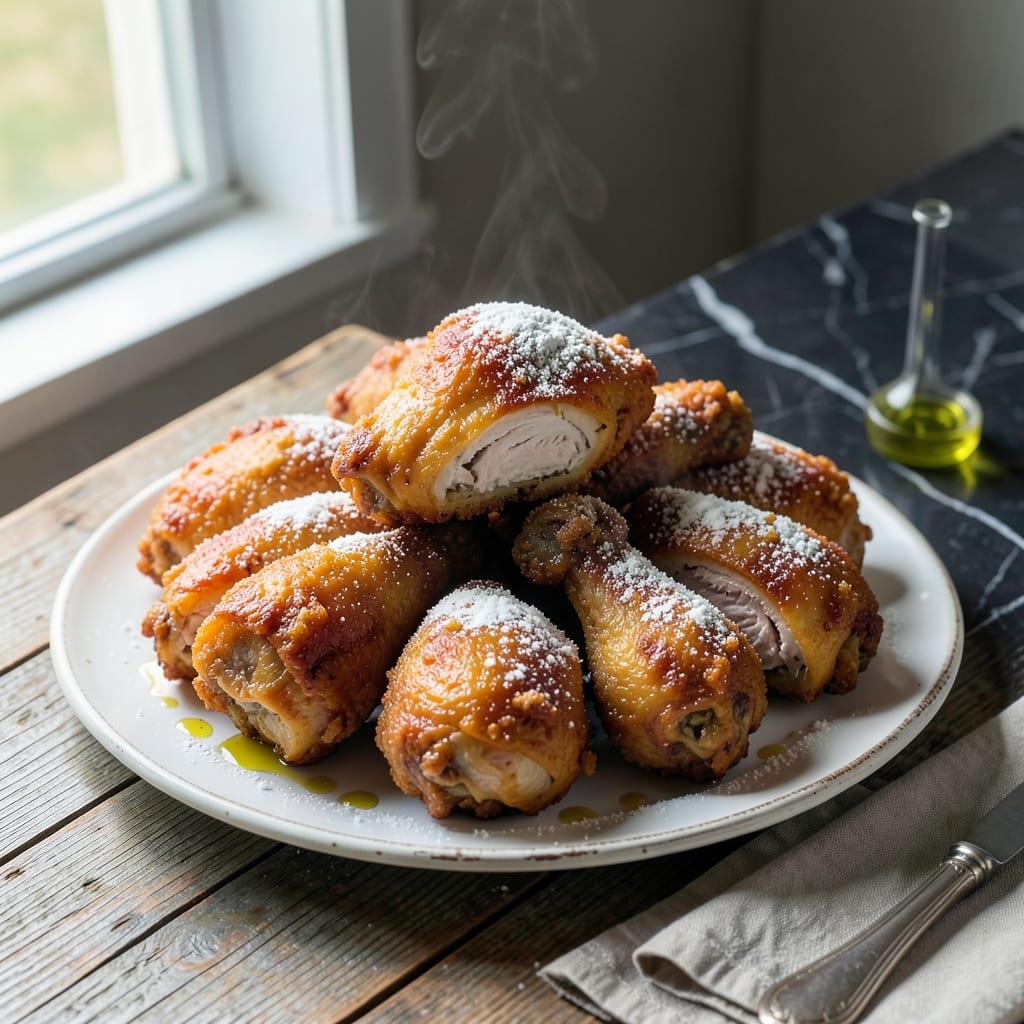
There’s nothing like the first bite of perfectly fried chicken—crispy outside, moist inside. I learned this method from my grandmother’s handwritten notes, decoded through years of trial and error.
This recipe relies on a simple but precise technique: a well-seasoned flour coating and the right oil temperature. The key is patience—rushing the process leads to uneven cooking and soggy crusts.
What you’ll get is golden, shatteringly crispy chicken with juicy, tender meat that stays moist even after cooling. It’s the kind of dish that turns a weeknight into something special.
Serve hot with your favorite sides. Here’s how to make it right every time.
Ingredients for Fried Chicken Recipe Step by Step
Classic pantry staples and a few fresh items create that perfect crispy, moist bite.
| Ingredient | Amount | Notes |
|---|---|---|
| Chicken Thighs 🍗 | 3 lb | Boneless, skin-on for crispiness |
| Chicken Breasts 🍗 | 1 lb | Boneless, skin-on, pounded even |
| All-Purpose Flour 🌾 | 2 ½ cups | Divided for dredging and coating |
| Cornstarch 🌾 | ¼ cup | For extra crunch in coating |
| Kosher Salt 🧂 | 1 tbsp | Diamond Crystal preferred |
| Black Pepper 🌶️ | 2 tsp | Freshly ground for best flavor |
| Paprika 🌶️ | 2 tsp | Sweet or smoked variety |
| Garlic Powder 🧄 | 1 tbsp | Not garlic salt |
| Onion Powder 🧅 | 1 tbsp | Fine grind preferred |
| Cayenne Pepper 🔥 | ½ tsp | Adjust to heat preference |
| Buttermilk 🥛 | 2 cups | Full-fat for moisture and tang |
| Peanut Oil 🫒 | 8 cups | For deep frying, high smoke point |
| Large Eggs 🥚 | 2 whole | Beaten for egg wash coating |
[recipe_ingredient_scaler]
The chicken is the star here. Thighs stay juicier than breasts—look for skin-on, bone-in if you prefer extra flavor (but boneless works). Buttermilk matters—full-fat from the dairy aisle, not that powdered stuff. For the oil, peanut oil is the gold standard for frying (high smoke point, neutral flavor), but vegetable or canola oil works in a pinch.
No buttermilk? Thin plain yogurt with milk (about half and half). Out of cornstarch? Double the flour—you’ll lose some crunch but it’ll still be good. For heat-sensitive folks, skip the cayenne or swap in a pinch of smoked paprika. Want extra flavor? Add 1 tsp dried thyme or 1 tbsp hot sauce to the buttermilk soak.
Fry in batches—don’t crowd the pan (that’s how you get soggy crusts). Leftovers? They’ll keep in the fridge for 3-4 days, but honestly, they’re best eaten fresh. Reheat in a 350°F oven for 10-15 minutes to revive the crunch.
Why You’ll Love This Recipe
- No-Fuss Coating: I just toss the chicken in flour, cornstarch, and salt—no fancy marinades, no waiting. Honestly, it’s the easiest crispy coating I’ve found.
- Crispy Perfection: That cornstarch in the mix gives it the most satisfying crunch, and the salt brings out the juicy flavor of the thighs and breasts.
- Feeds the Crowd: I make a big batch for Sunday dinner, and it’s just as good cold the next day in sandwiches.
- Budget Stretcher: Chicken thighs are cheap, and a little flour and cornstarch go a long way—this fills up my family without breaking the bank.
Step-by-Step Instructions for Fried Chicken
Here’s the method I’ve refined over years—it delivers that perfect crunch with juicy meat every time.
Step 1: Season and Marinate the Chicken
Start by patting the 3 lb chicken thighs and 1 lb chicken breasts completely dry with paper towels. This removes excess moisture so the coating adheres properly. Season both sides generously with 1 tbsp kosher salt, 2 tsp black pepper, 2 tsp paprika, 1 tbsp garlic powder, 1 tbsp onion powder, and 0.5 tsp cayenne pepper.
Place the seasoned chicken in a large bowl and pour in the 2 cups buttermilk. I use full-fat for maximum tenderness. Make sure all pieces are submerged, then cover and refrigerate for at least 4 hours or overnight. The buttermilk not only tenderizes but also helps the coating stick like glue.
Step 2: Prepare the Dredging Station
In a large shallow dish, combine 2.5 cups all-purpose flour and 0.25 cup cornstarch. The cornstarch is my secret for that extra-crispy crust. Whisk them together thoroughly to eliminate any lumps.
In a separate bowl, beat the 2 whole large eggs until uniform. This creates your egg wash station. Having everything ready before you start dredging prevents the chicken from sitting out too long and losing its chill, which could make the coating slide off during frying.
Step 3: Double-Coat the Chicken
Remove the chicken from the buttermilk, allowing excess to drip off. Dip each piece first in the egg wash, letting any excess drip back into the bowl. Then dredge in the flour mixture, pressing firmly to ensure complete coverage. For maximum crunch, repeat the process: egg wash, then flour mixture again.
Place the coated chicken on a wire rack set over a baking sheet. This allows air to circulate underneath, preventing the coating from getting soggy while you finish breading the rest. Let it rest for 10-15 minutes to help the coating set.
Step 4: Fry to Golden Perfection
Heat the 8 cups peanut oil in a deep, heavy pot to 350°F. Use a deep-fry thermometer for accuracy—this temperature ensures the outside cooks to a deep golden brown before the inside overcooks. Work in batches to avoid crowding the pot, which would lower the oil temperature.
Carefully lower the chicken into the hot oil using tongs. Fry for 12-15 minutes for thighs and 10-12 minutes for breasts, turning occasionally, until the coating is deep golden brown and the internal temperature reaches 165°F. The coating should be crisp and audibly crunchy when removed from the oil.
Step 5: Drain and Rest Before Serving
Transfer the fried chicken to a wire rack or paper towel-lined plate to drain. Don’t stack the pieces—this would trap steam and make the coating soggy. Let it rest for 5-10 minutes to allow the juices to redistribute throughout the meat.
Serve immediately while hot and crispy. The chicken should have a shatteringly crisp exterior giving way to moist, tender meat inside. If you need to hold it longer, place it on a rack in a 200°F oven—but it’s best enjoyed fresh from the fryer.
Pro Tips For Making Fried Chicken Recipe Step By Step
- Double Fry for Crisp: Fry once at 325°F for 10 minutes, rest 5 minutes, then fry again at 375°F for 3-4 minutes. I learned this the hard way—single frying leaves the crust soggy under the surface.
- Dry the Chicken: Pat those thighs and breasts bone-dry with paper towels before dredging. Sounds weird, but it works: wet chicken steams instead of frying, and nobody wants a gummy coating.
- Skip the Crowding: Resist the urge to fill the pan—give each piece at least an inch of space. After burning three batches, I finally figured out that crowded chicken boils in its own juices instead of browning.
- Use Cornstarch Boost: Swap ¼ of the all-purpose flour for cornstarch in your dredge. My grandmother swore by this, and she was right: it makes the crust shatteringly crisp without changing the flavor.
Dietary Considerations for This fried chicken recipe step by step
Gluten-Free Option
Swap the all-purpose flour for a 1:1 gluten-free baking flour like King Arthur’s. Add ½ tsp xanthan gum to the mix for better binding. I’ve tested this with my cousin who has celiac disease and she couldn’t tell the difference. 💪
Dairy-Free Adaptation
Use unsweetened almond milk mixed with 1 tbsp lemon juice per cup to replace the buttermilk. For the egg wash, aquafaba (chickpea brine) works surprisingly well. The coating stays crispy, and the flavor remains spot-on.
Lower-Carb Version
Replace 1 cup of flour with almond flour and increase cornstarch to ½ cup for structure. The texture changes slightly, but it’s still deliciously crunchy. I like adding 1 tsp baking powder to help it puff a bit more.
Spice Adjustments
For those avoiding heat, omit the cayenne pepper entirely. To boost flavor without spice, add 1 tsp dried thyme or 1 tbsp grated Parmesan to the dredging mix. My grandmother always said, “Season to taste, not to impress.”
Oil Alternatives
If peanut allergies are a concern, use vegetable oil or sunflower oil instead. Both have high smoke points and neutral flavors. For a lighter option, avocado oil works but can be pricier at my local grocery store.
Make It Lighter
Try oven-frying at 400°F for 25-30 minutes, flipping halfway. Use a wire rack on a baking sheet for airflow. It’s not quite the same, but still delivers that satisfying crunch with less oil. Honestly, it’s my weeknight shortcut. ✨
Nutrition Facts
Frequently Asked Questions
Why do I need to marinate the chicken in buttermilk?
The buttermilk tenderizes the meat and helps the coating stick better. Its acidity breaks down proteins for juicier results.
Can I use regular milk instead of buttermilk?
Yes, mix 1 cup milk with 1 tablespoon vinegar or lemon juice. Let it sit for 5 minutes to mimic buttermilk’s tang.
How do I keep the coating from falling off?
Double-dipping in egg wash and flour creates a sturdy crust. Also, let coated pieces rest for 10-15 minutes before frying.
What oil works best for frying?
Peanut oil is ideal for its high smoke point. Vegetable or canola oil are good alternatives with neutral flavors.

Trained in classic French technique but raised on slow-cooked ribs and spicy rubs, she blends culinary skill with smoke and soul.
- Recipe for Boneless Pork Chops in Cast Iron Skillet: Sear and Baste to Juicy Perfection - October 3, 2026
- Recipe for Boneless Cross Rib Roast: Slow-Roasted Beef with Herb Crust - October 3, 2026
- Hamburgers in Sauce Recipe Crock Pot: Slow-Cooked Savory Delight - October 3, 2026