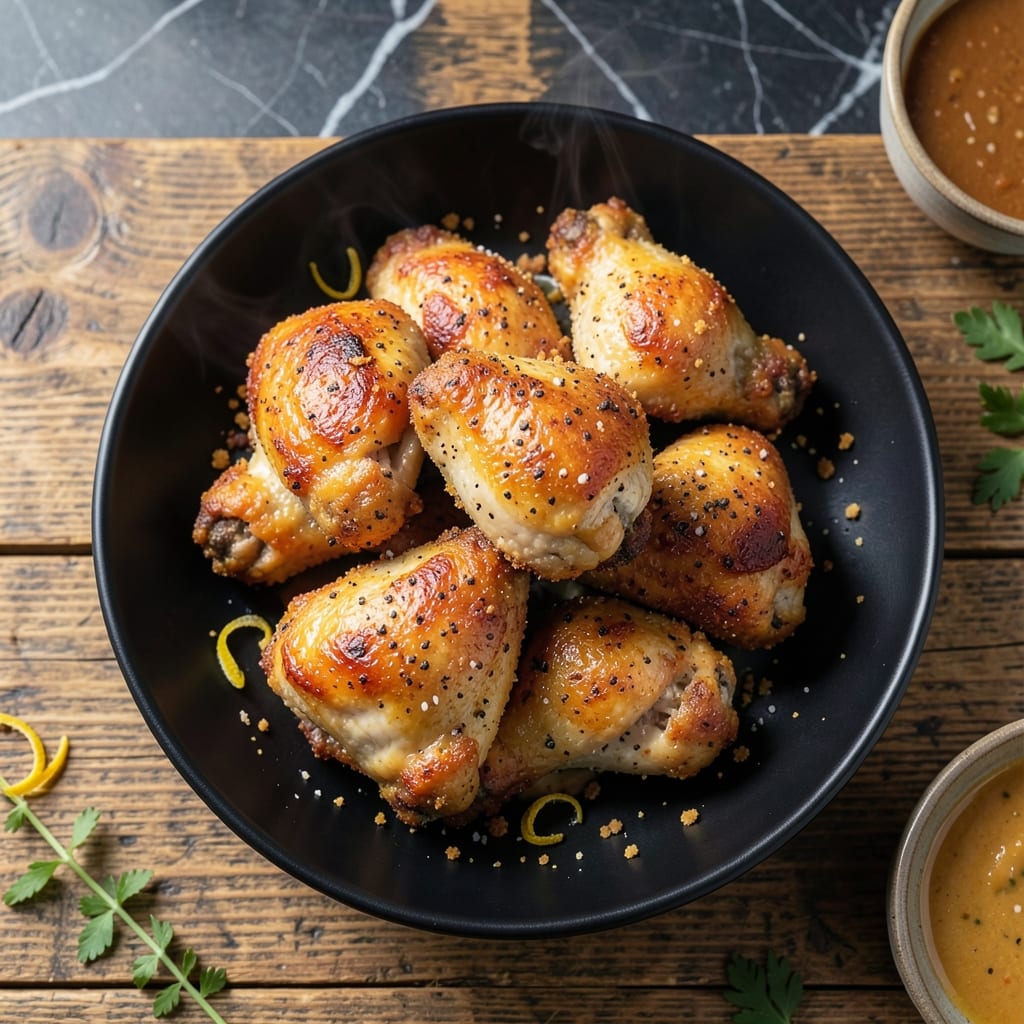
This air fryer method delivers crispy fried chicken without the mess of deep frying. I perfected this technique at The Smoky Pig, adapting traditional methods for home cooks.
The key is a two-step process: a buttermilk marinade for tenderness, followed by a seasoned flour coating. The air fryer circulates hot air at 400°F to create that signature crunch.
You’ll achieve golden-brown, shatteringly crispy skin with juicy meat inside. No special equipment needed—just your air fryer and 30 minutes.
Serve hot for the best texture. This method works with any chicken cut.
Ingredients for Fried Chicken Recipe Using Air Fryer
These ingredients create that signature shatteringly crispy texture with juicy meat inside.
| Ingredient | Amount | Notes |
|---|---|---|
| Chicken Thighs and Drumsticks 🍗 | 3 lb | Bone-in, skin-on preferred |
| Buttermilk 🥛 | 2 cups | Full-fat for best tenderness |
| All-Purpose Flour 🌾 | 2 cups | For crispy coating |
| Cornstarch 🌽 | ½ cup | Enhances crunch in coating |
| Kosher Salt 🧂 | 1 ½ tbsp | Diamond Crystal preferred |
| Black Pepper 🌶️ | 1 tbsp | Freshly ground for best flavor |
| Paprika 🌶️ | 1 tbsp | Sweet or smoked variety |
| Garlic Powder 🧄 | 1 tbsp | Not garlic salt |
| Onion Powder 🧅 | 1 tbsp | Balances seasoning blend |
| Cayenne Pepper 🔥 | ½ tsp | Adjust for heat preference |
| Large Eggs 🥚 | 2 whole | Helps coating adhere |
| Neutral Oil 🫒 | 2 tbsp | Avocado or vegetable oil |
[recipe_ingredient_scaler]
The chicken cut matters for optimal results. Bone-in, skin-on thighs and drumsticks yield the juiciest meat with crispest skin. Source from local butchers or Whole Foods for consistent quality. The buttermilk marinade is non-negotiable—full-fat provides the acidity and fat needed for tenderness. For the flour coating, King Arthur or Pillsbury brands deliver reliable texture.
No buttermilk? Whole milk plus 1 tbsp lemon juice per cup works in a pinch. Substitute 1 tbsp baking powder for cornstarch if unavailable. For heat adjustments, reduce cayenne by half for mild flavor or double for extra spice. The egg wash can be replaced with 2 tbsp mayonnaise for similar binding properties.
Marinate chicken in buttermilk for 4-12 hours (overnight ideal). Store raw chicken in the coldest part of your fridge for up to 2 days. Cooked chicken stays crispy for 2-3 days when refrigerated in a single layer, but best consumed immediately for peak texture.
Why You’ll Love This Recipe
- Set It & Forget It: No babysitting a hot pan—just toss the chicken in the air fryer and let it work its magic.
- Crispy Outside, Juicy Inside: The buttermilk soak keeps the meat tender while the cornstarch gives that addictive crunch.
- Weeknight Hero: I throw this together after work when I need something the whole family will devour.
- Budget-Friendly Feast: Chicken thighs and drumsticks are cheap, and one batch gives us leftovers for lunch the next day.
Step-by-Step Instructions for Fried Chicken Using Air Fryer
Master this technique and you’ll achieve golden, crispy results with minimal oil and maximum flavor.
Step 1: Brine the Chicken in Buttermilk
In a large bowl, whisk together all 2 cups buttermilk with the 1.5 tbsp kosher salt. Submerge all 3 lb chicken thighs and drumsticks in the mixture, ensuring each piece is fully coated. Cover and refrigerate for at least 4 hours or preferably overnight.
This buttermilk brine tenderizes the meat while the acidity helps the coating adhere better. The salt penetrates deeply, seasoning the chicken from within. For best results, I recommend the full 12-hour soak.
Step 2: Prepare the Seasoned Dredge
In a large shallow dish, combine all 2 cups all-purpose flour, the 0.5 cup cornstarch, 1 tbsp black pepper, 1 tbsp paprika, 1 tbsp garlic powder, 1 tbsp onion powder, and 0.5 tsp cayenne pepper. Whisk until thoroughly mixed and no lumps remain.
The cornstarch is crucial here—it creates an ultra-crispy exterior that stays crunchy even after cooling. I like to spread the mixture out slightly so each piece gets an even coating. The paprika adds color while the cayenne provides subtle heat.
Step 3: Coat and Rest the Chicken
Remove the chicken from the buttermilk, letting excess drip off. In a separate bowl, beat the 2 whole large eggs lightly. Dip each piece in the egg, then dredge through the seasoned flour mixture, pressing firmly to adhere. Place on a wire rack set over a baking sheet.
Let the coated chicken rest for 10-15 minutes at room temperature. This resting period allows the coating to hydrate slightly, which prevents it from blowing off in the air fryer. You’ll notice the flour mixture transforms from dry to slightly tacky—that’s your signal it’s ready.
Step 4: Air Fry to Golden Perfection
Preheat your air fryer to 375°F for 5 minutes. Lightly brush the chicken pieces with 2 tbsp neutral oil—just enough to help crisp the exterior. Arrange pieces in a single layer, leaving space between each for air circulation.
Air fry for 12 minutes at 375°F, then flip each piece and cook for another 8-10 minutes until the coating is deep golden brown and the internal temperature reaches 165°F. The skin should be crisp and the juices should run clear when pierced.
For evenly crispy results, work in batches if needed. Overcrowding the basket leads to steaming rather than frying. I typically need two batches for this quantity.
Pro Tips For Making Fried Chicken Recipe Using Air Fryer
- Preheat the Air Fryer: I learned this the hard way—skipping the 5-minute preheat leaves you with unevenly cooked chicken, even if you add extra time later.
- Double-Coat the Chicken: Dip in buttermilk, then flour, then buttermilk again, then flour mixed with cornstarch. Sounds tedious, but it guarantees that shatteringly crisp crust.
- Skip the Overcrowding: After burning three batches, I finally figured out that leaving at least ½ inch between pieces lets the air circulate and crisp every side.
- Use Ice-Cold Buttermilk: My grandmother swore by this, and she was right: soaking the chicken in ice-cold buttermilk for 4+ hours keeps it juicy and helps the coating stick better.
Common Mistakes When Making This Recipe
Overcrowding the Basket
I see this all the time—packing too many pieces into the air fryer basket. Leave at least ½ inch between each piece to allow hot air to circulate properly. Overcrowding causes steaming, resulting in soggy rather than crispy chicken.
Skipping the Preheat
Always preheat your air fryer to 375°F for 5 minutes. Starting with a cold basket means the chicken begins cooking at too low a temperature, leading to uneven browning. This step is non-negotiable for that perfect golden crust. 🔥
I learned this the hard way during my early days at The Smoky Pig—cold starts produce pale, limp results.
Insufficient Oil
While air frying uses less oil than deep frying, you still need a light coating. Brush each piece with ½ tbsp neutral oil before air frying. This helps crisp the exterior and prevents dryness. Avocado oil works beautifully here.
Not Using Cornstarch
The cornstarch in your dredge is what creates that shatteringly crispy texture. Don’t substitute it out—½ cup is the magic amount. It absorbs moisture and creates a crunchier crust than flour alone.
Ignoring Internal Temperature
Don’t rely on color alone. Use a meat thermometer to confirm the internal temperature reaches 165°F. Dark meat can handle going up to 175°F for extra tenderness without drying out. This ensures both safety and perfect doneness.
Nutrition Facts
Frequently Asked Questions
What temperature should I use?
Preheat to 375°F and maintain this temperature throughout. This ensures even cooking and a crispy exterior without burning the coating.
Can I use chicken breasts instead?
Yes, but reduce cooking time to 10-12 minutes per side. Breasts cook faster and can dry out if overdone. Check internal temp reaches 165°F.
Why did my coating fall off?
Likely skipped the resting step after coating. Let breaded pieces sit for 10-15 minutes before air frying so the coating adheres properly.
How do I keep it crispy after cooking?
Place finished pieces on a wire rack, not a plate. This prevents steam from making the coating soggy. Serve immediately for best texture.

Trained in classic French technique but raised on slow-cooked ribs and spicy rubs, she blends culinary skill with smoke and soul.
- Recipe for Boneless Pork Chops in Cast Iron Skillet: Sear and Baste to Juicy Perfection - October 3, 2026
- Recipe for Boneless Cross Rib Roast: Slow-Roasted Beef with Herb Crust - October 3, 2026
- Hamburgers in Sauce Recipe Crock Pot: Slow-Cooked Savory Delight - October 3, 2026