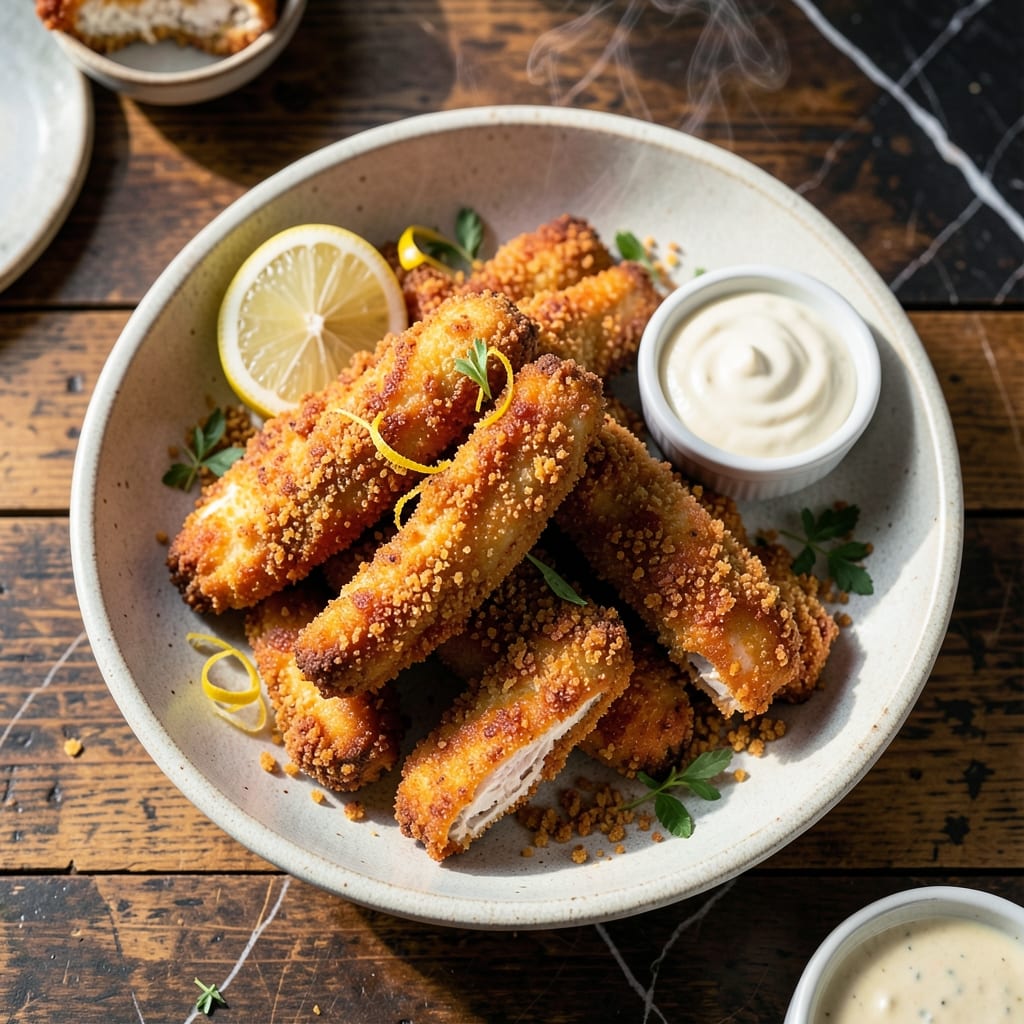
This panko-breaded chicken strip recipe delivers on the ultimate promise: ultra-crispy coating with tender meat inside. I developed this method after testing countless variations in my tiny Boston kitchen, always chasing that perfect crunch.
The secret lies in a double-dredging technique that creates layers of texture. Panko breadcrumbs, with their coarse texture, create a shatteringly crispy exterior that stays crunchy long after frying. Meanwhile, the chicken stays juicy and tender when cooked to the right temperature.
What emerges from the oil is golden brown strips with a satisfying crunch that gives way to perfectly cooked chicken. The contrast between the crispy breading and tender meat makes these impossible to resist. I’ve served these at countless gatherings, and they disappear faster than any other dish.
Perfect for game day, family dinners, or meal prep. The technique ensures consistent results every time.
Ingredients for Fried Chicken Strips Recipe with Panko Bread Crumbs
Ultra-crispy panko meets tender chicken with just the right seasoning blend. Everything you need for that perfect crunch.
| Ingredient | Amount | Notes |
|---|---|---|
| Boneless Skinless Chicken Breasts 🍗 | 1 ½ lb | Cut into 1-inch strips |
| Panko Breadcrumbs 🍞 | 2 cups | Japanese-style for maximum crunch |
| All-Purpose Flour 🌾 | 1 cup | Divided for dredging and binding |
| Large Eggs 🥚 | 2 whole | Beaten for egg wash |
| Buttermilk 🥛 | 1 cup | Full-fat for extra tenderness |
| Kosher Salt 🧂 | 1 ½ tsp | Diamond Crystal preferred for even seasoning |
| Freshly Ground Black Pepper 🌶️ | 1 tsp | Coarse grind for texture |
| Garlic Powder 🧄 | 1 tsp | For depth in breading |
| Onion Powder 🧅 | 1 tsp | Balances savory notes |
| Paprika 🌶️ | 1 tsp | Sweet or smoked for color |
| Neutral Oil 🫒 | 2 cups | Peanut or vegetable for frying |
| Cornstarch 🌾 | ¼ cup | For extra crispiness in coating |
| Cayenne Pepper 🔥 | ¼ tsp | Optional for subtle heat |
[recipe_ingredient_scaler]
The panko is non-negotiable here—Japanese-style from the Asian aisle or Kikkoman brand gives that signature shatter. I grab mine in bulk at Market Basket (Boston locals, you know). Chicken breasts should be uniform in thickness—pound them to 1/2-inch if needed. For the buttermilk, full-fat makes the difference in tenderness. Don’t even think about skipping the cornstarch; it’s the secret to that next-level crunch.
No buttermilk? Whole milk plus 1 tbsp vinegar works in a pinch (let it sit 5 minutes). Short on panko? Crush extra cornflakes or saltines for texture, but panko’s coarse crumb is ideal. Swap garlic and onion powder for 1 tsp ranch seasoning if that’s your vibe. The oil must hit 350°F—use a thermometer. Peanut oil’s high smoke point is perfect, but vegetable or canola oil works too.
Fry in batches to avoid crowding—keeps the oil temp steady and the coating crisp. Leftovers? They’ll lose some crunch but still taste great. Reheat on a rack in a 400°F oven for 10 minutes. Best eaten fresh, but they’ll keep in the fridge for 2-3 days.
Why You’ll Love This Recipe
- 20-Minute Meal: I can get these golden strips from raw chicken to crispy perfection faster than delivery arrives.
- That Panko Crunch: The buttermilk soak makes the chicken juicy while panko gives it that shatteringly crisp coating I crave.
- Kid-Approved Protein: My picky nephew devours these strips with ketchup, and they’re just as good cold in tomorrow’s lunchbox.
- Budget Stretcher: One pound of chicken breasts turns into enough strips to feed four, and panko costs pennies per serving.
Step-by-Step Instructions for Fried Chicken Strips With Panko Bread Crumbs
This method delivers shatteringly crisp coating with juicy, tender chicken every single time.
Step 1: Season and Dredge the Chicken
Cut the boneless skinless chicken breasts into 1-inch strips. In a shallow dish, combine the all-purpose flour with 1.5 tsp kosher salt, 1 tsp freshly ground black pepper, 1 tsp garlic powder, 1 tsp onion powder, 1 tsp paprika, and 0.25 tsp cayenne pepper.
Pat each strip dry with paper towels, then dredge through the seasoned flour, pressing gently to ensure an even coating. This first layer creates a sticky base for the egg wash to cling to, guaranteeing maximum crispiness in the final product.
Step 2: Create the Egg Wash and Panko Mixture
In a separate bowl, whisk together the buttermilk and large eggs until smooth and uniform. In a third shallow dish, mix the panko breadcrumbs with the cornstarch. The cornstarch adds an extra layer of crunch that makes these strips truly exceptional.
Dip each floured chicken strip into the egg wash, allowing any excess to drip off for a moment. Then press it firmly into the panko-cornstarch mixture, ensuring every surface is completely coated. The panko’s coarse texture is what gives these strips their signature ultra-crispy finish.
Step 3: Fry to Golden Perfection
Heat the neutral oil in a deep skillet or Dutch oven to 350°F. Use enough oil to submerge the strips completely for even cooking. Carefully lower 4-5 strips into the hot oil at a time, being careful not to overcrowd the pan.
Fry for 4-5 minutes per side until the coating is deep golden brown and the internal temperature reaches 165°F. The oil should bubble steadily around the strips—this visual cue tells you the temperature is just right. Drain on a wire rack set over a baking sheet to maintain crispiness.
Step 4: Rest and Serve Immediately
Transfer the fried strips to the wire rack and let them rest for 2-3 minutes. This brief pause allows the coating to set completely while keeping the chicken juicy inside. The contrast between the crunchy exterior and tender interior is what makes this dish so addictive.
Serve immediately while still hot and crispy. These strips are best fresh from the fryer, with the panko coating at its peak texture. The combination of savory spices and ultra-crispy breading delivers on both the crispy and tender promises perfectly.
Pro Tips For Making Fried Chicken Strips Recipe With Panko Bread Crumbs
- Double-Dredge the Chicken: Dip the strips in flour, then buttermilk, then flour again before the egg wash and panko—this builds a thicker crust that holds the crumbs better and stays crispy longer.
- Press the Panko Hard: After coating, press the panko into the chicken firmly with your palms so it adheres tightly and doesn’t flake off during frying.
- Rest Before Frying: Let the breaded strips rest for 10 minutes on a wire rack before frying—this sets the coating and prevents it from sliding off in the oil.
- Use a Thermometer: Keep the oil at a steady 350°F; if it drops below, the strips absorb grease and turn soggy, and if too hot, the outside burns before the inside cooks.
Dietary Considerations for This fried chicken strips recipe with panko bread crumbs
Gluten-Free Option
Swap the all-purpose flour for 1 cup gluten-free 1:1 baking flour and use certified gluten-free panko—Kikkoman makes a great version. The texture will be identical to the original, and I’ve tested this with my gluten-sensitive friends in Boston with rave reviews. 💪
Lower-Carb Version
Replace panko with 2 cups crushed pork rinds mixed with ¼ cup grated Parmesan for a keto-friendly coating. The pork rinds give that same crispy texture without the carbs, and the Parmesan adds a savory depth.
Dairy-Free Adaptation
Use unsweetened almond milk plus 1 tbsp vinegar instead of buttermilk. For the egg wash, aquafaba (chickpea brine) works as a binder. I’ve had success with 3 tbsp aquafaba per 2 strips—whisk until frothy before dipping.
Egg-Free Alternative
Mix ½ cup buttermilk with 2 tbsp cornstarch to create a sticky wash. The cornstarch helps the panko adhere without eggs. This works surprisingly well and keeps the coating just as crispy.
Spice Sensitivity
Omit the cayenne and reduce black pepper to ½ tsp for a milder version. Kids and sensitive palates love this. I often make a separate batch with just salt and paprika for my niece’s visits.
Air Fryer Method
Spray the breaded strips lightly with oil and air fry at 400°F for 12-15 minutes, flipping halfway. They won’t be as crispy as deep-fried but still delicious with less oil. Perfect for my tiny apartment kitchen! 🔥
Nutrition Facts
Frequently Asked Questions
Why use panko instead of regular breadcrumbs?
Panko’s coarse texture creates a lighter, crispier coating that stays crunchy longer. Regular breadcrumbs compress more, resulting in a denser, softer crust.
Can I bake these instead of frying?
Yes! Bake at 425°F for 15-20 minutes on a wire rack for even air circulation. Spray with oil first for extra crispiness.
How do I keep them crispy after cooking?
Drain on a wire rack, not paper towels, to prevent steam from softening the coating. Keep warm in a 200°F oven for up to 30 minutes.
Why did my coating fall off?
Common causes: not drying the chicken first, skipping the flour dredge, or overcrowding the pan. Ensure oil is at 350°F before adding strips.

Trained in classic French technique but raised on slow-cooked ribs and spicy rubs, she blends culinary skill with smoke and soul.
- Recipe for Boneless Pork Chops in Cast Iron Skillet: Sear and Baste to Juicy Perfection - October 3, 2026
- Recipe for Boneless Cross Rib Roast: Slow-Roasted Beef with Herb Crust - October 3, 2026
- Hamburgers in Sauce Recipe Crock Pot: Slow-Cooked Savory Delight - October 3, 2026