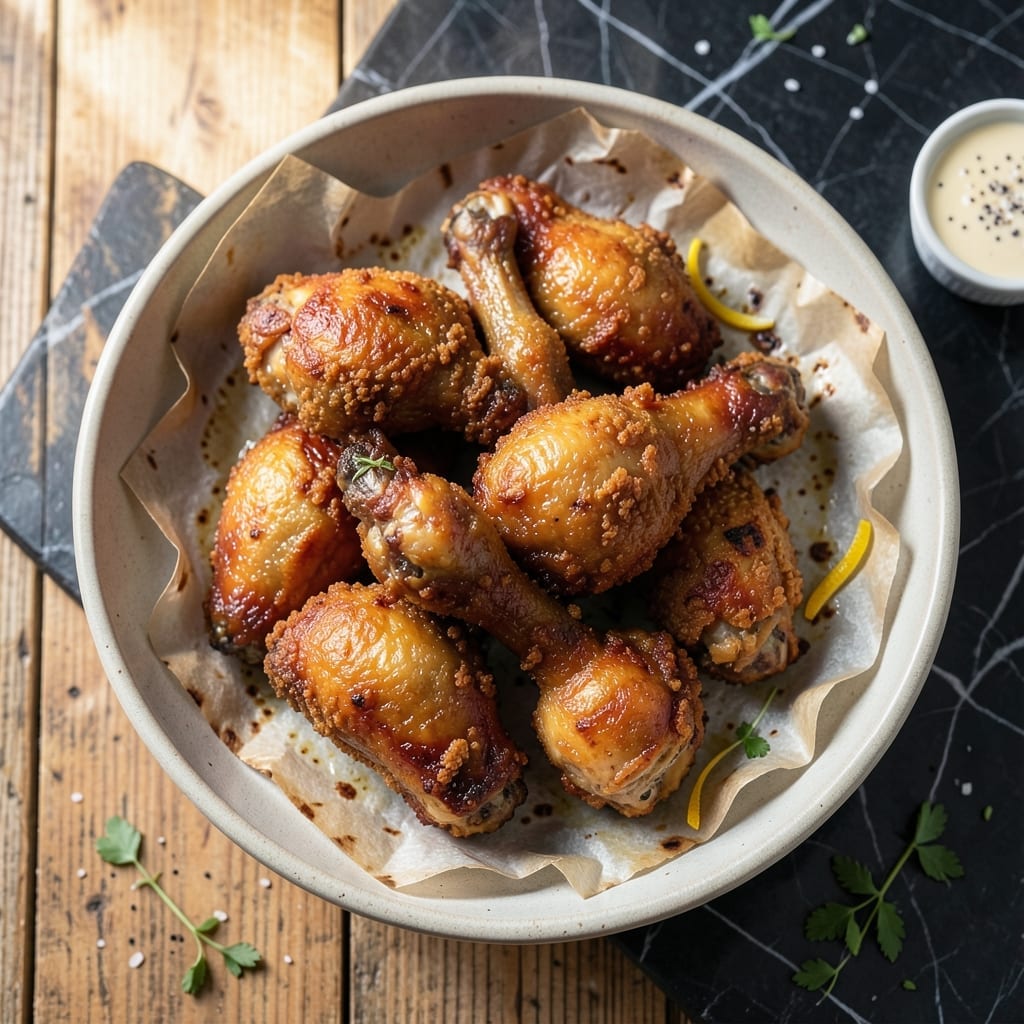
This buttermilk-fried chicken delivers the juicy interior and crispy coating that defines great Southern cooking. I learned the secret from my grandmother’s handwritten cards—simple techniques create extraordinary results.
The buttermilk marinade works overnight to tenderize the meat while adding subtle tang. A double-dredge in seasoned flour ensures a thick, shatteringly crisp crust that stays golden even after frying.
Cooking at 350°F guarantees even browning without drying the meat. Each bite offers perfect contrast: crunchy outside, tender inside.
Serve hot with classic sides like mashed potatoes or slaw. This method turns chicken into a meal worth remembering.
Ingredients for Fried Chicken Recipe Using Buttermilk
Pantry staples plus buttermilk and chicken. Nothing fancy, just Southern flavor.
| Ingredient | Amount | Notes |
|---|---|---|
| Chicken Thighs and Drumsticks 🍗 | 3 lb | Bone-in, skin-on for crispiness |
| Buttermilk 🥛 | 2 cups | Full-fat for best results |
| All-Purpose Flour 🌾 | 3 cups | Divided for double-dredging |
| Cornstarch 🌽 | ½ cup | For extra crispiness |
| Salt 🧂 | 1 tbsp | Diamond Crystal kosher preferred |
| Black Pepper 🌶️ | 2 tsp | Freshly ground for best flavor |
| Paprika 🌶️ | 2 tsp | Sweet or smoked variety |
| Garlic Powder 🧄 | 1 tsp | Not garlic salt |
| Onion Powder 🧅 | 1 tsp | Fresh ground preferred |
| Cayenne Pepper 🔥 | ½ tsp | Adjust to heat preference |
| Vegetable Oil 🫒 | 4 cups | For deep frying, peanut oil works too |
| Large Eggs 🥚 | 2 whole | For binding the coating |
[recipe_ingredient_scaler]
The chicken is everything here. Bone-in, skin-on thighs and drumsticks give you that juicy interior and crispy skin—boneless does not cut it. I grab mine from Whole Foods or the local butcher, but standard grocery store chicken works fine too. Look for pieces that are evenly sized so they cook at the same rate. The buttermilk should be full-fat (the good stuff, not the low-fat version).
No buttermilk? Whole milk plus 1 tbsp vinegar or lemon juice per cup does the trick. Want extra crunch? Swap half the flour for crushed cornflakes. The cayenne can be omitted if you’re sensitive to heat, but I’d keep the paprika—it’s more for color than spice. For the oil, peanut oil has a higher smoke point, but vegetable oil is just as good and more budget-friendly.
The chicken can marinate overnight in the buttermilk, or just 4 hours if you’re short on time. Leftover fried chicken reheats best in the oven at 375°F for 10-15 minutes—keeps it crispy. Store in the fridge for up to 3 days.
Why You’ll Love This Recipe
- No Fuss Marinade: Buttermilk does all the work—just dunk the chicken and let it soak while I prep the rest.
- That Crispy Crunch: The cornstarch in the flour mix gives it this ridiculous crunch that shatters with every bite.
- Crowd Pleaser: I’ve served this at picnics, potlucks, and random Tuesdays—everyone from kids to grandparents asks for seconds.
- Budget Stretcher: A bag of thighs and drumsticks is cheap, and this recipe makes them taste like a million bucks. Honestly, leftovers (if there are any) reheat surprisingly well.
Step-by-Step Instructions for Fried Chicken Using Buttermilk
Here’s the method. Straightforward, tested, works every time.
Step 1: Marinate the Chicken in Buttermilk
In a large bowl, whisk together the 2 cups Buttermilk and the 2 whole Large Eggs until fully combined. This mixture forms the foundation of your marinade, ensuring the chicken stays moist throughout the frying process.
Add the 3 lb Chicken Thighs and Drumsticks to the bowl, making sure each piece is fully submerged in the buttermilk mixture. Cover and refrigerate for at least 4 hours, but overnight is ideal. This extended marinating time tenderizes the meat and infuses it with flavor, which is key to achieving that promised juicy interior.
Step 2: Prepare the Dredging Mixture
In a separate large bowl, combine 3 cups All-Purpose Flour, 0.5 cup Cornstarch, 1 tbsp Salt, 2 tsp Black Pepper, 2 tsp Paprika, 1 tsp Garlic Powder, 1 tsp Onion Powder, and 0.5 tsp Cayenne Pepper. Whisk until everything is evenly distributed.
The cornstarch is the secret to an ultra-crispy coating, while the spices add depth and a touch of heat. I always use freshly ground black pepper for the best flavor impact.
Step 3: Double-Dredge for Maximum Crunch
Remove the chicken from the refrigerator and let it sit at room temperature for 15-20 minutes while you heat the oil. This takes the chill off the meat, ensuring more even cooking.
Dredge each piece of chicken in the flour mixture, pressing firmly to adhere. Shake off any excess, then dip it back into the buttermilk mixture, and dredge it in the flour one more time. This double-dredging technique creates a thicker, crunchier coating that holds up to frying.
Step 4: Fry to Golden Perfection
In a large, heavy-bottomed pot or Dutch oven, heat the 4 cups Vegetable Oil to 350°F. Use a deep-fry or candy thermometer to monitor the temperature—this ensures consistent results.
Fry the chicken in batches to avoid crowding the pot, which would lower the oil temperature and lead to greasy results. Cook each piece for 12-15 minutes, turning occasionally, until the coating is deep golden brown and the internal temperature reaches 165°F. The oil should bubble steadily around each piece, a sign that the coating is crisping up beautifully.
Step 5: Drain and Rest Before Serving
Transfer the fried chicken to a wire rack set over a baking sheet or a paper towel-lined plate. This allows air to circulate, keeping the coating crisp while excess oil drains away.
Let the chicken rest for 5-10 minutes before serving. This resting period lets the juices redistribute throughout the meat, ensuring every bite is as juicy as promised. Serve hot for the best texture contrast between the crispy exterior and tender interior.
Pro Tips For Making Fried Chicken Recipe Using Buttermilk
- Soak Overnight: Let the chicken marinate in buttermilk for at least 12 hours—I learned this the hard way after my first batch came out dry. The longer it sits, the juicier and more tender it gets.
- Double Dredge: Dip the chicken back in the buttermilk after the first flour coating, then dredge again in the flour-cornstarch mix. Sounds tedious, but it creates that extra-crispy crust everyone loves.
- Hold the Crowding: Fry in batches with space between pieces—resist the urge to cram the pan. Overcrowding drops the oil temp, and you’ll end up with greasy, soggy chicken instead of golden perfection.
- Rest Before Serving: Give the fried chicken 5-10 minutes on a wire rack after frying. My grandmother swore by this, and she was right: it keeps the crust crispy and lets the juices redistribute.
Make-Ahead Tips for This Recipe
Overnight Marinade
For the juiciest results, let your chicken soak in the buttermilk-egg mixture for a full 24 hours. I learned this from my grandmother’s notes—she’d start the marinade before bed, then fry the next evening. The acidity in buttermilk breaks down proteins, guaranteeing tender meat. 💪
Prep the Dredge
Mix your flour-cornstarch blend the night before and store it in an airtight container. This saves time on cooking day. Just whisk in the spices when ready to use. The cornstarch absorbs moisture, ensuring extra crunch.
Double-Dredge Shortcut
Set up a dredging station with two shallow dishes: one for buttermilk, one for flour. This makes the double-dredge process faster and less messy. I use 9×13-inch baking dishes for easy cleanup.
Oven Reheating
To revive leftovers, place pieces on a wire rack over a baking sheet and warm at 375°F for 10-15 minutes. This keeps the coating crisp while heating through. Avoid microwaving—it turns the crust soggy. ❄️
Freeze for Later
Fully cook and cool the chicken, then freeze in a single layer on a tray before transferring to a bag. This prevents sticking. Reheat from frozen in the oven at 400°F for 20-25 minutes for best results.
Day-Of Tips
Bring refrigerated chicken to room temperature for 15-20 minutes before frying. This ensures even cooking. I always set a timer—it’s easy to forget when prepping multiple dishes.
Nutrition Facts
Frequently Asked Questions
Can I use regular milk instead of buttermilk?
Yes! Mix 1 cup whole milk with 1 tablespoon vinegar or lemon juice. Let it sit for 5 minutes to thicken before using. The acidity mimics buttermilk’s tenderizing effect.
Why does the chicken need to rest after frying?
Resting for 5-10 minutes lets juices redistribute. Skipping this step means dry meat when you cut in. The coating stays crispier too.
How do I keep the coating from falling off?
Double-dredging is key. Press flour firmly into the meat and let it adhere for 2-3 minutes between dips. Also, maintain oil at 350°F to prevent greasiness.
Can I bake this instead of frying?
For a lighter version, bake at 400°F for 25-30 minutes on a wire rack. Spray with oil first for crispiness. It won’t be identical, but still delicious.

Trained in classic French technique but raised on slow-cooked ribs and spicy rubs, she blends culinary skill with smoke and soul.
- Recipe for Boneless Pork Chops in Cast Iron Skillet: Sear and Baste to Juicy Perfection - October 3, 2026
- Recipe for Boneless Cross Rib Roast: Slow-Roasted Beef with Herb Crust - October 3, 2026
- Hamburgers in Sauce Recipe Crock Pot: Slow-Cooked Savory Delight - October 3, 2026