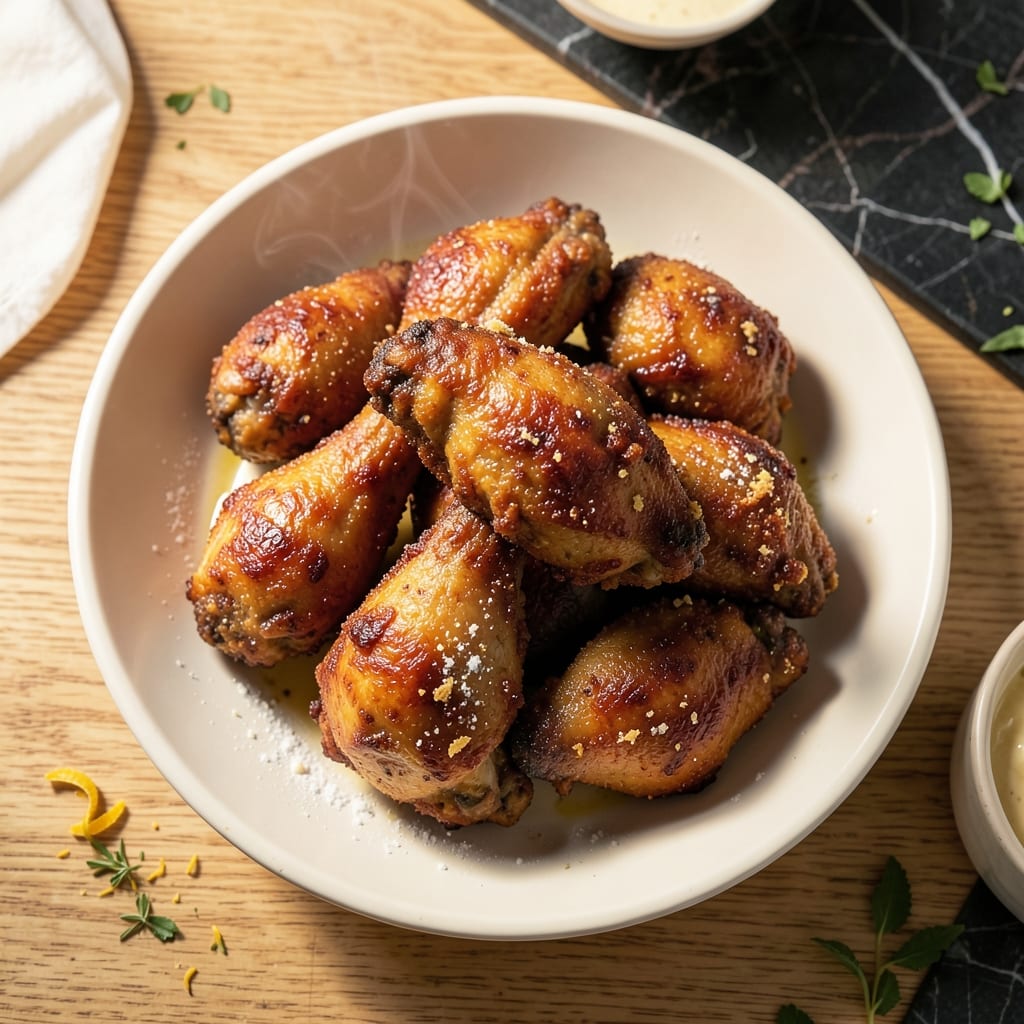
This fried chicken delivers a golden crust with every bite, using simple pantry staples you already have on hand. The egg and milk in the batter create a coating that clings perfectly to the chicken, ensuring maximum crunch and flavor.
I developed this method after testing countless variations, focusing on achieving that ideal balance of crispy exterior and juicy interior. The egg and milk work together to form a cohesive batter that fries up light and airy, not dense or greasy.
The result is chicken that’s evenly browned, tender inside, and impossible to resist. The process is straightforward, with clear steps for marinating, coating, and frying to ensure consistent results every time.
Serve it hot for the best texture, with your favorite dipping sauces. This is the kind of dish that turns a simple meal into something special.
Ingredients for Fried Chicken Recipe with Egg and Milk
Golden, crispy perfection starts with these pantry-friendly staples and a few fresh picks.
| Ingredient | Amount | Notes |
|---|---|---|
| Chicken Thighs 🍗 | 2 lb | Boneless, skin-on preferred |
| All-Purpose Flour 🌾 | 2 cups | For dredging chicken |
| Large Eggs 🥚 | 2 whole | Beaten for batter |
| Whole Milk 🥛 | 1 cup | For egg wash batter |
| Baking Powder 🧂 | 1 tbsp | For extra crispiness |
| Salt 🧂 | 1 tbsp | Kosher or sea salt |
| Black Pepper 🌶️ | 1 tsp | Freshly ground preferred |
| Paprika 🌶️ | 1 tsp | Sweet or smoked variety |
| Garlic Powder 🧄 | 1 tsp | Not garlic salt |
| Onion Powder 🧅 | 1 tsp | Fresh ground preferred |
| Vegetable Oil 🫒 | 4 cups | For deep frying |
| Buttermilk 🥛 | 1 cup | Optional for marinade |
[recipe_ingredient_scaler]
The chicken is key here. Thighs stay juicier than breasts—look for skin-on, bone-in at your local Whole Foods or butcher. If you’re using breasts, pound them to even thickness so they cook through without burning. The flour should be all-purpose (no need for fancy stuff), and King Arthur is my go-to brand. Fresh egg and milk make that batter cling like a dream.
No buttermilk? Milk plus 1 tbsp vinegar works in a pinch. Want extra crunch? Swap half the flour for cornstarch. Out of paprika? Cayenne for heat or skip it entirely—the egg and milk batter still delivers. The oil needs to be neutral (vegetable, canola, or peanut), and Crisco is a solid budget pick. Don’t overcrowd the pan, or the temperature drops and you’ll get greasy chicken.
Fry in batches and keep finished pieces warm on a rack (not paper towels—steam makes them soggy). Leftovers? They’re best fresh, but reheat in the oven at 400°F for 15 minutes to revive the crust. The marinade (if using) keeps 2 days in the fridge.
Why You’ll Love This Recipe
- One Bowl Wonder: I mix the flour, egg, and milk right in the same dish—no extra bowls, no fuss.
- Crispy, Juicy Magic: The egg and milk wash makes the coating stick perfectly, and the thighs stay tender inside.
- Weeknight Hero: Between us, this is my go-to for busy evenings when I need dinner fast.
- Budget Stretcher: Chicken thighs are cheap, and this recipe makes them taste like a million bucks.
Step-by-Step Instructions for Fried Chicken With Egg and Milk
This method ensures crispy, golden perfection using simple pantry staples and a few smart techniques.
Step 1: Marinate the Chicken Thighs
In a large bowl, whisk together the 1 cup Buttermilk with 1 tbsp Salt, 1 tsp Black Pepper, 1 tsp Paprika, 1 tsp Garlic Powder, and 1 tsp Onion Powder. Submerge the 2 lb Chicken Thighs in the mixture, making sure each piece is fully coated.
Let it marinate at room temperature for 30 minutes (or up to 2 hours in the fridge). This step tenderizes the chicken and infuses it with flavor. The buttermilk’s acidity also helps the coating adhere better during frying.
Step 2: Prepare the Flour Dredge
In a shallow dish, combine the 2 cups All-Purpose Flour and 1 tbsp Baking Powder. The baking powder adds extra crispiness to the crust. Stir well to distribute it evenly throughout the flour.
In a separate bowl, whisk the 2 whole Large Eggs with 1 cup Whole Milk until smooth. This egg wash acts as a glue, helping the flour coating stick to the chicken.
Step 3: Dredge and Coat the Chicken
Remove the chicken thighs from the buttermilk marinade, letting any excess drip off. Dredge each piece in the flour mixture, pressing gently to ensure an even, thick coating. Shake off any excess flour.
Next, dip the floured chicken into the egg and milk mixture, coating it completely. Then, dredge it once more in the flour mixture. This double-dredging method guarantees an extra-crispy, golden crust.
Step 4: Fry to Golden Perfection
In a deep, heavy-bottomed skillet or Dutch oven, heat the 4 cups Vegetable Oil to 350°F over medium-high heat. Use a thermometer to monitor the temperature—this is critical for even cooking and a crispy finish.
Carefully place the chicken in the hot oil, working in batches if needed to avoid overcrowding. Fry for 12-15 minutes, turning occasionally, until the chicken is deep golden brown and the internal temperature reaches 165°F. Drain on a wire rack or paper towels to keep it crispy.
Step 5: Rest and Serve
Let the fried chicken rest for 5-10 minutes before serving. This allows the juices to redistribute, ensuring moist, tender meat inside that crispy crust. The chicken should be golden and crunchy on the outside, with a juicy, flavorful center.
Serve immediately while hot for the best texture. This method delivers perfectly crisp, flavorful fried chicken every time, with minimal ingredients and maximum satisfaction.
Pro Tips For Making Fried Chicken Recipe With Egg And Milk
- Preheat the Oil: I learned this the hard way—if the oil isn’t at 350°F before the chicken goes in, you’ll get greasy, sad results instead of that crispy crust. Use a thermometer or test with a pinch of flour to see if it sizzles immediately.
- Soak the Chicken: Let the thighs sit in the egg and milk mixture for at least 10 minutes before dredging. Sounds weird, but it works: the milk tenderizes the meat while the egg helps the flour stick like glue.
- Skip the Overcrowding: After burning three batches, I finally figured out that packing the pan drops the oil temp fast. Fry in batches—two or three thighs at a time—so each piece gets even browning.
- Add Baking Powder: My grandmother swore by this, and she was right: a teaspoon of baking powder in the flour mix makes the coating lighter and crispier. It’s the thing that actually changes the outcome, especially with thick-cut thighs.
Storing and Reheating This fried chicken recipe with egg and milk
Refrigerator Storage
Let your fried chicken cool completely before storing. Place pieces in an airtight container with a paper towel to absorb excess oil. It keeps at 40°F or below for up to 3 days. Honestly, it’s best fresh but still tasty the next day. ❄️
Freezer Storage
For longer storage, freeze in a single layer on a baking sheet first. Once frozen, transfer to a freezer bag, squeezing out excess air. It stays good for 1 month. I label mine with the date—Pickles my cat always tries to steal a piece when I’m packing it up.
Oven Reheating
Preheat your oven to 400°F for the best crispy revival. Place chicken on a wire rack over a baking sheet and heat for 10-15 minutes. This method prevents sogginess while restoring that golden crunch. I use my Lodge cast iron pan for extra even heating. 🔥
Air Fryer Option
For a quicker reheat, use your air fryer at 375°F for 5-7 minutes. Shake the basket halfway through for even crisping. This works great for smaller batches and keeps the coating perfectly intact.
Microwave Warning
I avoid microwaving fried chicken—it inevitably turns soggy. If you must, use 50% power in 30-second bursts and place a paper towel under the pieces. Still, the oven or air fryer is the way to go.
Nutrition Facts
Frequently Asked Questions
Can I use chicken breasts instead of thighs?
Yes, but pound them to even ½-inch thickness first. Thighs stay juicier, while breasts can dry out. Adjust frying time to 8-10 minutes per side.
Why add baking powder to the flour?
It creates tiny air pockets for extra crispiness. Use 1 tbsp per 2 cups flour—this is the secret to that light, airy crust.
How do I know when the oil is hot enough?
Use a thermometer for 350°F. Without one, drop in a pinch of flour—if it sizzles immediately, it’s ready. Medium-high heat works best.
Can I bake this instead of frying?
Bake at 425°F for 25-30 minutes on a rack. It won’t be as crispy, but still delicious. Turn halfway for even browning.

Trained in classic French technique but raised on slow-cooked ribs and spicy rubs, she blends culinary skill with smoke and soul.
- Recipe for Boneless Pork Chops in Cast Iron Skillet: Sear and Baste to Juicy Perfection - October 3, 2026
- Recipe for Boneless Cross Rib Roast: Slow-Roasted Beef with Herb Crust - October 3, 2026
- Hamburgers in Sauce Recipe Crock Pot: Slow-Cooked Savory Delight - October 3, 2026