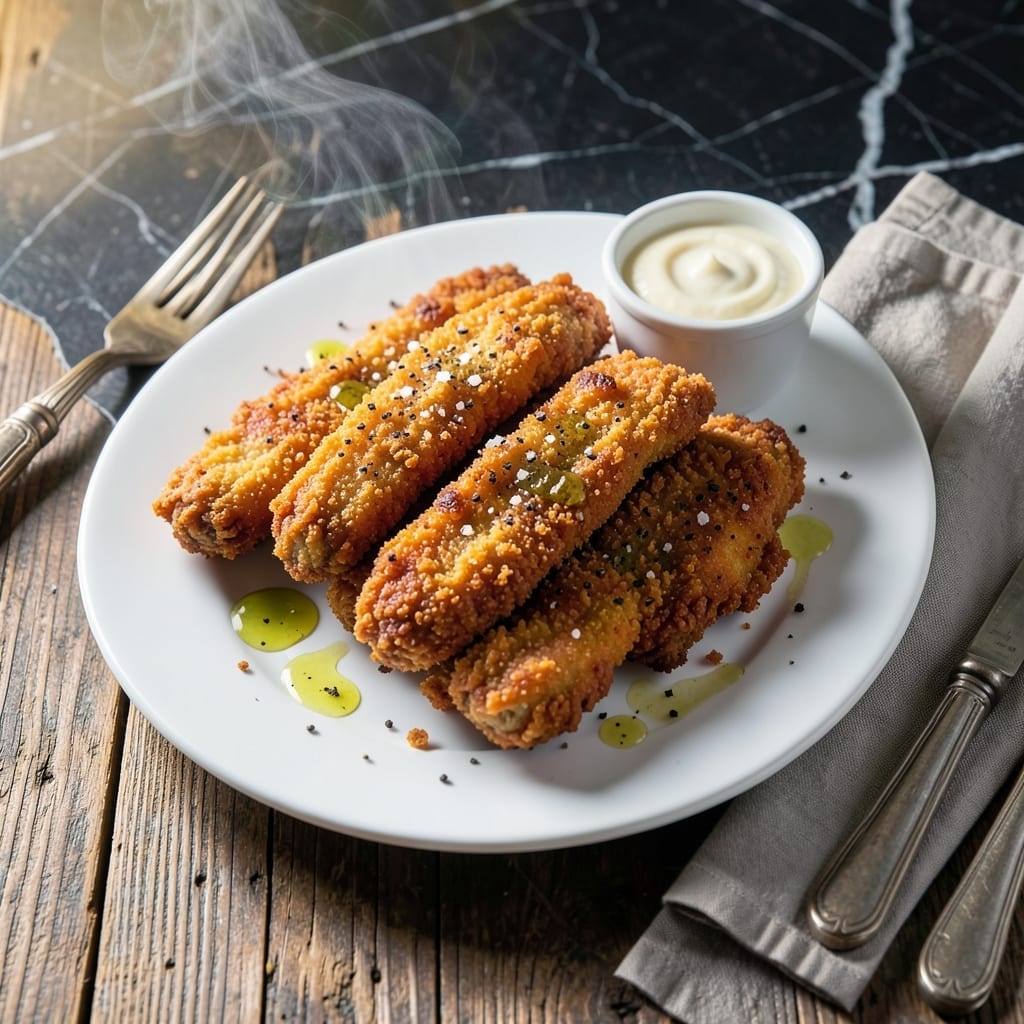
This recipe transforms ordinary chicken into crispy, golden strips with a triple-coated crunch you’ll crave. No deep fryer needed—just a skillet, simple ingredients, and a foolproof technique.
I developed this method after years of testing to achieve the perfect balance: a shatteringly crispy exterior and juicy interior. The key is layering bread crumbs with seasoned flour and egg for maximum crunch.
Each bite delivers that satisfying crunch followed by tender, flavorful chicken. The coating stays intact, even when served with dipping sauces or packed for lunch.
Serve hot for the best texture, or keep warm in the oven while frying batches. This is comfort food at its finest.
Ingredients for Fried Chicken Strips Recipe with Bread Crumbs
Simple ingredients create extraordinary crispy chicken strips with a triple-coated crunch everyone loves.
| Ingredient | Amount | Notes |
|---|---|---|
| Boneless Skinless Chicken Breasts 🍗 | 1 ½ lb | Cut into 1-inch strips |
| All-Purpose Flour 🌾 | 1 cup | For initial dredging layer |
| Large Eggs 🥚 | 2 whole | Beaten for egg wash |
| Panko Breadcrumbs 🍞 | 2 cups | For maximum crunch texture |
| Kosher Salt 🧂 | 1 ½ tsp | Diamond Crystal preferred |
| Freshly Ground Black Pepper 🌶️ | 1 tsp | Coarse grind ideal |
| Garlic Powder 🧄 | 1 tsp | For seasoning flour mix |
| Onion Powder 🧅 | 1 tsp | Complements garlic flavor |
| Paprika 🌶️ | 1 tsp | Sweet or smoked variety |
| Dried Oregano 🍃 | ½ tsp | Mediterranean variety preferred |
| Vegetable Oil 🫒 | 1 cup | For shallow frying |
| Buttermilk 🥛 | ½ cup | For tenderizing chicken |
[recipe_ingredient_scaler]
The chicken quality affects the final texture significantly. Air-chilled boneless, skinless chicken breasts from Whole Foods or Trader Joe’s yield the juiciest results. Look for even thickness to ensure uniform cooking. The Panko breadcrumbs must be fresh—stale crumbs won’t achieve that signature shatter. For the seasoning blend, Penzeys offers superior quality spices that elevate the flavor profile.
No buttermilk? Whole milk with 1 tbsp vinegar per cup works as a substitute. Regular breadcrumbs can replace Panko, though the crunch will be less pronounced. For a gluten-free version, use almond flour and gluten-free breadcrumbs. The vegetable oil can be swapped for peanut or canola oil with similar smoke points. Always maintain oil temperature at 350°F for optimal crisping.
Store raw chicken in the coldest part of the fridge for up to 2 days. The prepared coating mix keeps in an airtight container for 1 week. Cooked strips stay crispy when kept warm in a 200°F oven for up to 30 minutes. Refrigerate leftovers for 3-4 days or freeze for 1 month with minimal texture loss.
Why You’ll Love This Recipe
- Minimal Effort: I just dip, coat, and fry—no fancy techniques, just panko and eggs doing the heavy lifting.
- Crispy Perfection: That panko crust gives it a satisfying crunch with every bite, while the chicken stays juicy inside.
- Crowd Pleaser: Honestly, it’s a hit with kids and adults alike, whether it’s game night or a quick dinner.
- Budget Friendly: Chicken breasts and pantry staples mean I’m feeding the family without breaking the bank.
Step-by-Step Instructions for Fried Chicken Strips With Bread Crumbs
Master this triple-coating technique for shatteringly crisp chicken strips with a tender, juicy interior.
Step 1: Season and Prepare the Chicken Strips
Begin by cutting the 1.5 lb Boneless Skinless Chicken Breasts into 1-inch strips, ensuring uniform thickness for even cooking. Pat them completely dry with paper towels—this is critical for the coating to adhere properly.
In a shallow dish, combine the 1 cup All-Purpose Flour, 1.5 tsp Kosher Salt, 1 tsp Freshly Ground Black Pepper, 1 tsp Garlic Powder, 1 tsp Onion Powder, 1 tsp Paprika, and 0.5 tsp Dried Oregano. The spices will infuse the flour with robust flavor.
Step 2: Set Up the Triple-Coating Station
Create an assembly line with three shallow dishes. Place the seasoned flour in the first dish. In the second, beat the 2 whole Large Eggs with the 0.5 cup Buttermilk until fully combined—the buttermilk tenderizes the chicken while the egg binds the coating.
Pour the 2 cups Panko Breadcrumbs into the third dish. Panko’s coarse texture ensures maximum crunch compared to standard breadcrumbs. This three-step process guarantees a thick, craggy crust that stays put during frying.
Step 3: Dredge, Dip, and Coat the Chicken
Working with one piece at a time, dredge each strip in the seasoned flour, pressing gently to ensure an even layer. Shake off any excess—clumps will burn in the oil. Next, dip the floured strip into the egg and buttermilk mixture, letting any excess drip back into the dish.
Finally, roll the strip in the Panko Breadcrumbs, pressing firmly so the crumbs cling to every surface. For extra crunch, repeat the egg dip and Panko coating once more. Place the coated strips on a wire rack to rest for 5 minutes—this helps the coating set before frying.
Step 4: Fry to Golden Perfection
Heat the 1 cup Vegetable Oil in a large, heavy skillet over medium-high heat until it reaches 350°F. To test the temperature, drop in a pinch of Panko—if it sizzles immediately and floats, the oil is ready.
Carefully place the coated strips in the hot oil, working in batches to avoid crowding the pan. Fry for 3-4 minutes per side until the coating is deep golden brown and the internal temperature of the chicken reaches 165°F. Use a slotted spoon to transfer the strips to a paper towel-lined plate to drain.
Step 5: Rest and Serve Immediately
Let the fried chicken strips rest for 2-3 minutes before serving. This brief rest allows the coating to crisp up further and the juices inside the chicken to redistribute, ensuring each bite is moist and flavorful.
Serve while hot, accompanied by your favorite dipping sauces. The triple-coated strips should have a shatteringly crisp exterior with a tender, juicy interior—every piece delivering that signature crunch with each bite.
Pro Tips For Making Fried Chicken Strips Recipe With Bread Crumbs
- Double Dredge: Dip the chicken in flour, then egg, then panko, and repeat the process—this extra layer guarantees a thicker, crunchier crust that won’t fall off.
- Press the Crumbs: After coating, firmly press the panko into the chicken strips so they stick better and create those crispy, jagged edges everyone loves.
- Rest Before Frying: Let the breaded strips sit for 10 minutes before frying; this helps the coating set and prevents it from sliding off in the oil.
- Use Oil at 350°F: Keep the oil at a steady 350°F—any lower and the chicken absorbs grease, any higher and the outside burns before the inside cooks.
Common Mistakes When Making Perfect Results
Skipping the Drying Step
Never skip patting the chicken strips completely dry with paper towels after cutting. Even slight moisture prevents the coating from adhering properly, resulting in soggy breading that slides right off. I learned this the hard way with my first batch. 💡
Overcrowding the Pan
Frying too many strips at once lowers the oil temperature, causing the coating to absorb oil instead of crisping. Work in batches with 1 inch of space between pieces. Use a candy thermometer to monitor the oil stays at 350°F.
Insufficient Coating Rest
Let the coated strips rest on a wire rack for 5 minutes before frying. This allows the egg wash to set, preventing breading loss during cooking. Rushing this step often leads to bare spots and uneven texture.
Wrong Oil Temperature
Oil that’s too cool creates greasy strips, while oil that’s too hot burns the coating before the chicken cooks through. Test with a pinch of Panko—it should sizzle immediately and float to the surface. Maintain consistent 350°F throughout frying.
Using Stale Breadcrumbs
Old Panko breadcrumbs lose their crisping power. Always check the expiration date and store them in an airtight container after opening. Fresh crumbs make the difference between good and extraordinary texture.
Skipping the Second Coating
For maximum crunch, the triple-coating process is essential. After the initial flour, egg, and Panko, repeat the egg dip and Panko coating once more. This extra layer creates that signature shatter when you bite in. 🔥
Nutrition Facts
Frequently Asked Questions
Can I use regular breadcrumbs instead of Panko?
Yes, but Panko’s coarse texture creates superior crunch. Regular breadcrumbs will work, though the coating may be less crispy. For best results, pulse regular breadcrumbs in a food processor to create larger crumbs.
How do I keep the strips crispy after frying?
Place fried strips on a wire rack in a 200°F oven between batches. This prevents steam from making the coating soggy. Avoid covering or stacking hot strips, as trapped moisture ruins the texture.
Why does my coating keep falling off?
The most common culprit is moisture on the chicken. Always pat strips completely dry before dredging. Also, let the coated strips rest for 5 minutes before frying to help the egg wash set properly.
Can I bake these instead of frying?
Yes! Bake at 400°F for 15-20 minutes, flipping halfway. Use a wire rack on a baking sheet for even air circulation. The texture won’t be as crispy as frying, but it’s a healthier alternative.

Trained in classic French technique but raised on slow-cooked ribs and spicy rubs, she blends culinary skill with smoke and soul.
- Recipe for Boneless Pork Chops in Cast Iron Skillet: Sear and Baste to Juicy Perfection - October 3, 2026
- Recipe for Boneless Cross Rib Roast: Slow-Roasted Beef with Herb Crust - October 3, 2026
- Hamburgers in Sauce Recipe Crock Pot: Slow-Cooked Savory Delight - October 3, 2026