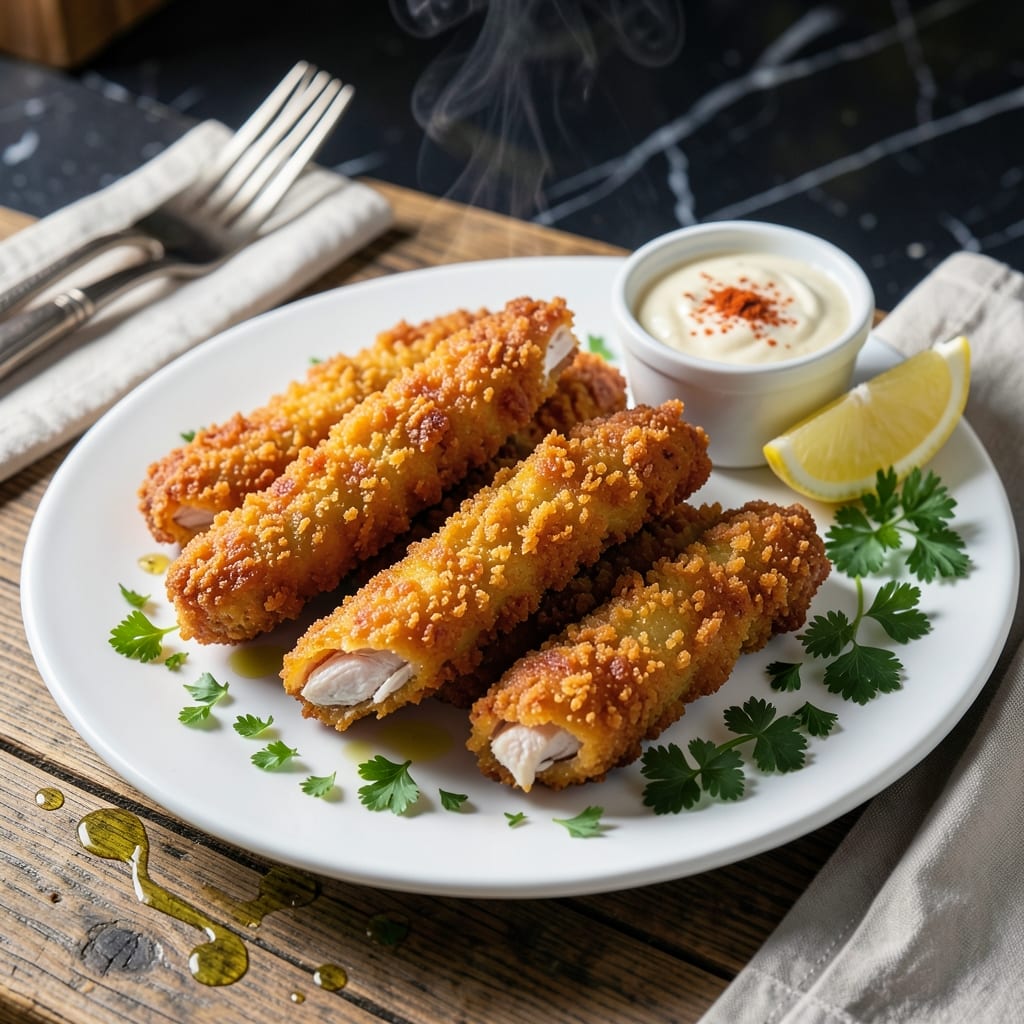
Achieving perfectly crispy chicken tenders at home requires the right breading technique and precise cooking temperatures. This Japanese-inspired version uses panko for an ultra-crunchy exterior that stays shatteringly crispy even after frying.
The double-dredge method ensures every bite has maximum crunch while keeping the chicken tender and juicy inside. I tested this recipe repeatedly in my small Boston kitchen to perfect the timing and temperature for foolproof results.
Serve these golden tenders with your favorite dipping sauces for a restaurant-quality meal. The panko crust creates an irresistible texture contrast with the moist chicken, making each bite satisfying from start to finish.
This method works consistently whether you’re frying a small batch or feeding a crowd. Here’s how to make them perfectly every time.
Ingredients for Fried Chicken Tenders Recipe Panko
Pantry staples plus panko create that irresistible crunch everyone loves.
| Ingredient | Amount | Notes |
|---|---|---|
| Chicken Breast Tenders 🍗 | 1 ½ lb | Cut into 1-inch strips, pounded even |
| All-Purpose Flour 🌾 | 1 cup | For initial dredge coating |
| Cornstarch 🌾 | ¼ cup | Mixed with flour for crispiness |
| Large Eggs 🥚 | 2 whole | Beaten for egg wash binding |
| Panko Breadcrumbs 🍞 | 2 cups | Japanese-style for ultra-crunch |
| Baking Powder 🧂 | 1 tsp | Makes crust extra crispy |
| Paprika 🌶️ | 1 tsp | Sweet or smoked for color |
| Garlic Powder 🧄 | 1 tsp | For seasoning the breading |
| Onion Powder 🧅 | 1 tsp | Adds depth to coating |
| Kosher Salt 🧂 | 1 ½ tsp | Diamond Crystal preferred |
| Freshly Ground Black Pepper 🌶️ | ½ tsp | For balanced seasoning |
| Vegetable Oil 🫒 | 4 cups | For deep frying (peanut oil works too) |
| Buttermilk 🥛 | 1 cup | For tenderizing chicken |
[recipe_ingredient_scaler]
The panko is non-negotiable here—Japanese-style from Kikkoman or a well-stocked grocery store aisle gives that shatteringly crisp texture. I grab mine at Market Basket in Boston (the big bags last forever). For the chicken, look for tenders already cut from the breast—saves time and ensures even cooking. If buying whole breasts, slice them into 1-inch strips yourself (pound thicker pieces to even thickness).
No buttermilk? Whole milk plus a tablespoon of vinegar (let it sit 5 minutes) works perfectly. Swap vegetable oil for peanut or canola if you prefer. Want extra kick? Add half a teaspoon of cayenne to the flour mix. The cornstarch is key for that ultra-crisp crust—don’t skip it. Freshly ground pepper makes a noticeable difference, but pre-ground is fine in a pinch.
Fry in batches to avoid overcrowding—keeps the oil temp steady for maximum crunch. Leftovers? They’ll lose some crispness but reheat pretty well in a 375°F oven for 10-12 minutes. Best eaten fresh though (trust me on this one).
Why You’ll Love This Recipe
- 20-Minute Crisp: That panko-cornstarch combo fries up shatteringly crisp in minutes—no deep fryer, just a pan and a splash of oil.
- Unreal Crunch: Honestly, the panko gives it that restaurant-style crunch you just can’t get from regular breadcrumbs.
- Kid Approved: My picky nephew devours these tenders straight from the pan, and they’re just as good cold in tomorrow’s lunchbox.
- Budget Stretch: One pound of chicken tenders feeds four for less than takeout, and the pantry staples last for rounds two and three.
Step-by-Step Instructions for Ultra-Crispy Japanese-Style Chicken Tenders
Here’s the method that delivers that signature crunch and juicy interior every time.
Step 1: Prep and Season the Chicken
Pat the 1.5 lb Chicken Breast Tenders dry with paper towels—this is crucial for the coating to adhere properly. Cut them into 1-inch strips and pound them to an even thickness so they cook uniformly. You’ll prevent dry spots and ensure every bite is perfectly tender.
Season the strips lightly with 1.5 tsp Kosher Salt and 0.5 tsp Freshly Ground Black Pepper. This base layer of seasoning ensures the meat itself is flavorful, not just the crust. Set the chicken aside while you prepare the breading stations.
Step 2: Set Up the Breading Stations
In a shallow dish, whisk together the 1 cup All-Purpose Flour, 0.25 cup Cornstarch, 1 tsp Baking Powder, 1 tsp Paprika, 1 tsp Garlic Powder, and 1 tsp Onion Powder. The baking powder is the secret to an extra-crispy crust, while the cornstarch adds that delicate crunch.
In a second dish, beat the 2 whole Large Eggs with the 1 cup Buttermilk until fully combined. This mixture tenderizes the chicken and helps the coating stick. In a third dish, add the 2 cups Panko Breadcrumbs—no need to season these, as the flour mixture already has plenty of flavor.
Step 3: Coat the Chicken for Maximum Crisp
Dredge each piece of chicken in the flour mixture, pressing gently to ensure a thick, even coating. Shake off any excess—clumps will burn in the oil. Next, dip the floured chicken into the egg-buttermilk mixture, letting any excess drip off for a moment. This step is what gives the coating its staying power.
Finally, press the chicken into the Panko, turning to coat all sides completely. I like to press firmly so the breadcrumbs really adhere. Place the breaded tenders on a wire rack set over a baking sheet. This setup allows air to circulate, keeping the coating dry and crisp as you finish the batch.
Step 4: Fry to Golden, Crispy Perfection
Heat the 4 cups Vegetable Oil in a deep, heavy pot or Dutch oven over medium-high heat until it reaches 350°F. Use a thermometer for accuracy—oil that’s too cool will make the tenders greasy, while oil that’s too hot will burn the outside before the inside cooks.
Working in batches to avoid crowding the pot, carefully lower the breaded tenders into the oil. Fry for 4-5 minutes, turning occasionally, until they’re golden brown and the internal temperature reaches 165°F. Transfer the cooked tenders to a wire rack or paper towels to drain. The rack keeps them crispier than stacking on towels.
Let the oil return to 350°F between batches. This temperature consistency ensures each batch cooks evenly. Serve immediately while hot and crispy—these are best fresh out of the fryer!
Pro Tips For Making Fried Chicken Tenders Recipe Panko
- Double Dredge: Dip the tenders in flour, egg, then panko, but repeat the egg and panko step for a thicker crust that actually stays put when frying.
- Press the Panko: After coating, press the panko firmly into the chicken with your fingers—I learned this the hard way after losing half my breading in the oil the first time.
- Rest Before Frying: Let the breaded tenders sit for 10 minutes on a wire rack before frying; it keeps the coating from sliding off and helps it crisp up faster.
- Cornstarch Boost: Mix a tablespoon of cornstarch into your flour for the first dredge—sounds weird, but it makes the crust extra shatteringly crisp, like the takeout stuff.
Best Sauces and Condiments for This Recipe
Classic Dipping Sauces
You can’t go wrong with ranch dressing—I mix ½ cup mayonnaise with ¼ cup buttermilk and a blend of dried herbs. Honey mustard is another winner: 3 tbsp Dijon with 2 tbsp honey and 1 tbsp mayo. These pair perfectly with the crispy panko crust. 💛
Spicy Options
For heat lovers, sriracha mayo is my go-to—just ¼ cup mayo with 1 tbsp sriracha. Buffalo sauce works too: melt 2 tbsp butter with ¼ cup Frank’s RedHot. The coolness of the chicken balances the spice beautifully.
Asian-Inspired Pairings
Since we’re using panko, lean into Japanese flavors with tonkatsu sauce—I grab Bull-Dog brand at my local Asian market. For a sweet-savory twist, try yum yum sauce: ¼ cup mayo, 1 tbsp ketchup, 1 tsp sugar, and ½ tsp paprika.
Fresh and Light
A simple lemon aioli brightens up the dish—whisk ½ cup mayo with 1 minced garlic clove and zest of 1 lemon. Or serve with sweet chili sauce for a Thai-inspired touch. These lighter options balance the richness. ✨
Nutrition Facts
Frequently Asked Questions
Why use panko instead of regular breadcrumbs?
Panko creates a lighter, crispier coating that stays crunchy longer. Its larger flakes absorb less oil, giving you that signature Japanese-style texture. Regular breadcrumbs can turn soggy more quickly.
Can I bake these instead of frying?
Yes! Bake at 400°F for 15-20 minutes, flipping halfway. Spray with oil first for extra crispiness. They won’t be as shatteringly crisp as fried, but still delicious.
How do I keep them crispy after cooking?
Place cooked tenders on a wire rack—not paper towels—to allow air circulation. Keep warm in a 200°F oven if serving later. Avoid stacking or covering until ready to eat.
What’s the best oil for frying?
Use oils with a high smoke point like peanut, vegetable, or canola. Peanut oil adds a subtle nutty flavor. Avoid olive oil—it can burn at frying temperatures.

Trained in classic French technique but raised on slow-cooked ribs and spicy rubs, she blends culinary skill with smoke and soul.
- Recipe for Boneless Pork Chops in Cast Iron Skillet: Sear and Baste to Juicy Perfection - October 3, 2026
- Recipe for Boneless Cross Rib Roast: Slow-Roasted Beef with Herb Crust - October 3, 2026
- Hamburgers in Sauce Recipe Crock Pot: Slow-Cooked Savory Delight - October 3, 2026