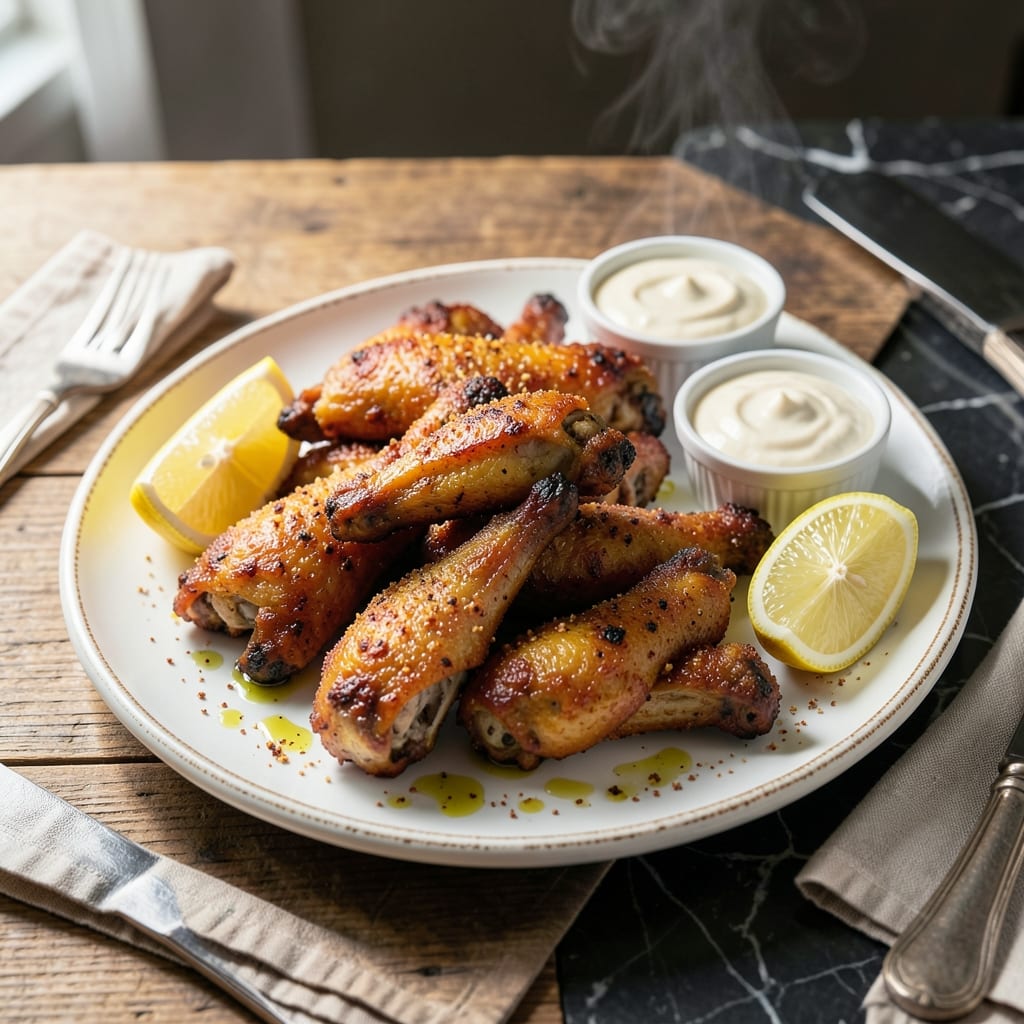
This no-batter method delivers crispy chicken wings with minimal effort and maximum flavor. I developed this technique after years of messy batter experiments, and the results are consistently perfect.
The secret is patting the wings completely dry before frying, which ensures the skin crisps up beautifully. A simple seasoning blend enhances the natural flavor without masking it.
You’ll achieve golden, crispy wings with tender meat inside—no heavy coating needed. The texture is exactly what you want from great fried chicken.
Serve with your favorite dipping sauce or enjoy them plain. This method works in a deep fryer or heavy skillet.
Ingredients for Fried Chicken Wings Recipe No Batter
No batter, no mess—just crispy wings with bold, simple seasoning.
| Ingredient | Amount | Notes |
|---|---|---|
| Chicken Wings 🍗 | 2 lb | Split into drumettes and flats |
| Kosher Salt 🧂 | 1 ½ tsp | Diamond Crystal preferred |
| Freshly Ground Black Pepper 🌶️ | 1 tsp | Coarse grind for texture |
| Garlic Powder 🧄 | 1 tsp | Not garlic salt |
| Onion Powder 🧅 | 1 tsp | Enhances depth of flavor |
| Paprika 🌶️ | 1 tsp | Sweet or smoked variety |
| Cayenne Pepper 🔥 | ¼ tsp | Adjust for heat preference |
| Vegetable Oil 🫒 | 4 cups | For frying, high smoke point |
| Baking Powder 🧂 | 1 tbsp | Helps crisp the skin |
| Cornstarch 🌾 | 1 tbsp | For extra crunch |
[recipe_ingredient_scaler]
The wings are the star here. Buy split wings (drumettes and flats) from the butcher counter or do it yourself at home—it’s easier than you think. Pat them bone-dry with paper towels (this is non-negotiable for crispiness). I grab mine from Costco when I’m feeding a crowd, but any supermarket will do. Look for plump, evenly sized pieces with smooth skin.
No cayenne? Red pepper flakes at half the amount work fine. Swap paprika for smoked paprika if you want a deeper, barbecue-like flavor. The baking powder might seem odd, but it’s the secret to extra-crispy skin. If you’re out of cornstarch, all-purpose flour in the same amount does the trick (though the texture won’t be quite as crunchy).
Fry in batches to avoid crowding the pan—this keeps the oil temp steady. Leftovers (if there are any) reheat best in a 400°F oven for 10-12 minutes. They’ll stay crispy for 2-3 days in the fridge, but honestly, they’re best eaten fresh out of the oil.
Why You’ll Love This Recipe
- No-Fuss Coating: Honestly, no batter means no messy drips—just toss the wings in salt, pepper, garlic and onion powder and they’re ready for the pan.
- Crispy, Spiced Perfection: That golden skin with the garlic-onion punch? I’ll be real: it’s the reason I make these twice a week.
- Weeknight MVP: I throw them on after work, and by the time the rice is done, they’re crisp and ready.
- Leftovers? Still Great: Cold or reheated, the flavor holds—my daughter grabs them straight from the fridge.
Step-by-Step Instructions for Crispy Fried Chicken Wings Without Batter
Here’s my foolproof method for achieving restaurant-quality crispiness with minimal effort.
Step 1: Season and Prep the Wings
Pat the 2 lb Chicken Wings completely dry with paper towels—this is non-negotiable for crispy skin. Any moisture will cause steam, which is the enemy of crunch. I like to split them into drumettes and flats at this stage if they aren’t already separated.
In a large bowl, toss the wings with 1.5 tsp Kosher Salt, 1 tsp Freshly Ground Black Pepper, 1 tsp Garlic Powder, 1 tsp Onion Powder, 1 tsp Paprika, and 0.25 tsp Cayenne Pepper until evenly coated. These spices create a flavorful base that clings to the skin as it crisps.
Step 2: Add the Crispy Coating
Sprinkle 1 tbsp Baking Powder and 1 tbsp Cornstarch over the seasoned wings. The baking powder might seem unusual, but it’s the secret to an extra-crispy exterior without batter. It raises the pH of the skin, allowing it to brown faster and get crunchier.
Toss the wings thoroughly until they’re evenly dusted with a fine white coating. Don’t be alarmed by the pale appearance—the cornstarch will create the perfect texture during frying. Let the wings rest for 10 minutes to allow the coating to adhere properly.
Step 3: Heat the Oil and Fry in Batches
In a large, heavy-bottomed pot or Dutch oven, heat 4 cups Vegetable Oil to 375°F. Use a deep-fry or candy thermometer to monitor the temperature—it must stay between 350-375°F for even cooking. If the oil isn’t hot enough, the wings will absorb it and become greasy.
Working in batches to avoid overcrowding, carefully lower the wings into the hot oil. Fry for 12-15 minutes, turning occasionally, until they’re deep golden brown and the internal temperature reaches 165°F. The coating should be visibly crispy and audibly crackling when removed from the oil.
Step 4: Drain and Serve Immediately
Transfer the fried wings to a wire rack set over a baking sheet or a paper towel-lined plate. The rack allows air to circulate, preventing the bottoms from becoming soggy. Avoid piling them up—this traps steam and softens the crispy skin you worked so hard to achieve.
Let them drain for 2-3 minutes before serving. The skin should stay crisp for about 10-15 minutes after frying, so serve them fresh from the kitchen. These wings are delicious as-is, but feel free to toss them with your favorite sauce if desired.
Pro Tips For Making Fried Chicken Wings Recipe No Batter
- Dry the Wings: Pat the wings completely dry with paper towels before seasoning—any moisture will steam them instead of frying. I learned this the hard way after my first three batches came out soggy.
- Hot Oil Ready: Get the oil screaming hot (375°F) before adding the wings. Sounds obvious, but I used to rush this part and ended up with greasy, pale wings every time.
- Skip the Crowding: Fry in batches with space between each wing—overcrowding drops the oil temp and gives you uneven cooking. Yes, it takes longer, but it’s worth it.
- Season Twice: Hit the wings with salt and spices before frying, then toss them with a little more right after. The double seasoning makes a real difference in flavor.
Dietary Considerations for This Dish
Gluten-Free Friendly
This no-batter method is naturally gluten-free since we skip traditional flour-based coatings. The cornstarch and baking powder create crispiness without any wheat products. Always verify your spices are certified gluten-free to avoid cross-contamination.
Low-Carb Option
With just 1 tbsp cornstarch for the entire batch, these wings fit well into low-carb diets. Each serving has approximately 3g net carbs. For strict keto, you can omit the cornstarch entirely—the baking powder alone will still deliver decent crispiness.
Dairy-Free by Design
The recipe contains no dairy ingredients, making it safe for lactose-intolerant diners. Just be mindful of dipping sauces—opt for hot sauce or mustard-based options instead of creamy ranch. I love serving these with a simple Frank’s RedHot and butter sauce. 🔥
Allergen Awareness
The primary allergen here is chicken itself. For those with egg allergies, this no-batter method is perfect since we skip egg washes. Always use fresh oil to avoid cross-contamination from previously fried foods containing allergens.
Sodium Control
You can reduce the kosher salt to 1 tsp without sacrificing flavor. The baking powder and spices still create a well-seasoned wing. For heart-healthy diets, I recommend using low-sodium versions of the garlic and onion powders.
Pickles Approved
Even my feline supervisor Pickles gives these wings her seal of approval—though she only gets the occasional tiny, unseasoned bite. The lack of heavy batter makes them lighter than traditional wings, which I appreciate after those 1990s sitcom marathons on Sundays.
Nutrition Facts
Frequently Asked Questions
Why do I need to dry the wings thoroughly?
Moisture causes steam, which prevents crispiness. Pat them completely dry with paper towels before seasoning for the best texture.
Can I bake these instead of frying?
Yes! Bake at 425°F for 45-50 minutes on a wire rack. Flip halfway and broil for 2-3 minutes at the end for extra crispiness.
What if my oil temperature drops too much?
Let it recover to 375°F between batches. Overcrowding causes temperature drops, leading to greasy wings. Frying in small batches solves this.
How can I make these extra crispy?
Double the cornstarch or add 1 tsp more baking powder. Resting the seasoned wings for 10 minutes before frying also helps.

Trained in classic French technique but raised on slow-cooked ribs and spicy rubs, she blends culinary skill with smoke and soul.
- Recipe for Boneless Pork Chops in Cast Iron Skillet: Sear and Baste to Juicy Perfection - October 3, 2026
- Recipe for Boneless Cross Rib Roast: Slow-Roasted Beef with Herb Crust - October 3, 2026
- Hamburgers in Sauce Recipe Crock Pot: Slow-Cooked Savory Delight - October 3, 2026