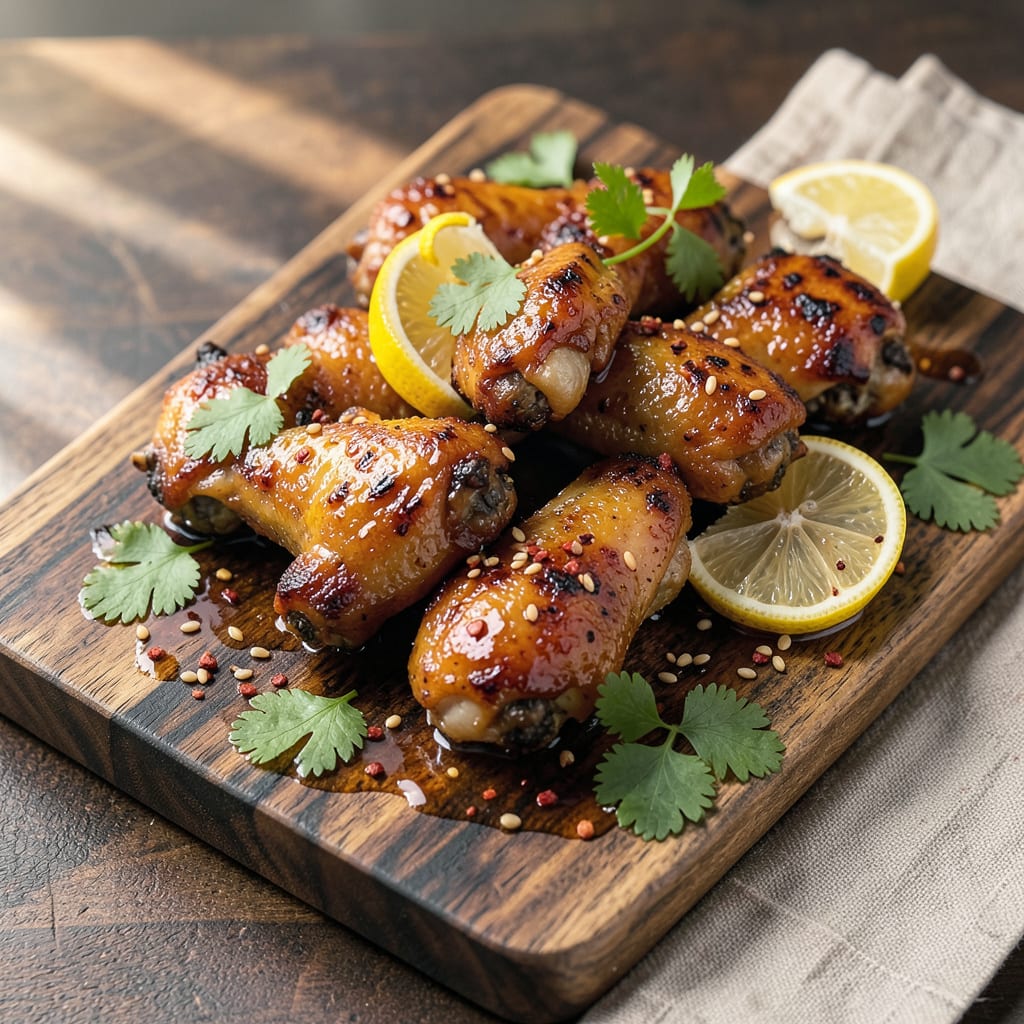
I’ll be real with you—parboiling chicken wings before grilling changed my BBQ game forever. That first bite of juicy meat with crispy skin, no dry edges or undercooked spots? Worth every extra minute. My family’s cookouts used to be hit-or-miss until I discovered this simple prep step that guarantees perfect wings every time.
Here’s the thing—boiling wings briefly before they hit the grill does two crucial things. First, it renders out excess fat so you don’t get flare-ups that char your meat. Second, it jumpstarts the cooking process, letting you achieve that ideal golden-brown crispiness on the grill without drying out the interior. I add a handful of salt and bay leaves to the water for subtle flavor that carries through to the finished dish.
The real magic happens when those parboiled wings hit the grill. They take on smoke flavor faster and develop that coveted crunchy exterior while staying tender inside. No more worrying about raw spots near the bone or rubbery skin. Just perfectly cooked wings with that ideal balance of smoky char and succulent meat.
Whether you’re feeding a crowd or just treating yourself, this method delivers restaurant-quality results. Toss them in your favorite sauce after grilling or serve them naked with dips on the side. Either way, you’re in for the best wings you’ve ever made at home.
📚 In This Guide
- What You’ll Need
- Instructions
- Tips and Common Mistakes
What Youll Need
- ● Chicken wings: 2–3 lbs (about 12–18 wings), split into drumettes and flats (tips removed). Pat dry for best results! 🍗
- ● Water: 4–6 cups (enough to fully submerge wings in a pot).
- ● Salt: 1 tbsp (for parboiling—enhances flavor and tenderness).
- ○ Aromatics (optional but recommended): 1 bay leaf
- ● 3–4 garlic cloves, smashed
- ● 1 tsp black peppercorns
- ● 1 sliced lemon or 1 tbsp vinegar (for brightness)
- ● Large pot or Dutch oven: With a lid (for even parboiling).
- ● Tongs or slotted spoon: For safe wing handling. 🔥
- ● Paper towels: To pat wings very dry post-boil (key for crispiness!).
- ● Grill: Charcoal, gas, or electric (preheated to medium-high, ~400°F).
- ● Oil: 1 tbsp high-smoke-point oil (like avocado or canola) for post-boil tossing.
- ○ Seasonings/rub (optional): BBQ dry rub, garlic powder, or your favorite blend.
- ● Meat thermometer: To confirm wings hit 165°F internally (safety first!).
- ○ Basting brush (optional): For saucy glaze applications.
- ● Aluminum foil or tray: For resting wings post-grill.
Step-by-Step Instructions for Parboiling Chicken Wings Before Grilling
This simple technique guarantees the juiciest meat and crispiest skin you’ve ever had from wings.
Prepare the Wings for Parboiling
Start by rinsing your chicken wings under cold water and patting them completely dry with paper towels. This removes any residual bone fragments and helps the seasoning adhere better. I like to trim off the wing tips at this stage (save them for stock) and separate the drumettes from the flats if they’re still connected.
Place the wings in a large pot and add enough cold water to cover them by about 2 inches. The extra water accounts for displacement when you add the wings. Don’t add salt yet—we’ll season after parboiling to prevent the meat from becoming too salty as the water reduces.
Parboil the Wings to Perfection
Bring the water to a rolling boil over high heat, then immediately reduce to medium-low to maintain a gentle simmer. You’ll know it’s right when you see small bubbles breaking the surface consistently, but not the vigorous boiling you started with.
Simmer the wings for exactly 8 minutes. This is the sweet spot—long enough to render out fat and start cooking the meat through, but not so long that the wings become mushy. You’ll notice the water becomes cloudy as impurities and fat rise to the surface. Skim off any foam that collects with a spoon during cooking.
Shock and Dry the Wings
After parboiling, immediately drain the wings in a colander and rinse them under cold running water for about 30 seconds. This stops the cooking process and helps tighten up the skin, which is crucial for getting that crispy texture later on the grill.
Shake the colander vigorously to remove excess water, then transfer the wings to a wire rack set over a baking sheet. Pat them dry with paper towels, then let them air-dry at room temperature for 10-15 minutes. You’ll see the skin start to look slightly opaque—that’s how you know they’re ready for seasoning and grilling.
Season and Get Ready to Grill
Now’s the time to season your wings generously. I use a simple mix of salt, black pepper, and garlic powder, but you can use your favorite dry rub. The key is to coat them evenly and press the seasoning into the skin so it adheres well during grilling.
Let the seasoned wings sit for another 5-10 minutes before grilling. This gives the seasoning time to penetrate the surface slightly. You’ll notice the skin becomes tacky to the touch—that’s perfect for creating those beautiful grill marks and maximum crispiness when they hit the hot grates.
Grill to Crispy Perfection
Preheat your grill to medium-high heat (about 375-400°F). Clean and oil the grates well to prevent sticking. Place the wings on the grill and cook for 4-5 minutes per side, turning once. You’re looking for deep golden-brown color and crispy skin that releases easily from the grates.
The parboiling means the wings are already cooked through, so you’re just focusing on getting that perfect char and crispiness. Watch for flare-ups from the rendered fat—move wings to a cooler part of the grill if needed. When they’re done, the skin should be crispy enough to make an audible crunch when you bite in, while the meat inside stays tender and juicy.
Tips and Common Mistakes
Mastering this technique comes down to a few key details that make all the difference between good wings and unforgettable ones. Here’s what I’ve learned from years of perfecting this method.
Simmering Secret: Those 8 minutes of simmering in Step 2 are absolutely critical. I’ve found that timing is everything here—too short and the fat won’t render properly, too long and the meat becomes mushy. You’ll know it’s perfect when the water turns cloudy and small bubbles maintain a gentle rhythm on the surface. This is where the magic happens for tender meat.
Drying Technique: Don’t rush the 10-15 minutes of air-drying in Step 3. I learned this the hard way after my first few batches came out steamed rather than crispy. The skin needs to become slightly opaque and tacky to the touch—this is what creates that perfect crispy exterior when grilling. A wire rack is essential here to allow air circulation on all sides.
Seasoning Strategy: When applying your salt, black pepper, and garlic powder in Step 4, really work it into the skin. I use my fingers to press the seasoning in, almost massaging it into every crevice. Then let it sit for the full 5-10 minutes—this short rest allows the flavors to penetrate while the skin develops that ideal tacky texture that grabs onto grill marks beautifully.
Grill Mastery: At medium-high heat (375-400°F) in Step 5, watch for flare-ups but don’t fear them. The rendered fat from parboiling actually helps create that incredible crispy skin. I like to move wings to different heat zones on the grill—start them over direct heat for char, then finish over indirect if they’re browning too quickly. Those 4-5 minutes per side should give you that perfect crunch while keeping the meat impossibly juicy inside.
Pro Tips for Parboil Chicken Wings Before Grilling
- Mastering this technique comes down to a few key details that make all the difference between good wings and unforget…
- Simmering Secret: Those 8 minutes of simmering in Step 2 are absolutely critical. I’ve found that timing is everythin…
- Drying Technique: Don’t rush the 10-15 minutes of air-drying in Step 3. I learned this the hard way after my first fe…
Frequently Asked Questions
Do I need to season the water when parboiling chicken wings?
Yes! Adding salt, garlic powder, or bay leaves to the water enhances flavor. A simple mix of 1 tbsp salt + 1 tsp pepper per quart of water works great. Avoid over-salting—you’ll season again after grilling!
How long should I parboil chicken wings before grilling?
Parboil for 8–10 minutes (12–15 for extra-large wings). The meat should turn opaque but not fully cook—overboiling makes wings mushy. Use a timer and check with a fork for slight resistance.
Can I skip parboiling and just grill the wings directly?
You can, but parboiling ensures juicier meat and crispier skin by rendering fat early. Direct grilling alone risks dryness or uneven cooking. For smoky flavor without parboiling, try brining or a low-and-slow grill method.
Why are my parboiled wings rubbery after grilling?
Rubbery texture usually means overboiling or not drying the wings well post-boil. Pat them completely dry with paper towels before grilling, and avoid boiling beyond 10 minutes. Let them rest 5 minutes pre-grill for best results.
What’s a good alternative to parboiling for crispy wings?
Try baking (400°F for 20–25 mins) or air-frying (375°F for 12–15 mins) before grilling for similar tenderness. For extra crispiness, toss in baking powder (1 tsp per lb) pre-cook—it’s a game-changer!
Parboiling chicken wings before grilling is your secret weapon for juicy, tender meat and perfectly crispy skin every time! 🍗✨ This simple extra step locks in flavor, cuts down grilling time, and ensures food safety—so you can serve up crowd-pleasing wings with confidence. Whether you’re prepping for game day or a backyard BBQ, this method delivers restaurant-quality results right at home.
Ready to fire up the grill? Grab your wings, try the technique, and don’t forget to experiment with your favorite sauces or dry rubs! For more grilling hacks, check out our guide on mastering smoky flavors with wood chips next.

Trained in classic French technique but raised on slow-cooked ribs and spicy rubs, she blends culinary skill with smoke and soul.
- Recipe for Boneless Pork Chops in Cast Iron Skillet: Sear and Baste to Juicy Perfection - October 3, 2026
- Recipe for Boneless Cross Rib Roast: Slow-Roasted Beef with Herb Crust - October 3, 2026
- Hamburgers in Sauce Recipe Crock Pot: Slow-Cooked Savory Delight - October 3, 2026