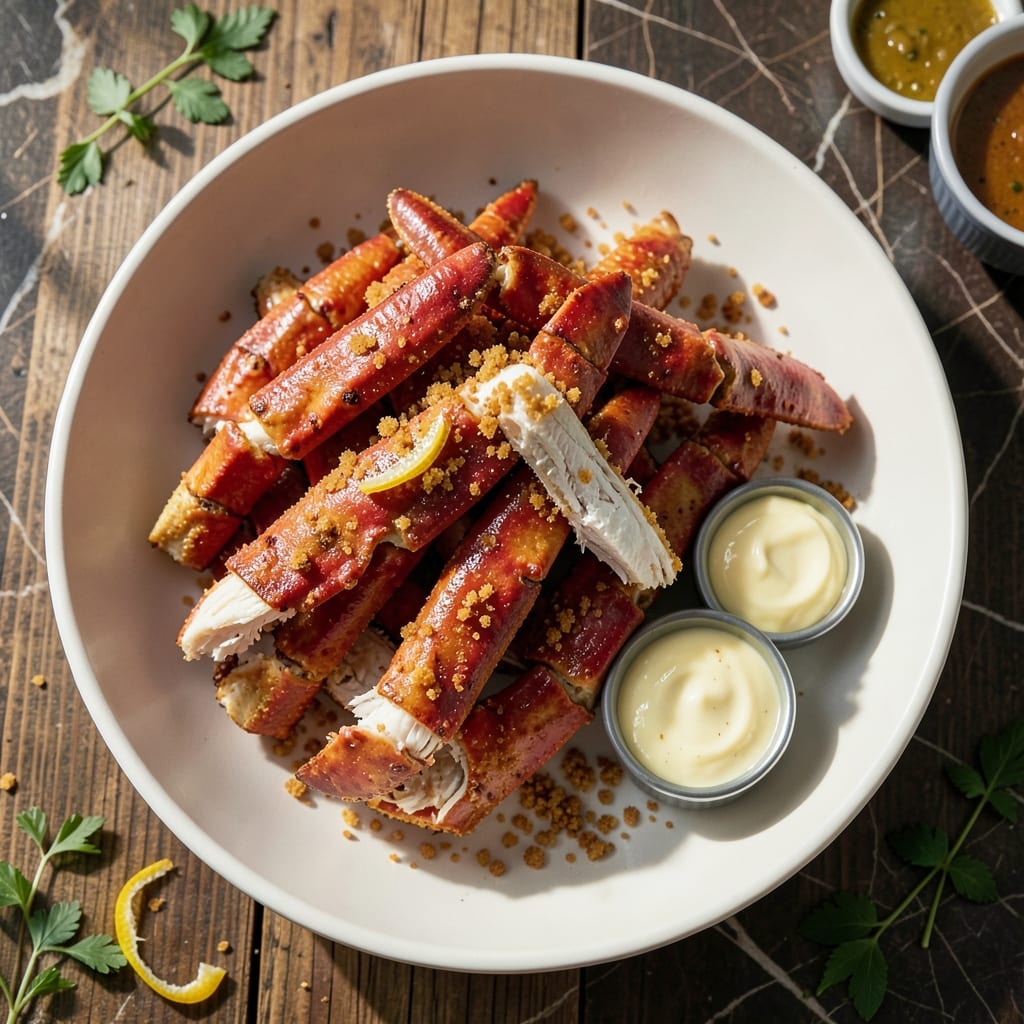
This method transforms fresh crab legs into a crispy, buttery delight while keeping the shell intact for maximum flavor. The key is proper preparation and precise frying temperature to achieve that perfect golden finish.
I developed this technique after years of experimenting with different approaches to frying shellfish. The shell not only protects the delicate meat but also creates a natural barrier that locks in moisture and flavor.
You’ll achieve tender, sweet crab meat with a satisfying crunch on the outside. The process is straightforward, but timing and temperature control are crucial for the best results.
Serve these immediately for the ultimate seafood experience with every bite.
Ingredients for Fried Crab Legs Recipe with Shell
Fresh crab legs, crispy coating, and bold seasonings make this dish irresistibly delicious.
| Ingredient | Amount | Notes |
|---|---|---|
| King Crab Legs 🦀 | 2 lb | Fresh or thawed, shell-on |
| All-Purpose Flour 🌾 | 1 cup | For dredging crab legs |
| Large Eggs 🥚 | 2 whole | Beaten for egg wash |
| Panko Breadcrumbs 🍞 | 1 ½ cups | For crispy coating |
| Unsalted Butter 🧈 | ½ cup | Melted for frying |
| Vegetable Oil 🫒 | 2 cups | For deep frying |
| Old Bay Seasoning 🌶️ | 2 tbsp | Classic seafood seasoning |
| Garlic Powder 🧄 | 1 tbsp | For added flavor depth |
| Lemon 🍋 | 1 whole | Sliced for garnish |
| Fresh Parsley 🌿 | ¼ cup | Chopped for serving |
| Salt 🧂 | 1 tsp | Kosher or sea salt |
| Black Pepper 🌶️ | ½ tsp | Freshly ground preferred |
[recipe_ingredient_scaler]
The crab legs are the star here. King crab gives the best meat-to-shell ratio, but snow crab works too (just adjust cooking time). Whole Foods or Costco usually have the freshest options—look for legs that smell like the ocean, not fishy. If using frozen, thaw them in the fridge overnight. The shell protects the meat, so don’t crack it before frying—intact shells are non-negotiable for that perfect crunch.
No Panko? Crushed saltine crackers give a similar crunch. Out of Old Bay? Mix paprika, cayenne, and celery salt for a close substitute. The egg wash can be replaced with buttermilk for extra tang. Vegetable oil swaps easily for peanut or canola oil. If you’re frying a big batch, keep the finished legs warm in a 200°F oven while you work.
Serve immediately—this dish doesn’t wait. Leftovers? Honestly, they’re best fresh, but you can refrigerate for up to 2 days. Reheat in a 350°F oven for 10 minutes to revive the crunch. Never microwave (soggy disaster).
Why You’ll Love This Recipe
- 3-Step Breaded: I dip, coat, and fry in minutes—no fancy techniques, just flour, egg, and panko clinging to sweet king crab.
- Buttery Crunch: The panko forms a golden shell that shatters into rich butter and briny crab with every bite.
- Impresses Every Time: I serve these at dinner parties and weeknight suppers alike; they feel luxurious without the fuss.
- Leftovers? Rarely: Honestly, between the crispy shell and tender meat, there’s never any left to reheat.
Step-by-Step Instructions for Fried Crab Legs With Shell
This method delivers crispy, golden crab legs with a buttery, flavorful crunch in every bite.
Step 1: Thaw and Prep the Crab Legs
If using frozen king crab legs, thaw them overnight in the refrigerator or under cold running water for 30 minutes. Pat them completely dry with paper towels—any moisture will prevent the coating from adhering properly.
Using kitchen shears, carefully cut the shells lengthwise to expose the meat, but leave the shell intact for presentation. This allows the seasoning to penetrate while keeping the integrity of the dish. Lightly score the meat with a knife to help it absorb flavors.
Step 2: Season and Create the Breading Stations
In a shallow bowl, combine the all-purpose flour with the Old Bay seasoning, garlic powder, salt, and black pepper. In another bowl, beat the large eggs until well blended. In a third bowl, place the panko breadcrumbs. This three-step breading process ensures maximum crunch and flavor.
I like to add a pinch of the Old Bay seasoning to the panko as well for an extra layer of taste. The key here is organization—have everything ready before you start breading to maintain efficiency and prevent the crab from sitting too long before frying.
Step 3: Bread the Crab Legs Thoroughly
Dredge each crab leg first in the seasoned flour, shaking off any excess. Then dip it into the beaten eggs, allowing any excess to drip off. Finally, press the crab leg into the panko breadcrumbs, ensuring an even and thick coating on all sides. The pressure helps the crumbs adhere better.
Place the breaded crab legs on a wire rack set over a baking sheet. This setup allows air to circulate around them, preventing the coating from becoming soggy while you finish breading the rest. Let them rest for 5-10 minutes to help the coating set.
Step 4: Fry to Golden, Crispy Perfection
In a large, heavy-bottomed pot, heat the vegetable oil to 350°F. Use a deep-fry thermometer to monitor the temperature accurately. While the oil heats, melt the unsalted butter in a small saucepan—you’ll use it for basting.
Carefully lower a few crab legs into the hot oil, ensuring not to overcrowd the pot. Fry for 3-4 minutes per side until the coating turns a deep, golden brown and the crab meat is heated through. Use tongs to turn them gently to avoid damaging the coating.
As they fry, baste the crab legs with the melted butter. This adds a rich, buttery flavor that complements the sweetness of the crab. Transfer the fried crab legs to a paper towel-lined plate to drain excess oil.
Step 5: Serve Immediately with Garnishes
Arrange the fried crab legs on a serving platter. Squeeze fresh lemon over the top for a bright, zesty contrast to the rich, buttery coating. The acidity cuts through the richness beautifully.
Sprinkle with the chopped fresh parsley for a pop of color and freshness. Serve immediately while the coating is still crispy and the crab meat is hot. The combination of textures and flavors—crispy, buttery, sweet, and tangy—makes this dish unforgettable.
Pro Tips For Making Fried Crab Legs Recipe With Shell
- Chill the Crab First: I learned this the hard way—thawed crab legs hold breading better if you pat them dry and refrigerate for 15 minutes before dredging. Wet shells make the flour slide right off.
- Double Dredge for Crunch: Dip the legs in flour, then egg, then panko, but repeat the egg and panko step for extra crunch. Sounds tedious, but it actually changes the outcome.
- Hot Oil, Low Crowd: Fry in small batches at 350°F—any lower and the breading absorbs oil like a sponge. I used to rush this part and ended up with soggy, greasy legs.
- Melt Butter Last: Toss the fried legs in melted butter right before serving, not during frying. After burning three batches, I finally figured out butter in hot oil burns fast.
Pro Cooking Tips for This Recipe
Oil Temperature Control
Maintaining 350°F oil temperature is non-negotiable for perfect results. I use a Taylor Precision deep-fry thermometer clipped to the pot side. If the oil smokes, it’s too hot—lower the heat immediately. Too cool, and you’ll get greasy, soggy crab legs. 🌡️
Double-Fry Technique
For extra crispiness, try a double-fry method. First fry at 325°F for 2 minutes to cook through, then increase to 375°F for the final minute. This creates a shatteringly crisp exterior while keeping the meat tender. Let them drain on a wire rack, not paper towels, to preserve crunch.
Butter Basting Pro Tip
Use clarified butter for basting—it has a higher smoke point than regular butter. I make mine by melting 1 cup unsalted butter and skimming off the milk solids. Baste generously during the last 30 seconds of frying for maximum flavor infusion without burning.
Shell Preparation
Before breading, use a seafood cracker to gently score the shells lengthwise. This helps the coating adhere without cracking the shell completely. I find Hi Mountain Seasonings makes excellent shellfish-specific tools. The shell should remain intact for presentation but allow seasoning penetration.
Batch Frying Strategy
Fry in small batches to avoid oil temperature drops. I never exceed 3 crab legs at a time in my 5-quart Dutch oven. Overcrowding causes uneven cooking and greasy results. Use a slotted spoon to remove any stray breading between batches. 💡
Crispiness Preservation
After frying, keep finished legs warm in a 200°F oven on a wire rack. This prevents steam from making the coating soggy. Never cover them—trapped moisture is the enemy of crispiness. Serve within 10 minutes for optimal texture.
Nutrition Facts
Frequently Asked Questions
Do I need to remove the shell before frying?
No, leave the shell intact for maximum flavor and protection. The shell helps lock in moisture while creating a crispy exterior. Just score it lightly to allow seasoning to penetrate.
What oil works best for frying?
Use vegetable oil or peanut oil for their high smoke points. Maintain 350°F for perfect crispiness. Avoid olive oil as it burns at lower temperatures.
How can I prevent the breading from falling off?
Pat the crab legs completely dry before breading, and let the coated legs rest for 5-10 minutes before frying. This helps the coating adhere better during cooking.
Can I use frozen crab legs?
Yes, but thaw them completely in the fridge overnight first. Frying frozen legs will lower oil temperature too much, resulting in soggy breading.

Trained in classic French technique but raised on slow-cooked ribs and spicy rubs, she blends culinary skill with smoke and soul.
- Recipe for Boneless Pork Chops in Cast Iron Skillet: Sear and Baste to Juicy Perfection - October 3, 2026
- Recipe for Boneless Cross Rib Roast: Slow-Roasted Beef with Herb Crust - October 3, 2026
- Hamburgers in Sauce Recipe Crock Pot: Slow-Cooked Savory Delight - October 3, 2026