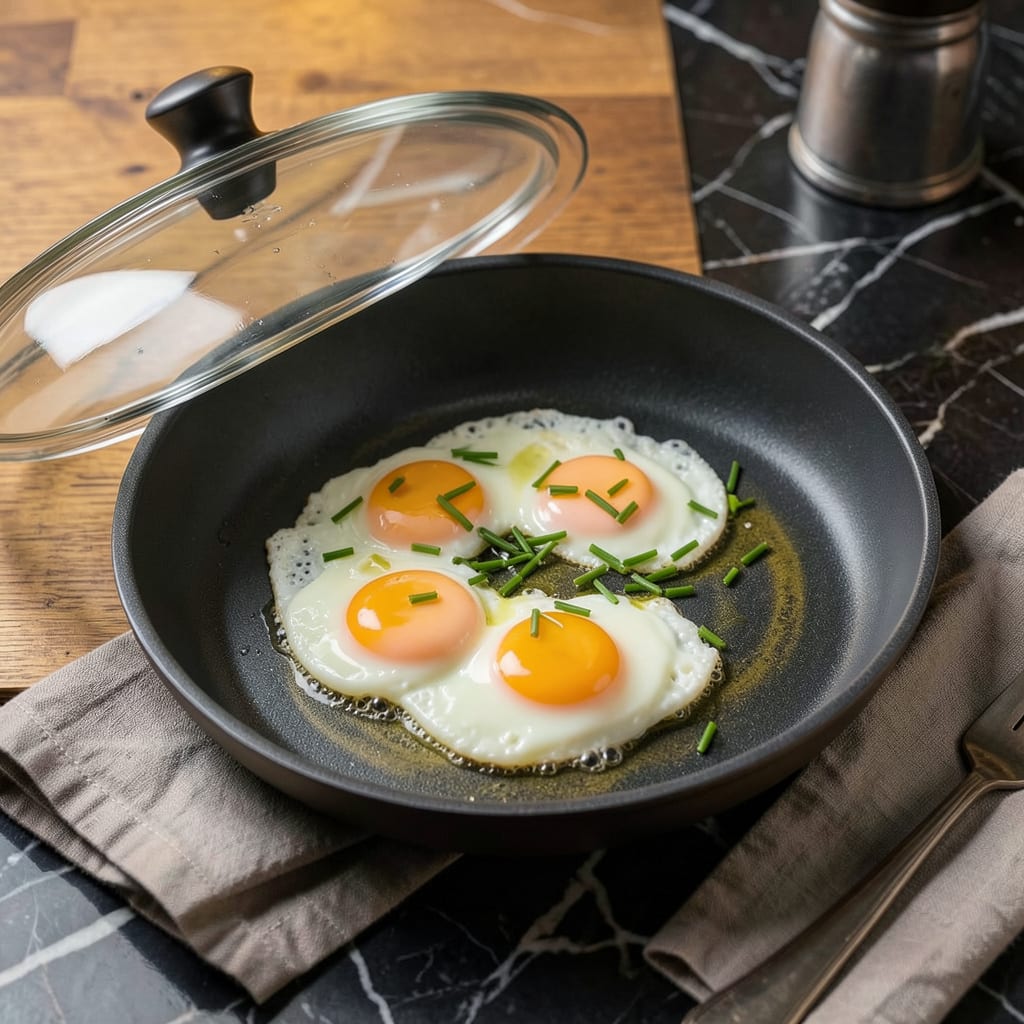
I’m about to change how you cook eggs forever. This water-frying method delivers the silkiest whites and runniest yolks without a drop of oil or butter. Honestly, I was skeptical too until I tried it during a particularly grease-heavy morning when I needed something lighter.
The technique is simple but revolutionary: gently poaching eggs in shallow water instead of frying them in fat. You get all the tenderness of poached eggs with the flat, sunny-side-up presentation. The water creates steam that cooks the whites perfectly while keeping yolks liquid gold. No more rubbery edges or broken yolks from aggressive flipping.
What you end up with is an egg that looks fried but tastes impossibly delicate. The whites stay soft and custardy, the yolks remain rich and runny, and there’s zero greasy residue. It’s become my go-to method when I want perfect eggs without the heavy feeling that comes from traditional frying.
Best part? This works in any pan, requires just eggs and water, and takes less than 5 minutes. Whether you’re making breakfast for one or feeding a crowd, this method delivers every time. Let’s get those eggs cooking!
📚 In This Guide
- What You’ll Need
- Instructions
- Tips and Common Mistakes
What Youll Need
- ● Fresh eggs – 2–4 large eggs (cold or room temperature, but not cracked! 🥚)
- ● Water – ½ cup (filtered or tap, enough for a shallow pool in your pan)
- ● Nonstick skillet – 8–10 inches (a well-seasoned cast-iron pan works too!)
- ● Lid or splatter guard – Fits your pan (to trap steam for silky whites ✨)
- ● Cooking oil or butter – 1 tsp (neutral oil like avocado or a pat of unsalted butter)
- ● Salt – Pinch of flaky sea salt (or to taste—add after cooking!)
- ○ Pepper – Freshly cracked black pepper (optional but highly recommended 🌶️)
- ● Silicon spatula (for gentle flipping, if needed)
- ● Small bowl (to crack eggs into first—avoids shell surprises!)
- ● Kitchen timer (for precision, though visual cues work too ⏰)
- ● Fresh herbs (chives, parsley, or dill for garnish 🌿)
Instructions
This simple method transforms ordinary fried eggs into something extraordinary—let me show you how.
Prepare Your Pan and Water
Choose a nonstick skillet with a tight-fitting lid—this is crucial for trapping steam. I prefer a 10-inch pan for cooking four eggs at once. Add just enough water to cover the bottom of the pan to a depth of about ¼ inch (that’s roughly ½ cup for a standard skillet).
Place the skillet over medium-high heat and bring the water to a gentle simmer. You’ll see small bubbles forming at the edges and the surface will shimmer slightly. This is the perfect temperature—too hot and the whites will get rubbery, too cool and they won’t set properly.
Crack and Add the Eggs
Once the water is simmering, carefully crack your eggs into the pan, spacing them at least 2 inches apart. I like to crack each egg into a small bowl first, then gently slide it into the water—this prevents broken yolks and gives you more control over placement.
You’ll immediately see the whites start to turn opaque around the edges while the yolks remain liquid. Don’t touch them yet! Let them cook undisturbed for exactly 1 minute. This initial cooking time sets the base of the whites while keeping the tops still slightly runny.
Cover and Steam to Perfection
After that first minute, place the lid on the skillet and reduce the heat to medium-low. The steam will now gently cook the tops of the eggs while the water maintains an even temperature. Cook covered for 3-4 minutes, depending on how set you like your yolks.
Here’s what to watch for: the whites should be completely set but still tender, with no translucent areas remaining. The yolks will develop a thin, delicate film on top but remain liquid underneath. If you prefer firmer yolks, add 30-60 seconds more cooking time, but don’t overdo it—the beauty of this method is that silky yolk.
Remove and Serve Immediately
Use a thin, flexible spatula to carefully lift each egg from the water. Tilt the pan slightly if needed to help drain excess water. Transfer the eggs to a paper towel-lined plate for just 10 seconds to blot any remaining moisture from the bottoms—this keeps your serving plate from getting waterlogged.
Serve immediately while hot. The whites should be perfectly tender with no browned edges, and the yolks should break open to reveal that gorgeous, runny center. I love these eggs on buttered toast where the yolk creates a rich sauce, or alongside crispy bacon where the contrast of textures really shines. The best part? Cleanup is a breeze since nothing sticks to the pan.
Tips and Common Mistakes
This method is all about precision—here’s how to nail it every time.
Water Temperature Control: In Step 1, getting the water to that gentle simmer at medium-high heat is everything. You want small bubbles at the edges and a shimmering surface—not a rolling boil. Too hot and your whites will turn rubbery; too cool and they won’t set properly. I like to test by dipping my finger near the surface—it should feel hot but not painful.
The 1-Minute Rule: Step 2’s undisturbed cooking time is non-negotiable. That first minute sets the foundation for your whites while keeping the tops soft enough to steam perfectly. Don’t be tempted to poke or prod—just let the eggs do their thing. You’ll see the whites turn opaque around the edges while the yolks stay beautifully liquid.
Steaming Technique: When you cover the pan in Step 3, resist the urge to peek! The trapped steam is what creates those silky whites and perfectly runny yolks. The 3-4 minute range accounts for yolk preference—start checking at 3 minutes for runnier yolks, or go the full 4 minutes if you like them slightly more set. The whites should be completely opaque with no translucent spots.
Serving Timing: Those 10 seconds on the paper towel in Step 4 make all the difference. Too long and your eggs will cool too much; too short and you’ll have waterlogged toast. I use a timer for this—it’s that important. Serve immediately while the yolks are still warm and runny for that perfect first bite.
Pro Tips for Fry Eggs In Water
- This method is all about precision—here’s how to nail it every time.
- Water Temperature Control: In Step 1, getting the water to that gentle simmer at medium-high heat is everything. You …
- The 1-Minute Rule: Step 2’s undisturbed cooking time is non-negotiable. That first minute sets the foundation for you…
Frequently Asked Questions
Here are the most common questions about frying eggs in water—answered!
Can I use any pan for water-fried eggs?
Yes! A non-stick skillet works best for easy release, but stainless steel or cast iron works too. Just add a splash of oil to prevent sticking. The key is even heat distribution, so avoid thin or warped pans.
How long does it take to fry eggs in water?
About 3-5 minutes total. Pour ½ inch of water, bring to a gentle simmer, then add eggs. Cover and cook 2-3 minutes for runny yolks or 4-5 for firmer ones. No flipping needed!
What’s the difference between water-fried and poached eggs?
Water-fried eggs cook in a shallow pool of water with the yolk exposed (like sunny-side-up), while poached eggs are fully submerged. The result? Silky whites with a tender, intact yolk—no vinegar required!
Why do my eggs stick to the pan even with water?
Two likely culprits: high heat (keep it at a gentle simmer) or not enough water (aim for ½ inch depth). A quick spray of oil before adding eggs helps too. If using stainless steel, preheat the pan first.
Can I add seasoning to the water?
Absolutely! A pinch of salt in the water enhances flavor, but avoid herbs or spices—they can make the whites cloudy. For extra richness, swap water for broth or add a pat of butter after cooking.
Frying eggs in water is a game-changer for perfectly silky whites and luscious yolks—no fancy tools required! 🍳 Whether you’re a breakfast newbie or a seasoned home cook, this method delivers consistent, restaurant-quality results with minimal effort. Ready to impress? Grab a pan, some water, and start experimenting with your favorite toppings (avocado toast, anyone?).
For your next step, try tweaking the water ratio or timing to match your ideal texture—then tag us in your egg-cellent creations! Happy cooking! 😊

Trained in classic French technique but raised on slow-cooked ribs and spicy rubs, she blends culinary skill with smoke and soul.
- Recipe for Boneless Pork Chops in Cast Iron Skillet: Sear and Baste to Juicy Perfection - October 3, 2026
- Recipe for Boneless Cross Rib Roast: Slow-Roasted Beef with Herb Crust - October 3, 2026
- Hamburgers in Sauce Recipe Crock Pot: Slow-Cooked Savory Delight - October 3, 2026