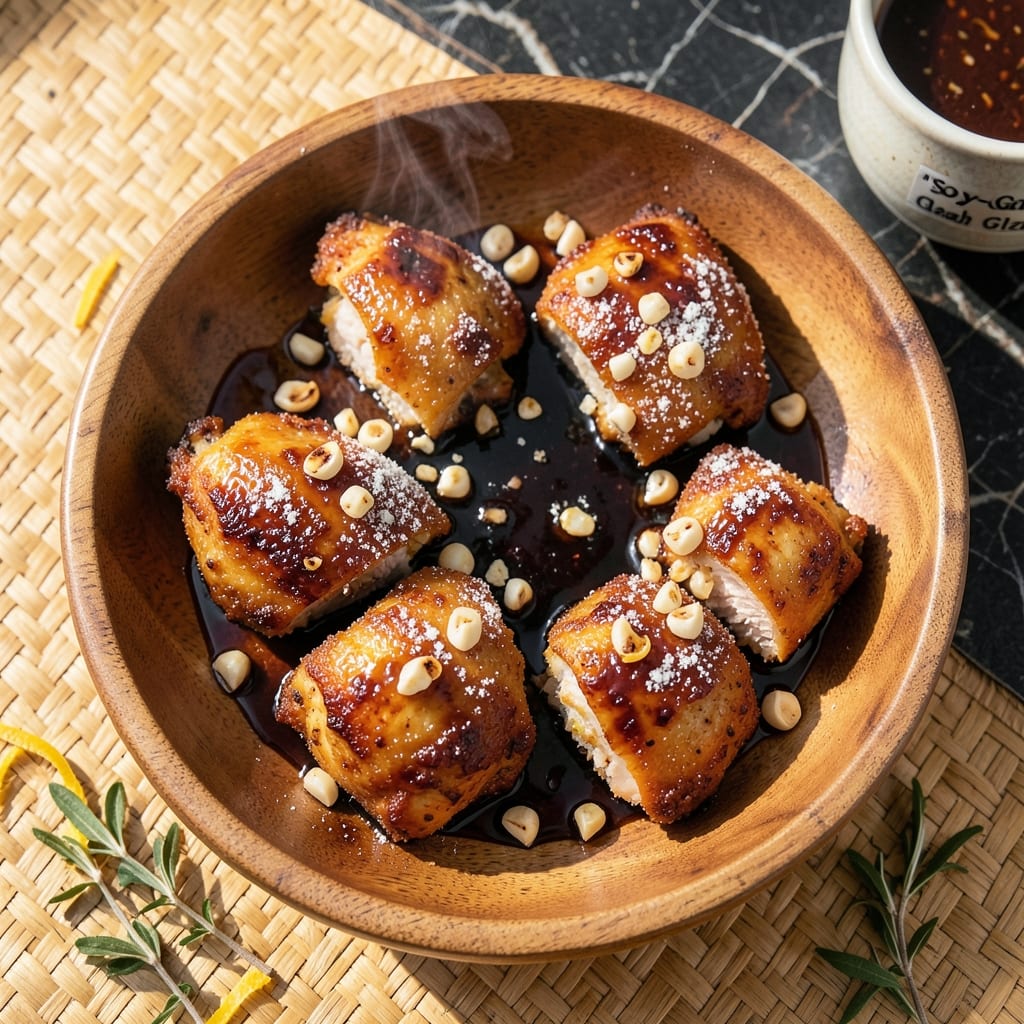
I developed this method after testing countless variations to achieve that perfect crispy exterior with juicy meat inside. The Hawaiian twist comes from a generous dose of fresh garlic and local island flavors.
The secret lies in a double-frying technique that ensures every piece emerges golden and shatteringly crispy. I also add a touch of soy sauce to the marinade for depth that balances the garlic’s boldness.
What you get is chicken with an audibly crispy coating that gives way to tender meat, all infused with that unmistakable Hawaiian garlic punch. The aroma alone will transport you to a roadside stand in Honolulu.
Serve these immediately for peak crispiness, with or without traditional island sides. Here’s how to make them perfectly every time.
Ingredients for Garlic Fried Chicken Recipe Hawaii
Pantry staples meet bold island flavors for these irresistibly crispy chicken bites.
| Ingredient | Amount | Notes |
|---|---|---|
| Chicken Thighs 🍗 | 2 lb | Boneless, skin-on for crispiness |
| Garlic Cloves 🧄 | 12 cloves | Fresh, minced finely |
| Soy Sauce 🫒 | ¼ cup | Low-sodium preferred |
| All-Purpose Flour 🌾 | 2 cups | For dredging coating |
| Cornstarch 🌽 | ½ cup | Creates extra crispy texture |
| Baking Powder 🧂 | 1 tsp | Helps coating puff and crisp |
| Salt 🧂 | 1 tbsp | Diamond Crystal kosher |
| Black Pepper 🌶️ | 1 tsp | Freshly cracked preferred |
| Paprika 🌶️ | 1 tsp | Sweet or smoked variety |
| Ginger Root 🌿 | 1 whole | Peeled, grated for marinade |
| Green Onions 🧅 | 4 whole | Thinly sliced for garnish |
| Vegetable Oil 🫒 | 4 cups | High smoke point for frying |
| Eggs 🥚 | 2 whole | Large, for egg wash |
| Water 💧 | ½ cup | Ice cold for batter |
[recipe_ingredient_scaler]
The garlic is non-negotiable here. Fresh cloves only—none of that jarred stuff. I grab mine from the local Asian market (they’re bigger, juicier, and cheaper). For the chicken, skin-on thighs give you that shatteringly crisp finish the intro promises. Most supermarkets carry them, but Costco has great bulk deals if you’re making a big batch. Look for thighs that are plump with smooth, unbroken skin.
No skin-on thighs? Drumsticks work too (just score the skin so it crisps). Out of soy sauce? Tamari or coconut aminos at one-to-one ratio. The cornstarch is key for that Hawaiian-style crunch—don’t swap it for more flour. If you’re avoiding gluten, use rice flour plus cornstarch. And that ginger? Fresh only. Ground just doesn’t cut it for this dish.
Fry and serve immediately—crispiness fades fast. Leftovers keep in the fridge for 2-3 days but reheat in the oven or air fryer to revive the crunch. The marinade can sit overnight (actually improves flavor), but don’t let the dredged chicken sit before frying or the coating gets soggy.
Why You’ll Love This Recipe
- One Pan Wonder: I toss the chicken with flour and cornstarch, fry it up, and the soy-garlic glaze happens in the same pan—hardly any cleanup.
- Umami Bomb: That first bite of juicy thigh with the crispy garlic crust and salty-sweet soy hit? Ridiculously good.
- Feeds a Crowd: I’ve served this at backyard luaus and weeknight dinners—it’s the dish everyone digs into without hesitation.
- Budget Friendly: Chicken thighs stay cheap, and a handful of garlic cloves plus soy sauce stretch flavor way further than pricier proteins.
Step-by-Step Instructions for Island-Style Garlic Fried Chicken
Here’s the method I use to achieve that irresistible Hawaiian-style crust with juicy, flavorful meat inside.
Step 1: Marinate the Chicken Thighs with Aromatics
In a large bowl, combine the 2 lb Chicken Thighs with 12 cloves Garlic Cloves (minced finely), 0.25 cup Soy Sauce, and the grated Ginger Root. I like to use my hands to ensure every piece is well coated.
Let this mixture marinate at room temperature for 20-30 minutes. The soy sauce tenderizes the meat while the garlic and ginger infuse it with that signature island flavor. Don’t skip this step—it’s what makes this dish special.
Step 2: Prepare the Ultra-Crispy Breading
In a separate large bowl, whisk together the 2 cups All-Purpose Flour, 0.5 cup Cornstarch, 1 tsp Baking Powder, 1 tbsp Salt, 1 tsp Black Pepper, and 1 tsp Paprika. The cornstarch is the secret to that extra-crispy texture we’re after.
In another bowl, beat the 2 whole Eggs with the 0.5 cup Water to create a thin egg wash. This helps the breading adhere perfectly to the chicken. I always use ice-cold water for the crispiest results.
Step 3: Dredge and Double-Coat for Maximum Crunch
Working with one piece at a time, remove the chicken from the marinade and dip it in the egg wash, letting any excess drip off. Then dredge it thoroughly in the flour mixture, pressing gently to ensure full coverage.
For extra crispiness, I repeat this process once more—dip in egg wash again, then back into the flour mixture. Place the breaded chicken on a wire rack to rest for 10 minutes. This helps the coating set and prevents it from falling off during frying.
Step 4: Fry to Golden Perfection
Heat the 4 cups Vegetable Oil in a deep, heavy-bottomed pot or Dutch oven to 350°F. Use a deep-fry thermometer to monitor the temperature—this is crucial for even cooking.
Carefully lower the chicken into the hot oil in batches, being careful not to overcrowd the pot. Fry for 8-10 minutes per side or until the coating is deep golden brown and the internal temperature reaches 165°F. Drain on a wire rack set over a baking sheet to keep it crispy.
Step 5: Garnish and Serve Immediately
Thinly slice the 4 whole Green Onions and sprinkle them over the fried chicken while it’s still hot. The residual heat will slightly soften the onions and release their aroma.
Serve immediately while the chicken is still crispy. I promise you’ll love the contrast between the crunchy exterior and the juicy, flavorful meat inside. This dish is best enjoyed fresh, so gather everyone around the table and dig in while it’s hot!
Pro Tips For Making Garlic Fried Chicken Recipe Hawaii
- Double Fry the Thighs: I learned this the hard way—first fry at 325°F until cooked through, then crank the heat to 375°F for 2-3 minutes to get that shatteringly crisp Hawaiian-style crust.
- Smash the Garlic: Don’t just mince it—smash the garlic cloves with the flat of your knife first, then chop. It releases way more flavor into the oil and soy sauce marinade.
- Skip the Crowding: After burning three batches, I finally figured out that overcrowding the pan drops the oil temp fast, leaving you with soggy chicken instead of that golden, crunchy coating.
- Cornstarch Last: Dust the chicken with cornstarch right before frying, not earlier—it’ll absorb moisture from the thighs and turn gummy if it sits too long.
Wine and Beer Pairings for This garlic fried chicken recipe hawaii
Crispy Chicken with Wine
For white wine lovers, I recommend a dry Riesling from Washington State—its crisp acidity cuts through the richness of the fried coating. The subtle stone fruit notes complement the garlic beautifully without overpowering it. 🍷
Beer Pairing Options
A light Hawaiian lager like Maui Brewing Co.’s Bikini Blonde Ale is my top choice. Its clean, refreshing finish balances the bold garlic and soy flavors perfectly. For something darker, try a local porter with coffee notes.
Sparkling Alternatives
If you prefer bubbles, a brut sparkling wine or dry prosecco works wonders. The effervescence cleanses your palate between each crispy bite. I love how the bubbles contrast with the chicken’s texture.
Cocktail Pairings
A mai tai with its rum, lime, and orgeat flavors brings tropical vibes that match the Hawaiian theme. The sweetness balances the savory garlic perfectly. For non-alcoholic, try ginger beer with lime. 💫
Rosè All Day
A chilled Provence rosé offers a versatile pairing with its crisp, dry profile. The strawberry and citrus notes enhance the dish’s flavors without competing. I keep a bottle of Whispering Angel on hand for just such occasions.
Nutrition Facts
Frequently Asked Questions
Can I use chicken breasts instead of thighs?
I don’t recommend it. Thighs stay juicier during frying. Breasts dry out faster and won’t have the same rich flavor.
Why do we double-fry the chicken?
The first fry cooks the meat while the second ensures maximum crispiness. It’s a classic technique for that perfect crunch.
Can I bake this instead of frying?
Baking at 400°F for 25-30 minutes works, but the texture won’t be as crispy. For best results, finish under the broiler.
How do I keep the chicken crispy after frying?
Place on a wire rack, not paper towels. This prevents steam from making the coating soggy. Serve within 10 minutes for peak crispiness.

Trained in classic French technique but raised on slow-cooked ribs and spicy rubs, she blends culinary skill with smoke and soul.
- Recipe for Boneless Pork Chops in Cast Iron Skillet: Sear and Baste to Juicy Perfection - October 3, 2026
- Recipe for Boneless Cross Rib Roast: Slow-Roasted Beef with Herb Crust - October 3, 2026
- Hamburgers in Sauce Recipe Crock Pot: Slow-Cooked Savory Delight - October 3, 2026