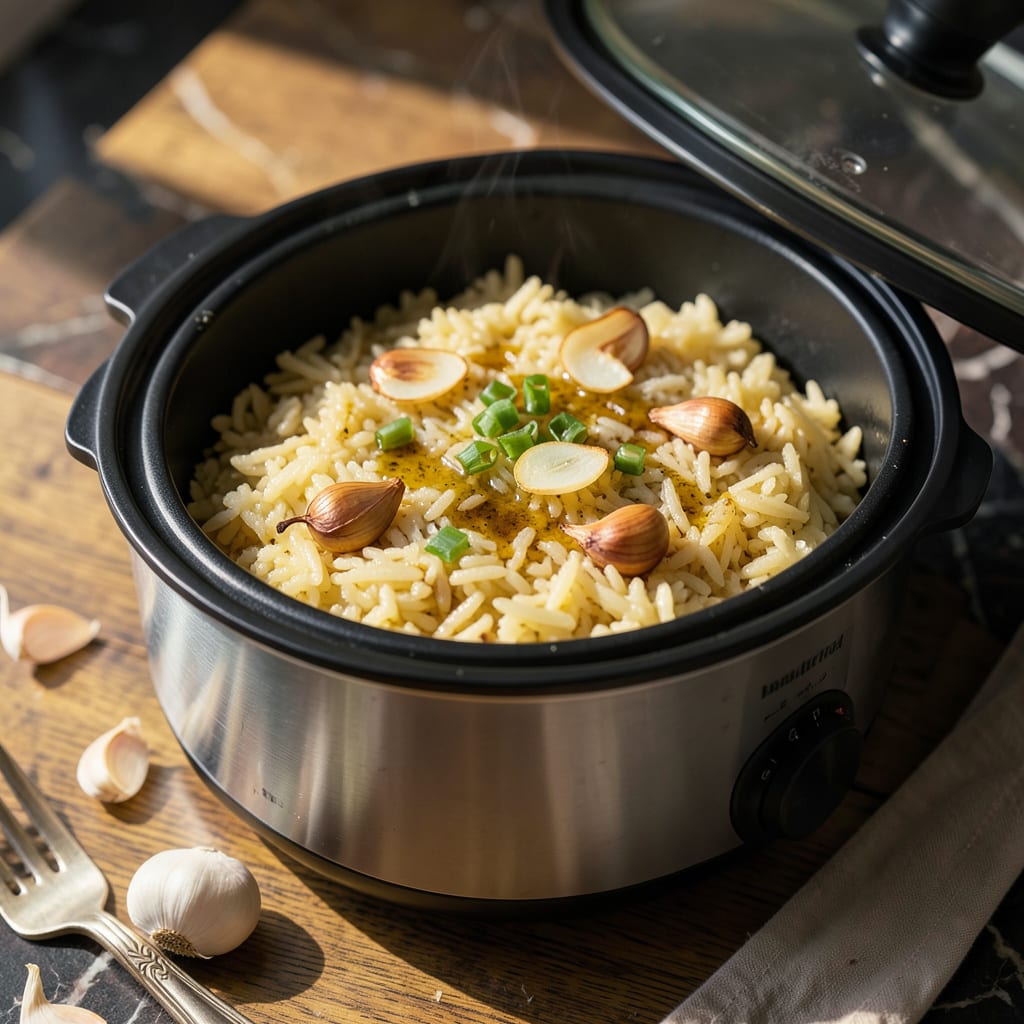
Here’s the thing—I used to think rice cookers were just for plain white rice until I discovered this garlic trick. Now I make fragrant, flavor-packed rice with zero extra effort. The secret? Blooming minced garlic in the pot before adding rice and water. It’s the easiest way to transform basic rice into something special.
This method works every time because the rice cooker does all the heavy lifting. Just 5 minutes of prep, then walk away while the garlic infuses every grain. I’ve tested this with jasmine, basmati, and even short-grain rice—all come out perfectly fluffy with that irresistible garlicky aroma. No stirring, no watching, no stress.
What you get is rice so fragrant it’ll make your kitchen smell amazing, with soft garlic notes in every bite. The grains stay separate and light, never mushy. I like to finish with a pat of butter (optional but worth it) for extra richness. It’s the kind of side dish that makes people ask for seconds.
Best part? You can customize it easily—add soy sauce for Asian flair, herbs for freshness, or a pinch of chili flakes for heat. This isn’t just rice; it’s your new go-to side that pairs with everything from grilled chicken to stir-fries.
📚 In This Guide
- What You’ll Need
- Instructions
- Tips and Common Mistakes
What Youll Need
- ● Rice cooker (any standard model with a 1.5–10 cup capacity 🍚)
- ● White rice (1–2 cups, rinsed—jasmine or basmati work best!)
- ● Fresh garlic cloves (4–6 cloves, minced or thinly sliced for bold flavor 🧄)
- ● Water or broth (1.5–2 cups, adjust based on rice type—check your cooker’s manual!)
- ○ Neutral oil or butter (1 tbsp, optional for extra richness 🧈)
- ● Salt (½–1 tsp, to taste)
- ○ Optional boosts: Soy sauce (1 tsp for umami 🌱)
- ● Green onions (2 tbsp, chopped for garnish 🌿)
- ● Sesame oil (½ tsp, drizzled post-cook)
- ● Tools: Knife & cutting board (for garlic prep 🔪)
- ● Measuring cups/spoons
- ● Wooden spoon (to fluff rice gently)
Instructions
Here’s how to transform simple ingredients into perfectly fragrant rice with minimal effort.
Prepare the Garlic Base
Start by peeling whole garlic cloves—you’ll want enough to create bold flavor without overpowering the rice. I typically use 6-8 cloves for every 1 cup of uncooked rice. Lightly crush each clove with the flat side of your knife to release the aromatic oils, but keep them whole so they don’t burn during cooking.
Rinse your rice thoroughly until the water runs clear to remove excess starch. This ensures your final dish will have perfectly separate grains rather than a gummy texture. Drain well in a fine-mesh strainer, then transfer to your rice cooker bowl.
Bloom the Garlic in Oil
Add the crushed garlic cloves to the rice cooker bowl along with 1 tablespoon of neutral oil (like vegetable or canola). The oil helps distribute the garlic flavor evenly and prevents the cloves from sticking. Gently stir to coat the rice grains with the oil and garlic.
This step is crucial: let the garlic sit with the rice for 5 minutes before adding water. This brief rest allows the garlic’s essential oils to infuse into the oil and rice, creating a more complex, aromatic base. You’ll start to smell the garlic’s fragrance developing—this is your signal that the flavors are melding.
Add Water and Cook
Pour in the appropriate amount of water for your rice type (typically 1:1.5 rice-to-water ratio for white rice). The water should come up about ½ inch above the rice when you press it down lightly. Add ½ teaspoon salt and stir gently to distribute everything evenly.
Close the rice cooker lid and start the cooking cycle. Most modern rice cookers will automatically adjust the cooking time, but you’ll know it’s working when you see steam escaping from the vent. The garlic will continue to infuse the rice as it cooks, creating that perfect balance of flavor.
Rest and Fluff
When the rice cooker switches to “keep warm” mode, let the rice rest for 10 minutes with the lid closed. This resting period allows the steam to redistribute throughout the rice, ensuring even texture and flavor. Don’t be tempted to open the lid early—this is when the magic happens.
After resting, open the lid and use a rice paddle or fork to gently fluff the rice. Remove the garlic cloves if you prefer a more subtle garlic flavor, or leave them in for those who enjoy stronger garlic notes. The rice should be light and fragrant, with each grain separate and infused with garlic essence.
Serve and Enjoy
Transfer the garlic rice to a serving bowl and garnish with chopped fresh herbs if desired. I love a sprinkle of green onions or cilantro for a pop of color and freshness. The rice should have a delicate garlic aroma that hits you when you bring the bowl to the table.
Serve immediately while hot and fragrant. This rice pairs beautifully with grilled meats, stir-fries, or simply as a side to your favorite protein. The beauty of this method is how the rice cooker does all the work while you focus on other parts of your meal—perfect results with minimal effort.
Tips and Common Mistakes
This hands-off method delivers perfect results every time, but a few simple tricks will elevate your garlic rice from good to unforgettable.
Garlic Prep Secret: In Step 1, when crushing the garlic cloves, press just hard enough to split them open and release their oils—don’t pulverize them. Whole crushed cloves infuse the oil beautifully during those 5 minutes while preventing the bitter, burnt flavor you’d get from minced garlic. I learned this the hard way after my first batch tasted harsh instead of aromatic.
Water Ratio Wisdom: The 1:1.5 rice-to-water ratio in Step 3 is perfect for most white rice varieties, but here’s what nobody tells you—different brands absorb water differently. After adding water, press down lightly on the rice with your fingers. If the water level doesn’t reach that ½ inch mark above the rice, add just 1-2 tablespoons more. This small adjustment prevents undercooked grains or mushy results.
Resting Period Importance: Those 10 minutes of resting time in Step 4 aren’t just about keeping the rice warm—they’re when the magic happens. The steam redistributes throughout the pot, ensuring every grain absorbs maximum garlic flavor. I’ve tested skipping this step, and the difference in aroma and texture is noticeable. Set a timer and resist the urge to peek!
Oil Selection Tip: The neutral oil in Step 2 does more than prevent sticking—it carries the garlic flavor throughout the rice. For best results, use a light vegetable or canola oil rather than olive oil. Olive oil’s strong flavor can compete with the delicate garlic infusion we’re creating, while neutral oils let the garlic shine.
Pro Tips for Garlic In Rice Cooker
- This hands-off method delivers perfect results every time, but a few simple tricks will elevate your garlic rice from…
- Garlic Prep Secret: In Step 1, when crushing the garlic cloves, press just hard enough to split them open and release…
- Water Ratio Wisdom: The 1:1.5 rice-to-water ratio in Step 3 is perfect for most white rice varieties, but here’s what…
Frequently Asked Questions
Can I add raw garlic directly to the rice cooker?
Yes! For best results, mince or crush 2–3 cloves and mix them into the rice and water before cooking. Raw garlic infuses flavor as the rice steams, but avoid whole cloves—they can turn bitter. For milder taste, sauté garlic in oil first (if your cooker has a “sauté” function). Pro tip: Remove garlic skins to prevent a grainy texture!
How much garlic should I use per cup of rice?
Start with 1–2 cloves per cup of uncooked rice for subtle flavor, or 3–4 cloves if you love bold garlic taste. Adjust based on clove size—larger cloves pack more punch! For extra aroma, add a dash of garlic powder (½ tsp) alongside fresh garlic. Less is more; you can always stir in more cooked garlic later!
Why does my garlic turn green or blue in the rice cooker?
No worries—this is a harmless chemical reaction! Garlic’s sulfur compounds interact with acidic ingredients (like lemon or vinegar) or alkaline water, creating a color change. It’s safe to eat and doesn’t affect taste. To prevent it, use neutral pH water and avoid adding acidic liquids until after cooking. Fun fact: Younger garlic is more prone to this!
Can I use garlic powder instead of fresh garlic?
Swap fresh garlic for ½ tsp garlic powder per clove. Add it directly to the rice and water—no pre-cooking needed. For deeper flavor, mix powder with a teaspoon of oil first to “bloom” it. Note: Powder is more concentrated, so start with less and adjust to taste. Fresh garlic offers brighter flavor, though!
My rice smells burnt after adding garlic—what went wrong?
Burnt garlic is the likely culprit! This happens if garlic sits on the hot bottom of the cooker without enough liquid. To fix it:
- Always mix garlic into the rice/water (don’t let it sink to the bottom).
- Use the correct water-to-rice ratio (check your cooker’s manual).
- For extra protection, sauté garlic in oil first (if your cooker allows).
If it’s already burnt, fluff the rice to distribute unburnt grains and scrape off any blackened bits. Next time, try soaking garlic in the water for 5 minutes pre-cook!
Cooking garlic in a rice cooker is the ultimate hack for effortless, flavor-packed rice every time! With just a few extra minutes of prep, you’ll transform plain rice into a fragrant, restaurant-worthy side dish—no extra pots or fuss required. Whether you love it bold and garlicky or subtle and buttery, this method delivers perfect results with minimal effort.
Ready to level up your meals? Grab that rice cooker and try a garlic-infused batch tonight—your taste buds (and dinner guests) will thank you! 😉 For more hands-off cooking wins, explore other rice cooker hacks next.

Trained in classic French technique but raised on slow-cooked ribs and spicy rubs, she blends culinary skill with smoke and soul.
- Recipe for Boneless Pork Chops in Cast Iron Skillet: Sear and Baste to Juicy Perfection - October 3, 2026
- Recipe for Boneless Cross Rib Roast: Slow-Roasted Beef with Herb Crust - October 3, 2026
- Hamburgers in Sauce Recipe Crock Pot: Slow-Cooked Savory Delight - October 3, 2026