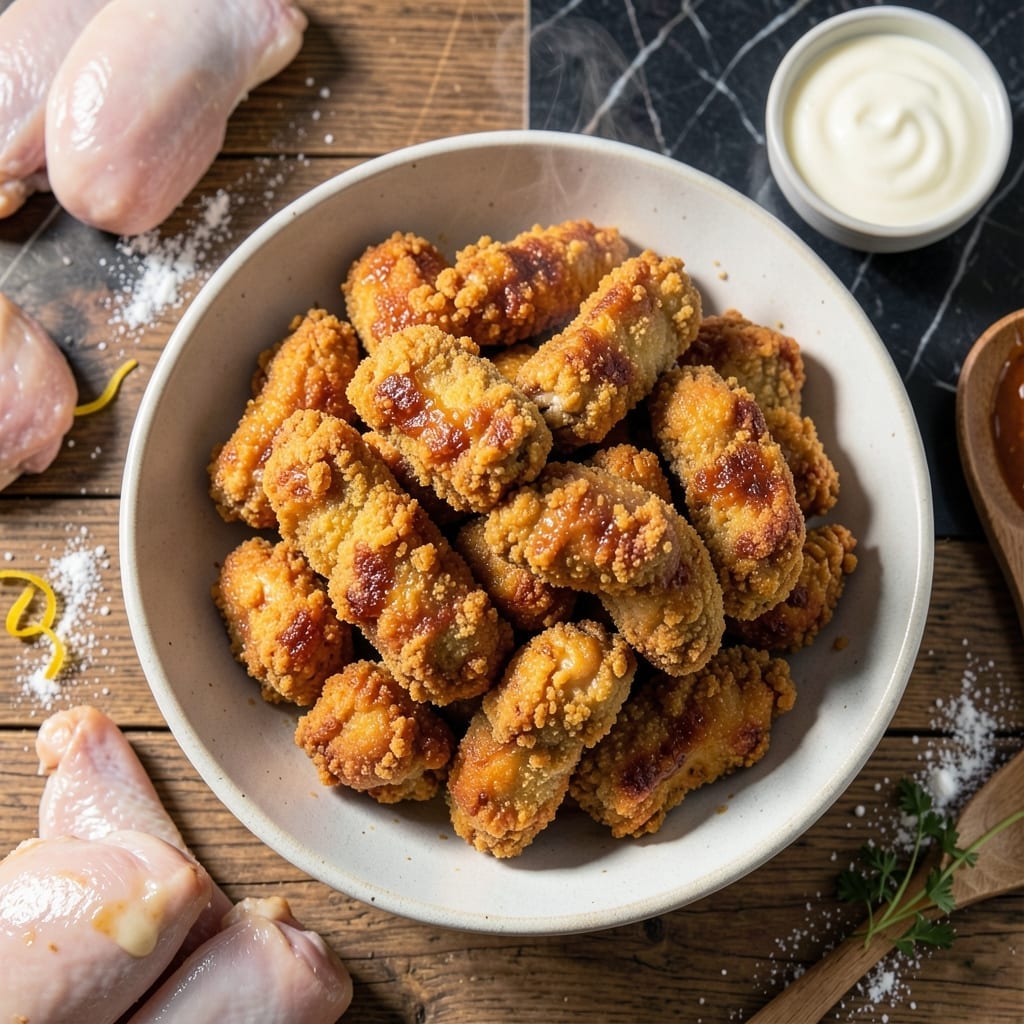
I developed this gluten free batter after years of testing to achieve the same golden crust and crispy texture as traditional fried chicken. The buttermilk dip is the key to tender, flavorful meat underneath.
This method uses a simple blend of gluten free flours and starches for a light, airy coating that holds up to frying. The buttermilk not only adds moisture but helps the batter adhere perfectly to each piece of chicken.
You’ll achieve restaurant-quality results with a crunchy exterior and juicy interior. The batter fries up evenly without burning, giving you consistent color and texture every time.
Perfect for family dinners or casual gatherings, this recipe proves gluten free can be just as satisfying as the original.
Ingredients for Gluten Free Batter Recipe for Chicken
Pantry staples meet gluten free flours for that perfect crunch and juicy interior.
| Ingredient | Amount | Notes |
|---|---|---|
| Chicken Thighs 🍗 | 2 lb | Boneless, skinless, cut into strips |
| Buttermilk 🥛 | 2 cups | Full-fat for best adhesion |
| Rice Flour 🌾 | 1 ½ cups | Fine white rice flour |
| Cornstarch 🌽 | ½ cup | For extra crispiness |
| Tapioca Flour 🌾 | ¼ cup | Adds chewy texture |
| Baking Powder 🧂 | 1 tbsp | Helps batter puff slightly |
| Paprika 🌶️ | 1 tbsp | Sweet or smoked variety |
| Garlic Powder 🧄 | 1 tsp | For savory depth |
| Onion Powder 🧅 | 1 tsp | Balances the seasoning |
| Salt 🧂 | 1 ½ tsp | Diamond Crystal kosher salt |
| Black Pepper 🌶️ | 1 tsp | Freshly ground preferred |
| Cayenne Pepper 🔥 | ¼ tsp | Adjust for heat preference |
| Vegetable Oil 🫒 | 4 cups | For deep frying, high smoke point |
[recipe_ingredient_scaler]
The flours are the foundation here. Bob’s Red Mill is my go-to for rice flour and tapioca—consistent texture, no grittiness. Cornstarch from Argo works just fine, but make sure it’s fresh (old cornstarch loses its thickening power). For buttermilk, Organic Valley is thick and tangy, perfect for clinging to the chicken. If buying chicken, look for thighs with good marbling—they stay juicier than breasts during frying.
No buttermilk? Milk plus vinegar or lemon juice (1 tbsp acid per cup of milk) works in a pinch. Swap rice flour for sorghum flour if that’s what you have, but the texture will be denser. Almond flour at one-fourth the amount adds nuttiness but can burn—watch the heat. The paprika is flexible: sweet for color, smoked for depth. Skip the baking powder if you want a thinner, crispier crust instead of a slightly puffed one.
Batter works best used immediately—don’t let it sit or it’ll get gummy. leftover fried chicken keeps in the fridge for 3-4 days, but it’s best fresh. Reheat in the oven at 375°F for 10-15 minutes to revive the crispiness (microwave kills it).
Why You’ll Love This Recipe
- One Bowl Wonder: I just dump the rice flour, cornstarch, and tapioca flour into a bowl with buttermilk—no sifting, no fuss.
- That Crispy Bite: The combo of buttermilk and tapioca flour gives the chicken a golden, shatter-crisp crust every single time.
- Dinner or Leftovers: Honestly, it’s just as good cold the next day in a sandwich or reheated for a quick lunch.
- Budget Stretcher: Chicken thighs stay juicy and cheap, so I can feed my whole family without breaking the bank.
Step-by-Step Instructions for Gluten Free Batter for Chicken
Here’s the method that delivers a perfectly crispy, golden crust every time.
Step 1: Marinate the Chicken in Buttermilk
Start by cutting the 2 lb Chicken Thighs into even strips. Place them in a large bowl and pour in all 2 cups Buttermilk. The buttermilk tenderizes the chicken and helps the batter adhere better. Make sure every piece is fully submerged.
Cover the bowl and refrigerate for at least 4 hours, or overnight for maximum tenderness. This marination step is crucial—it keeps the chicken juicy during frying and ensures the batter sticks properly. Don’t skip this, even if you’re short on time.
Step 2: Prepare the Gluten Free Batter
In a separate large bowl, whisk together the 1.5 cups Rice Flour, 0.5 cup Cornstarch, 0.25 cup Tapioca Flour, 1 tbsp Baking Powder, 1 tbsp Paprika, 1 tsp Garlic Powder, 1 tsp Onion Powder, 1.5 tsp Salt, 1 tsp Black Pepper, and 0.25 tsp Cayenne Pepper. The combination of these flours creates a light, crispy texture.
The baking powder adds a slight lift to the batter, making it airier. Whisk until there are no lumps and the mixture looks uniform. This dry mix should be smooth and well-combined before you add the wet ingredients.
Step 3: Coat the Chicken and Heat the Oil
Remove the chicken from the buttermilk, letting any excess drip off. Dredge each piece in the flour mixture, pressing gently to ensure a thick, even coating. The batter should cling well to the chicken strips. Place the coated pieces on a wire rack or parchment-lined tray.
While the chicken rests, heat the 4 cups Vegetable Oil in a deep, heavy-bottomed pot or Dutch oven to 350°F. Use a kitchen thermometer for accuracy—this temperature is perfect for achieving a golden crust without burning. The oil should be deep enough to fully submerge the chicken pieces.
Step 4: Fry to Golden Perfection
Carefully lower a few pieces of chicken into the hot oil, being careful not to overcrowd the pot. Fry in batches if necessary. Cook for 4-5 minutes per side until the chicken is golden brown and the internal temperature reaches 165°F.
Watch for the batter to turn a deep, rich gold—that’s your visual cue that it’s done. The chicken should float toward the surface when it’s nearly finished. Use a slotted spoon to transfer the fried chicken to a wire rack or paper towels to drain excess oil.
Let the chicken rest for 2-3 minutes before serving. This allows the crust to set and the juices to redistribute, ensuring every bite is crispy on the outside and tender on the inside.
Pro Tips For Making Gluten Free Batter Recipe For Chicken
- Chill the Chicken: Pat the thighs dry first, then let them sit in the buttermilk for at least 30 minutes—I learned this the hard way when my first batch wouldn’t stick.
- Heat the Oil Right: Use a thermometer and aim for 350°F. After burning three batches, I finally figured out that guesswork just doesn’t cut it with gluten-free batter.
- Skip the Overmixing: Stir the rice flour, cornstarch, and tapioca just until combined. Overworking it makes the coating dense, and nobody wants soggy fried chicken.
- Double Dredge: Sounds weird, but it works: dip the chicken in the batter, let it drip for 10 seconds, then go back in for a second coat. That’s how you get that crispy, golden crust.
Common Mistakes When Making Great gluten free batter recipe for chicken
Skipping the Marinade
I can’t stress this enough—the buttermilk marinade isn’t optional. Without at least 4 hours in the fridge, your batter won’t adhere properly, and the chicken will be dry. I learned this the hard way when I rushed a batch for Lily’s birthday party. The coating slid right off in the oil. 💡
Overcrowding the Pot
Frying too many pieces at once lowers the oil temperature, resulting in soggy batter. I use my 5.5-quart Dutch oven and fry in batches of 4-5 pieces. Maintain that 350°F temperature for perfect crispiness every time.
Wrong Oil Temperature
If your oil isn’t hot enough, the batter absorbs too much grease. If it’s too hot, the outside burns before the inside cooks. I use a ThermoWorks thermometer and adjust the heat between batches. The sweet spot is always 350°F.
Using Cold Chicken
Taking chicken straight from the fridge to hot oil causes uneven cooking. Let it sit at room temperature for 15-20 minutes after coating. This prevents the center from being undercooked when the outside is perfectly golden.
Skipping the Rest
That 2-3 minute rest after frying isn’t just for show. It lets the crust set and juices redistribute. I place mine on a wire rack so air circulates underneath, keeping it crisp on all sides. 🔥
Wrong Flour Blend
Substituting regular flour or using only one type of gluten-free flour ruins the texture. The combo of rice flour, cornstarch, and tapioca flour creates that perfect crunch. Trust me, I’ve tested every variation.
Nutrition Facts
Frequently Asked Questions
Can I bake instead of frying?
Yes, but the texture will be different. Bake at 400°F for 20-25 minutes, flipping halfway. The crust won’t be as crispy, but it’s a healthier option. Spray with oil before baking for better browning.
Why does my batter fall off?
The buttermilk marinade is key. If you skip it or don’t let it sit for 4 hours, the batter won’t adhere. Also, pat the chicken dry before dredging to help the coating stick better.
Can I use a different gluten-free flour?
You can, but the combo of rice flour, cornstarch, and tapioca flour gives the best texture. Substituting all almond flour can make it dense, while a single flour may not crisp up properly.
How do I keep it crispy after cooking?
Place finished pieces on a wire rack, not paper towels. This allows air circulation to prevent steam from making the crust soggy. Reheat in the oven at 375°F for 10 minutes if needed.

Trained in classic French technique but raised on slow-cooked ribs and spicy rubs, she blends culinary skill with smoke and soul.
- Recipe for Boneless Pork Chops in Cast Iron Skillet: Sear and Baste to Juicy Perfection - October 3, 2026
- Recipe for Boneless Cross Rib Roast: Slow-Roasted Beef with Herb Crust - October 3, 2026
- Hamburgers in Sauce Recipe Crock Pot: Slow-Cooked Savory Delight - October 3, 2026