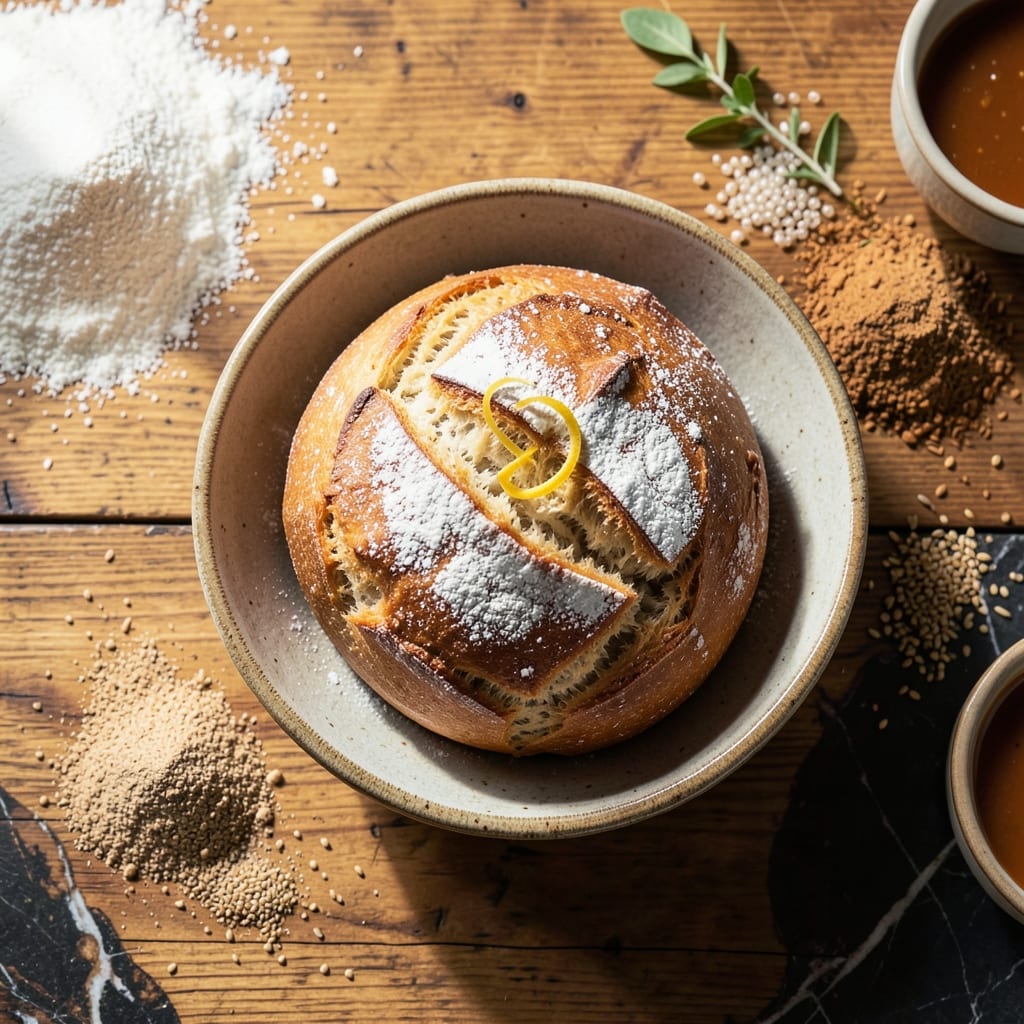
Achieving light, airy gluten free bread without xanthan gum is absolutely possible with the right technique. This recipe delivers soft texture and proper rise through carefully balanced ingredients and precise mixing methods.
The key lies in using a blend of gluten free flours that mimic wheat’s structure naturally. Psyllium husk powder replaces xanthan gum, creating the elasticity needed for bread that doesn’t crumble.
You’ll get a loaf with a golden crust and tender interior that slices beautifully. The process requires patience, with proper rising times ensuring the best texture.
Perfect for sandwiches or toast, this bread proves gluten free baking can be just as satisfying as traditional methods.
Ingredients for Gluten Free Bread Recipe No Xanthan Gum
A carefully balanced flour blend plus psyllium husk creates light, airy loaves without any gum.
| Ingredient | Amount | Notes |
|---|---|---|
| White Rice Flour 🌾 | 1 ½ cups | Fine, super-fine preferred |
| Brown Rice Flour 🌾 | 1 cup | Adds structure and nuttiness |
| Tapioca Starch 🌾 | ½ cup | For chewy texture |
| Psyllium Husk Powder 🌿 | 2 tbsp | The xanthan gum replacement |
| Instant Yeast 🍞 | 2 ¼ tsp | One packet, active dry works too |
| Granulated Sugar 🍚 | 1 tbsp | Feeds the yeast |
| Salt 🧂 | 1 ½ tsp | Fine sea salt preferred |
| Large Eggs 🥚 | 3 whole | Room temperature for best rise |
| Unsalted Butter 🧈 | ¼ cup | Melted and cooled |
| Warm Water 💧 | 1 ½ cups | 110°F, not too hot |
| Apple Cider Vinegar 🍏 | 1 tbsp | Enhances rise and flavor |
| Honey 🍯 | 2 tbsp | Adds moisture and sweetness |
[recipe_ingredient_scaler]
The psyllium husk is non-negotiable here—Bob’s Red Mill or Anthony’s Goods are reliable brands. I get mine from Whole Foods bulk bins when available. The rice flours should be super-fine for best texture; Authentic Foods makes a great blend. Don’t skip the tapioca starch—it’s what gives the bread that satisfying chew. Store all your gluten-free flours in airtight containers to prevent spoilage.
No psyllium husk? Chia seed gel or ground flaxseed can work in a pinch, but the texture won’t be the same. Out of brown rice flour? Swap with sorghum flour at a 1:1 ratio. The vinegar helps with rise, but lemon juice works too. If you’re avoiding eggs, try a flax egg (1 tbsp ground flax + 3 tbsp water per egg), though the structure might be denser.
This bread keeps well wrapped at room temperature for 3 days, or freeze slices for up to 3 months. Toasting revives day-old loaves beautifully. The dough is sticky—don’t be tempted to add more flour, as it can make the bread dense.
Why You’ll Love This Recipe
- No Fuss Mixing: I just dump the dry ingredients—white rice flour, brown rice, tapioca starch—toss in psyllium husk and yeast, add water, and let it rise. No weird gum or complicated steps.
- Soft and Chewy: The psyllium husk gives it that bread-shop softness I’ve missed, with a mild, nutty depth from the brown rice flour.
- Meal Prep Hero: Honestly, I bake two loaves on Sunday and we’re set for sandwiches, toast, or even French toast all week.
- Budget Friendly: Rice flour and tapioca starch are pantry staples here, so I’m not buying pricey speciality blends every time.
Step-by-Step Instructions for Gluten Free Bread Without Xanthan Gum
Achieve that perfect light and airy texture with this carefully tested method.
Step 1: Activate the Yeast and Psyllium Husk
In a large mixing bowl, whisk together the 1.5 cups Warm Water, 1 tbsp Granulated Sugar, and 2.25 tsp Instant Yeast. Let this sit for 5 minutes until the mixture becomes foamy—this confirms your yeast is active and ready to work its magic.
Add the 2 tbsp Psyllium Husk Powder and 1 tbsp Apple Cider Vinegar to the yeast mixture, then whisk vigorously. You’ll notice the psyllium husk thickens the liquid almost immediately into a gel-like consistency. This is your gluten replacement working to create structure.
Let this mixture rest for 2 minutes to fully hydrate. The psyllium husk will develop a slightly elastic texture, mimicking the properties of gluten that we’re replacing.
Step 2: Combine Dry Ingredients and Wet Mixture
In a separate bowl, whisk together the 1.5 cups White Rice Flour, 1 cup Brown Rice Flour, 0.5 cup Tapioca Starch, and 1.5 tsp Salt. This blend of flours creates the perfect balance of structure, texture, and flavor for your bread.
Slowly pour the dry ingredients into the bowl with the yeast and psyllium mixture. Add the 3 whole Large Eggs, 0.25 cup Unsalted Butter (melted and cooled), and 2 tbsp Honey. The eggs and butter add richness and moisture, while the honey provides subtle sweetness and helps with browning.
Using a stand mixer with the paddle attachment, mix on medium speed for 3-4 minutes until the dough is smooth and elastic. It will be stickier than traditional bread dough but should pull away from the sides of the bowl.
Step 3: Proof the Dough for Maximum Rise
Transfer the dough to a greased loaf pan, smoothing the top with wet hands to prevent sticking. Cover the pan with a damp kitchen towel or plastic wrap and let it rise in a warm, draft-free place for 45-60 minutes.
You’ll know it’s ready when the dough has risen to about 1 inch above the rim of the pan. The apple cider vinegar and honey in the dough will help with the rise, giving you that light and airy texture we’re aiming for.
Preheat your oven to 375°F during the last 15 minutes of proofing. This ensures your oven is fully heated and ready to bake the bread evenly.
Step 4: Bake to Golden Perfection
Bake the bread in the preheated oven for 45-50 minutes, or until the top is deep golden brown and the internal temperature reaches 205°F. If the top begins to brown too quickly, tent the pan loosely with aluminum foil.
Remove the bread from the oven and let it cool in the pan for 10 minutes. This allows the bread to set and makes it easier to remove from the pan without breaking.
Transfer the bread to a wire rack and let it cool completely for at least 1 hour before slicing. I know it’s tempting to dig in right away, but cooling ensures the structure sets properly for clean slices.
Pro Tips For Making Gluten Free Bread Recipe No Xanthan Gum
- Hydrate Psyllium First: Mix psyllium husk powder with warm water and let it sit for 5 minutes before adding other ingredients—this mimics the binding xanthan gum would provide.
- Warm Your Flours: Take the rice flours and tapioca starch out of the fridge 30 minutes before mixing; cold starches absorb liquid unevenly and stunt rise.
- Skip Overproofing: Gluten-free dough collapses fast, so pull it from the rise when it’s just crowned over the pan—about 45-60 minutes in a warm spot.
- Bake With Steam: Toss a cup of boiling water into a tray on the oven floor when the loaf goes in—this keeps the crust from cracking while the bread sets.
Make-Ahead Tips for This Recipe
Prep Dry Ingredients
Measure and whisk together all your gluten free flours the night before. Store the 2.5 cups flour blend in an airtight container at room temperature. This saves time and ensures even distribution of leavening agents. I always do this step ahead. 💡
Pre-Mix Wet Components
Combine the 1.5 cups Warm Water, 2 tbsp Psyllium Husk Powder, and 1 tbsp Apple Cider Vinegar in a jar. Shake well and refrigerate for up to 24 hours. The psyllium will fully hydrate, creating a gel that improves bread structure.
Make Dough Balls
Prepare the full dough, then divide into 4 equal portions (about 1 cup each). Shape into balls, wrap tightly in plastic wrap, and refrigerate for up to 3 days. This allows for fresh-baked bread on demand.
Freeze for Longer
For storage beyond 3 days, freeze dough balls on a tray first, then transfer to a freezer bag. They’ll keep for 1 month. Thaw overnight in the fridge before baking. I label mine with the date.
Bake from Cold
When ready to bake, let chilled dough warm at room temperature for 30 minutes before shaping. Cold dough takes slightly longer to rise—about 75-90 minutes. The texture remains excellent. ❄️
Slice and Freeze
Bake the loaf completely, then slice and freeze individual pieces. Toast frozen slices directly from the freezer for 2-3 minutes at 350°F. This method preserves freshness for up to 3 months.
Nutrition Facts
Frequently Asked Questions
Why use psyllium husk instead of xanthan gum?
Psyllium husk mimics gluten’s elasticity naturally, creating structure without gums. It forms a gel when hydrated, trapping air for a light, airy texture. Xanthan gum can leave an aftertaste some dislike.
Can I substitute other flours?
Yes, but keep the starch-to-flour ratio similar. Swap brown rice flour for sorghum or millet at a 1:1 ratio. Tapioca starch can be replaced with potato starch, but don’t omit it entirely.
Why does my bread collapse after baking?
Underproofing or opening the oven too early often causes this. Ensure dough rises 1 inch above the pan before baking. Let it cool completely before slicing to maintain structure.
How do I store leftovers?
Wrap cooled bread tightly in foil or plastic. It keeps at room temperature for 3 days or frozen for 3 months. Toast slices directly from the freezer for best results.

Trained in classic French technique but raised on slow-cooked ribs and spicy rubs, she blends culinary skill with smoke and soul.
- Recipe for Boneless Pork Chops in Cast Iron Skillet: Sear and Baste to Juicy Perfection - October 3, 2026
- Recipe for Boneless Cross Rib Roast: Slow-Roasted Beef with Herb Crust - October 3, 2026
- Hamburgers in Sauce Recipe Crock Pot: Slow-Cooked Savory Delight - October 3, 2026