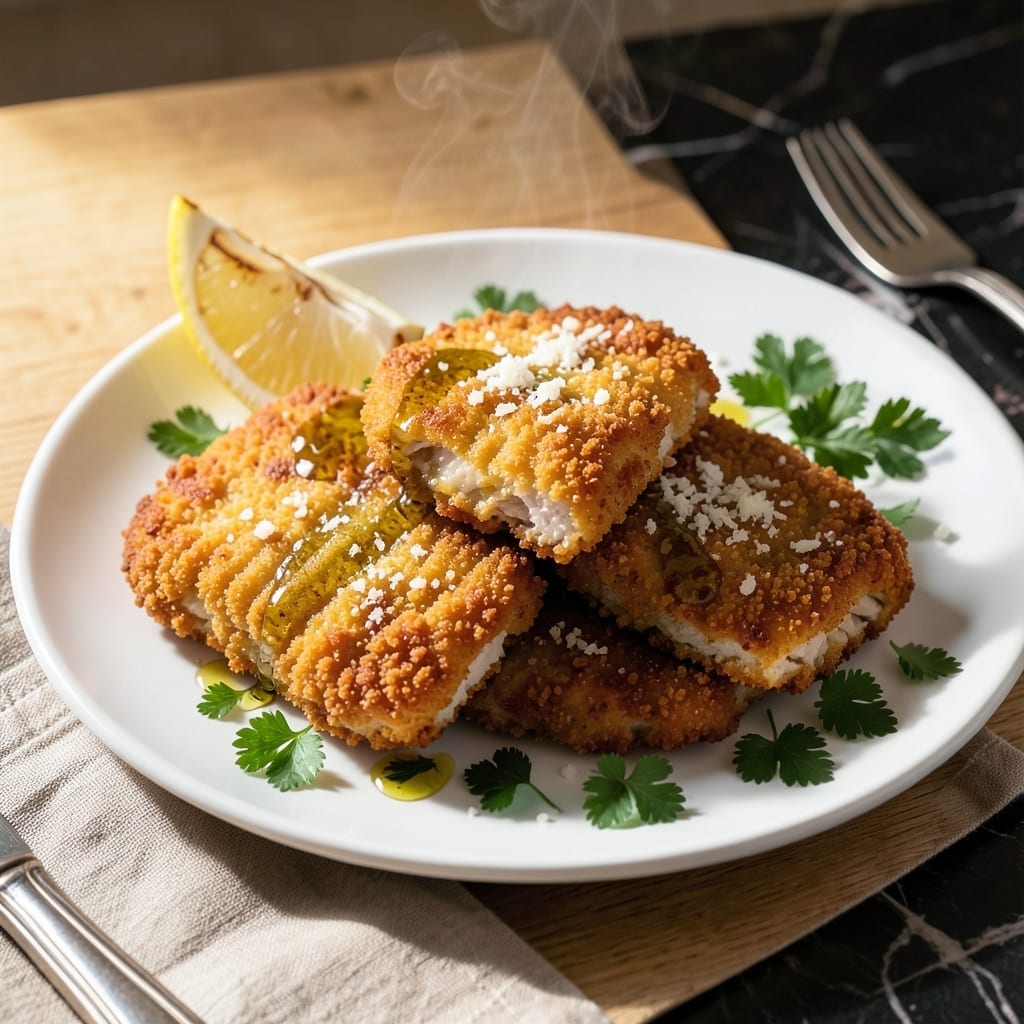
I developed this recipe after years of testing gluten-free alternatives that never quite delivered on texture. The solution lies in a specific blend of ingredients that creates a crispy coating rivaling traditional breading.
This method uses simple pantry staples and a two-step process to ensure the breading adheres perfectly and stays in place during cooking. No special equipment required—just a bowl, a pan, and about 30 minutes.
You’ll achieve golden, crunchy chicken with a tender interior, proving that gluten-free versions can be just as satisfying as the original. The coating holds up to baking or frying without falling apart.
Perfect for weeknight dinners or meal prep, this dish brings the comfort of breaded chicken back to the table without compromise.
Ingredients for Gluten Free Breading Recipe for Chicken
Simple pantry staples create that perfect crispy coating without compromise.
| Ingredient | Amount | Notes |
|---|---|---|
| Boneless Chicken Breasts 🍗 | 1 ½ lb | Pounded to even thickness |
| Gluten-Free All-Purpose Flour 🌾 | 1 cup | For initial dredging layer |
| Cornstarch 🌽 | ½ cup | Creates extra crispiness |
| Large Eggs 🥚 | 2 whole | Beaten for binding |
| Gluten-Free Panko Breadcrumbs 🍞 | 2 cups | For outer crunch layer |
| Grated Parmesan Cheese 🧀 | ½ cup | Freshly grated preferred |
| Garlic Powder 🧄 | 1 tsp | For seasoning blend |
| Onion Powder 🧅 | 1 tsp | For seasoning blend |
| Paprika 🌶️ | 1 tsp | Sweet or smoked variety |
| Salt 🧂 | 1 tsp | Kosher or sea salt |
| Black Pepper 🌶️ | ½ tsp | Freshly ground preferred |
| Neutral Cooking Oil 🫒 | ½ cup | For frying, high smoke point |
| Dried Oregano 🍃 | 1 tsp | For herbaceous flavor |
[recipe_ingredient_scaler]
The breading is everything here. Gluten-free panko (like Kikkoman or Aleia’s) delivers the crunch traditional breadcrumbs can’t match. Most supermarkets carry it in the gluten-free aisle. For the flour, Bob’s Red Mill 1-to-1 works best—its fine texture adheres beautifully. Cornstarch is the secret weapon for that extra crisp (trust me on this).
No gluten-free panko? Crushed gluten-free cornflakes or gluten-free crackers work in a pinch. Skip the cornstarch? Arrowroot powder at the same amount substitutes well. For dairy-free, omit the Parmesan or use nutritional yeast. The seasoning blend is flexible—add cayenne for heat or swap paprika for smoked if you prefer.
Breading holds best when used immediately, but you can prep the chicken and breading separately up to 24 hours ahead. Store cooked chicken in an airtight container in the fridge for up to 3 days. Reheat in the oven at 375°F for 10-12 minutes to maintain crispiness.
Why You’ll Love This Recipe
- 30-Minute Crisp: I can coat and bake a whole batch while the oven preheats—no resting, no fuss.
- Golden Crunch: The panko plus cornstarch gives that shatter-when-you-bite-it shell without a hint of gluten.
- Freezer Friendly: Bread a double batch, freeze raw, then bake straight from the freezer for last-minute dinners.
- Budget Stretch: Boneless breasts go further when every piece is coated in that light, crisp layer.
Step-by-Step Instructions for Gluten Free Breaded Chicken
Master this technique for a golden, crispy coating that stays put through cooking.
Step 1: Prep the Chicken and Seasoning Blend
Pound the 1.5 lb boneless chicken breasts to an even ½-inch thickness using a meat mallet. This ensures uniform cooking and prevents dry spots. Place the pounded breasts on a clean surface and pat them dry with paper towels—excess moisture prevents the coating from adhering properly.
In a shallow dish, combine the 1 tsp garlic powder, 1 tsp onion powder, 1 tsp paprika, 1 tsp salt, and 0.5 tsp black pepper. Whisk in the 1 tsp dried oregano to create a uniform seasoning blend. Lightly season both sides of each breast with this mixture—this base layer enhances flavor in every bite.
Step 2: Create the Three-Stage Breading Station
Set up three shallow dishes in a row. In the first, whisk together the 1 cup gluten-free all-purpose flour and 0.5 cup cornstarch. The cornstarch is your secret weapon for extra crispiness. In the second dish, beat the 2 whole large eggs until the yolks and whites are fully combined and slightly frothy.
In the third dish, mix the 2 cups gluten-free panko breadcrumbs with the 0.5 cup grated parmesan cheese. The panko provides superior crunch, while the parmesan adds a savory depth. Stir these together thoroughly so the cheese is evenly distributed throughout the breadcrumbs.
Step 3: Bread the Chicken with Precision
Dredge each seasoned chicken breast in the flour-cornstarch mixture, pressing gently to ensure full coverage. Shake off any excess—you want a thin, even layer that won’t clump. Next, dip the floured breast into the beaten eggs, allowing any excess to drip off. This egg wash acts as the glue for the final breading layer.
Press each breast firmly into the panko-parmesan mixture, turning to coat all sides completely. Apply slight pressure to help the breading adhere. For maximum crunch, let the breaded chicken rest on a wire rack for 10 minutes before cooking—this sets the coating and prevents it from falling off during frying.
Step 4: Pan-Fry to Golden Perfection
Heat the 0.5 cup neutral cooking oil in a large, heavy-bottomed skillet over medium-high heat until it shimmers but doesn’t smoke. To test readiness, drop a pinch of breading into the oil—it should sizzle immediately and float to the surface within 3-5 seconds.
Carefully place the breaded chicken in the hot oil, working in batches if necessary to avoid crowding the pan. Cook for 4-5 minutes per side until the coating is deep golden brown and crispy. The internal temperature should reach 165°F when measured at the thickest part. Use a splatter screen to contain any oil spatter and turn only once to maintain the crust’s integrity.
Transfer the cooked chicken to a paper towel-lined plate to drain excess oil. The coating should be uniformly crispy and adhere firmly to the chicken. Serve immediately while hot for the best texture.
Pro Tips For Making Gluten Free Breading Recipe For Chicken
- Preheat the Oil: I learned this the hard way—gluten-free breading needs oil hot enough to sizzle on contact, about 350°F, or it’ll absorb too much and turn soggy.
- Pound the Chicken: Boneless breasts often cook unevenly; pound them to an even ½-inch thickness so the coating crisps before the meat dries out.
- Double-Coat the Crumbs: Sounds tedious, but pressing the chicken into the gluten-free panko twice gives that extra crunch that GF breading often lacks.
- Rest on a Rack: After frying, place the chicken on a wire rack, not paper towels—this keeps the bottom from steaming and losing its crisp.
Troubleshooting Great gluten free breading recipe for chicken
Breading Won’t Stick
If your coating slides off, the chicken might be too wet. Pat it completely dry with paper towels before breading. Also, ensure the egg wash is beaten thoroughly—I use a fork for 30 seconds until frothy. Let the breaded pieces rest on a rack for 10 minutes to set. 💡
Coating Too Thick
Thick breading burns before the chicken cooks through. Press firmly in each stage but shake off excess. Use shallow dishes for better control. If needed, thin the egg wash with 1 tbsp water to create a lighter glue.
Soggy Results
Overcrowding the pan lowers oil temperature. Cook in batches with 2 inches between pieces. Use a thermometer to maintain 350-375°F oil. For oven baking, place on a wire rack over a sheet pan for 20-25 minutes at 400°F.
Bland Flavor
Boost the seasoning blend with ½ tsp cayenne or 1 tsp smoked paprika. I also add 1 tsp dried thyme for depth. Ensure the chicken itself is well-seasoned before breading. Taste your breading mixture before coating.
Uneven Browning
Inconsistent thickness causes patchy color. Pound the chicken to an even ½-inch thickness. Turn only once during cooking. If frying, rotate the pan occasionally for even heat distribution. For baking, flip halfway through cooking time.
Oil Temperature Issues
Test oil readiness with a pinch of breading—it should sizzle and float in 3-5 seconds. If smoking, it’s too hot; lower the heat. If breading absorbs oil instead of frying, increase heat slightly. I use a candy thermometer for precision. 🌡️
Nutrition Facts
Frequently Asked Questions
Can I use almond flour instead of gluten-free flour?
Almond flour works but creates a denser coating. For best results, mix it with cornstarch in equal parts to lighten the texture. The flavor will be nuttier, which pairs well with chicken.
How do I keep the breading crispy when baking?
Use a wire rack on a baking sheet and bake at 400°F for 20-25 minutes. This allows air circulation underneath, preventing sogginess. Spray lightly with oil before baking for extra crunch.
Can I make this ahead of time?
Bread the chicken and refrigerate uncovered on a rack for up to 24 hours. This actually helps the coating set better. Cook just before serving for maximum crispiness.
Why did my breading fall off during cooking?
The most common cause is excess moisture on the chicken. Pat it completely dry before breading. Also, let breaded pieces rest for 10 minutes before cooking to help adhesion.

Trained in classic French technique but raised on slow-cooked ribs and spicy rubs, she blends culinary skill with smoke and soul.
- Recipe for Boneless Pork Chops in Cast Iron Skillet: Sear and Baste to Juicy Perfection - October 3, 2026
- Recipe for Boneless Cross Rib Roast: Slow-Roasted Beef with Herb Crust - October 3, 2026
- Hamburgers in Sauce Recipe Crock Pot: Slow-Cooked Savory Delight - October 3, 2026