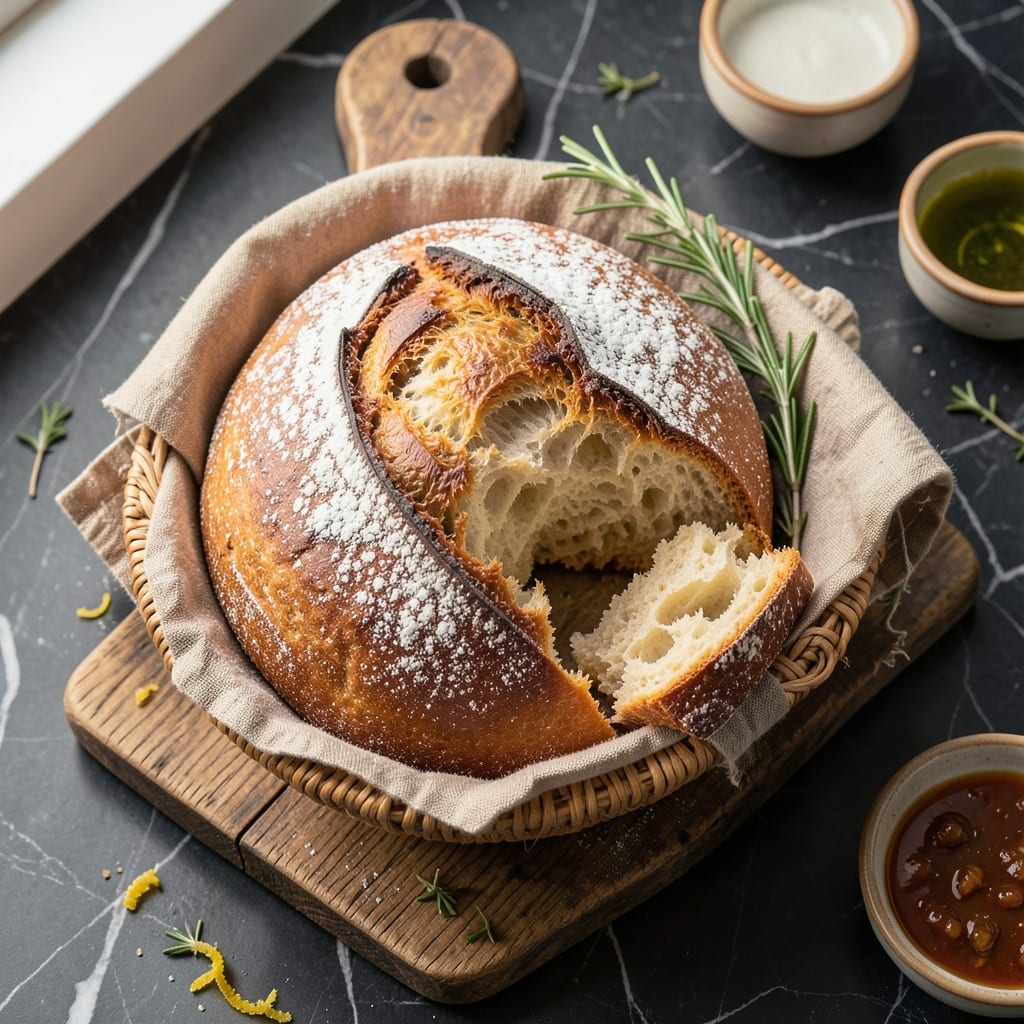
There’s something deeply satisfying about pulling a homemade loaf from your oven, knowing every step was yours to control. I still remember my grandmother’s hands guiding mine through the first rise in her Sicilian kitchen.
This recipe proves you don’t need fancy equipment to achieve bakery-quality results. The key is patience during fermentation and a hot oven for that signature artisan crust.
What emerges is a golden loaf with a shatteringly crisp exterior and a soft, airy interior. The aroma alone makes the wait worthwhile.
The best part? You’ll have fresh bread ready for sandwiches, toast, or simply enjoying with butter and a sprinkle of sea salt.
Ingredients for Homemade Bread Recipe for One Loaf
Simple ingredients, one bowl, and time create that perfect crust you remember.
| Ingredient | Amount | Notes |
|---|---|---|
| Bread Flour 🌾 | 3 ½ cups | All-purpose works in a pinch |
| Active Dry Yeast 🍞 | 2 ¼ tsp | One packet, proofed in warm water |
| Warm Water 💧 | 1 ¼ cups | 110°F, not hotter |
| Granulated Sugar 🧂 | 1 tbsp | Feeds the yeast |
| Kosher Salt 🧂 | 1 ½ tsp | Diamond Crystal preferred |
| Extra-Virgin Olive Oil 🫒 | 2 tbsp | For bowl and dough |
| Honey 🍯 | 1 tbsp | Adds subtle sweetness |
| Cornmeal 🌽 | 2 tbsp | For dusting baking surface |
| Unsalted Butter 🧈 | 1 tbsp | For serving, optional |
| Sea Salt Flakes 🧂 | ½ tsp | For finishing, optional |
[recipe_ingredient_scaler]
The flour makes all the difference here. King Arthur Bread Flour is my go-to for that perfect chew and rise, but Gold Medal all-purpose works if that’s what’s in your pantry. Yeast is finicky—check the expiration date and store it in the freezer to extend its life. Warm water should feel like a baby’s bath (not hot!). I grab my yeast from Whole Foods bulk section for freshness.
No bread flour? All-purpose plus 1 tsp vital wheat gluten per cup mimics it. Out of honey? Maple syrup or agave at the same amount works. The olive oil can be any neutral oil if that’s what you have. For the cornmeal, semolina or extra flour prevents sticking too. And if you skip the honey, add a pinch more sugar to feed the yeast.
Dough rises best in a warm spot—70-75°F is ideal. Store yeast in an airtight container in the freezer for up to 1 year. Baked loaf keeps 3-4 days wrapped at room temperature, or slice and freeze for 3 months.
Why You’ll Love This Recipe
- No Fuss Dough: I just mix flour, yeast, warm water, sugar, and salt—no fancy steps, no kneading for hours.
- Warm, Toasty Perfection: That first bite of crisp crust giving way to soft, buttery interior? Worth every minute.
- Sandwich Savior: I slice it thick for sandwiches or tear off chunks for soup dipping—works for lunch all week.
- Penny Pincher: A pound of flour and a packet of yeast makes a loaf that costs less than store-bought. Honestly, my wallet notices.
Step-by-Step Instructions for Homemade Bread
Here’s the method I’ve perfected for a crusty loaf with a soft, airy interior.
Step 1: Activate the Yeast and Mix the Dough
In a small bowl, combine the 2.25 tsp Active Dry Yeast, 1.25 cups Warm Water, 1 tbsp Granulated Sugar, and 1 tbsp Honey. Let it sit for 5-7 minutes until the mixture becomes foamy and cloudy—this confirms the yeast is alive and active.
In a large mixing bowl, combine the 3.5 cups Bread Flour and 1.5 tsp Kosher Salt. Make a well in the center and pour in the yeast mixture and 2 tbsp Extra-Virgin Olive Oil. Use a wooden spoon to stir until a shaggy dough forms. The dough will be sticky, but that’s exactly what you want.
Step 2: Knead Until Smooth and Elastic
Turn the dough out onto a lightly floured surface and begin kneading. Push the dough away from you with the heel of your hand, then fold it back over itself. Rotate the dough a quarter turn after each fold and repeat for 8-10 minutes.
You’ll know it’s ready when the dough feels smooth, elastic, and slightly tacky but not sticky. It should spring back slowly when pressed with your finger. If it sticks to your hands, add a light dusting of flour, but avoid adding too much—this can make the bread dense.
Step 3: First Rise Until Doubled in Size
Lightly oil a clean large bowl with some of the 2 tbsp Extra-Virgin Olive Oil and place the dough inside. Cover the bowl with a damp kitchen towel or plastic wrap. Let it rise in a warm, draft-free spot for 1 to 1.5 hours, or until the dough has doubled in volume.
I like to check if it’s ready by pressing my finger gently into the dough. If the indentation remains, the dough has risen enough. If it springs back quickly, give it more time. This step develops the bread’s flavor and texture.
Step 4: Shape, Second Rise, and Prep for Baking
Punch down the risen dough to release the air, then turn it out onto a lightly floured surface. Shape it into a round loaf by tucking the edges under to create surface tension. This helps the bread hold its shape while baking.
Dust a baking sheet with the 2 tbsp Cornmeal to prevent sticking and add a rustic texture. Place the shaped dough on the sheet, cover loosely, and let it rise again for 30-45 minutes until puffy. Preheat your oven to 425°F during the last 15 minutes of rising.
Step 5: Bake to Golden Perfection and Finish
Just before baking, use a sharp knife or razor to score the top of the dough about ½ inch deep in a decorative pattern. This allows the bread to expand properly. Bake for 25-30 minutes until the crust is deep golden brown and the loaf sounds hollow when tapped on the bottom.
Transfer the bread to a wire rack and let it cool for at least 20 minutes before slicing. If desired, brush the warm crust with 1 tbsp Unsalted Butter and sprinkle with 0.5 tsp Sea Salt Flakes for added flavor and shine. Slicing too soon results in a gummy texture, so patience is key!
Pro Tips For Making Homemade Bread Recipe For One Loaf
- Test Your Yeast: Always proof your active dry yeast in warm water with a pinch of sugar first—I learned this the hard way after a few loaves that refused to rise.
- Use Room-Temp Ingredients: Pull your bread flour and water out 30 minutes before mixing; cold ingredients make the dough sluggish and uneven.
- Skip the Rush: Let the dough double in size during the first rise, even if it takes an extra 20 minutes—underproofed bread is dense and sad.
- Score the Top: Right before baking, slash the loaf with a sharp knife or razor; it’s the easiest way to guarantee an even bake and that bakery-style crust.
Storing and Reheating homemade bread recipe for one loaf
Room Temperature Storage
Let your loaf cool completely—about 2 hours—before storing. Wrap it in a clean kitchen towel or place in a paper bag to maintain the crust’s crispness. This method keeps bread fresh for 2-3 days at room temperature. 💡
Refrigerator Storage
For longer storage, slice the loaf and place in an airtight container. It’ll last 5-7 days in the fridge, though the crust may soften. I recommend toasting slices before serving to restore texture.
Freezer Method
Slice the loaf and wrap individual pieces in plastic wrap, then place in a freezer bag. It’ll keep for up to 3 months. Thaw at room temperature or toast directly from frozen for best results. ❄️
Reheating in Oven
Preheat oven to 350°F and wrap the loaf in aluminum foil. Heat for 10-15 minutes until warmed through. For a crispier crust, unwrap and bake for an additional 5 minutes.
Toaster Revival
For quick reheating, toast individual slices in a toaster until golden and crisp. This works especially well for bread stored in the fridge or freezer. I love how it brings back that fresh-baked aroma.
Pro Tip
If your bread has gone stale, sprinkle it with water and bake at 375°F for 5-10 minutes. The steam revives the crumb beautifully. This trick saved many a loaf in my grandmother’s kitchen. 💫
Nutrition Facts
Frequently Asked Questions
Can I use all-purpose flour instead of bread flour?
Yes! For each cup of bread flour, use 1 cup all-purpose flour + 1 tsp vital wheat gluten. This mimics the higher protein content of bread flour for better structure.
Why didn’t my bread rise properly?
Check your yeast expiration date first. If that’s fine, your water might have been too hot (over 110°F) or too cold. Also, dough rises best in a warm spot, around 70-75°F.
How can I tell when the bread is done?
Look for a deep golden brown crust and an internal temperature of 190-200°F. The most reliable test is tapping the bottom—it should sound hollow. Don’t rely on color alone!
Can I make this without a stand mixer?
Hand-kneading works perfectly. Just be prepared to work the dough for 8-10 minutes until it becomes smooth and elastic. The exercise is worth the result.

Trained in classic French technique but raised on slow-cooked ribs and spicy rubs, she blends culinary skill with smoke and soul.
- Recipe for Boneless Pork Chops in Cast Iron Skillet: Sear and Baste to Juicy Perfection - October 3, 2026
- Recipe for Boneless Cross Rib Roast: Slow-Roasted Beef with Herb Crust - October 3, 2026
- Hamburgers in Sauce Recipe Crock Pot: Slow-Cooked Savory Delight - October 3, 2026